...

Contact Skychem Group for more chemical solutions, If you have questions or need more information, please contact us.
Respond within 24 hours

How to Source Basic Dyes for Acrylic: Manufacturer Guide

Buying basic dyes can look simple until a shade drifts between lots, a dye bath turns patchy, or a customer asks for compliance paperwork that is not on file. Acrylic and cationic-dyeable fibers leave little room for error. The dye strikes fast, barely migrates, and exposes small mistakes in chemistry or process control.

This guide explains what basic dyes are, which fibers they suit, which quality parameters matter, and how to evaluate a manufacturer before placing a bulk order.

What Are Basic Dyes?

Basic dyes are water-soluble, positively charged (cationic) colorants known for very bright shades and high color strength. Their charge makes them bond readily with fibers that contain negatively charged dye sites.

Basic Dyes vs Cationic Dyes

In textile sourcing, the two names usually describe the same family. “Basic dye” is the older, general term. “Cationic dye” is the term most suppliers now use for modern grades developed for acrylic and modified fibers. Using both terms in an inquiry avoids confusion, since some price lists and buyers still use only one.

Why They Suit Acrylic Fibers

Acrylic polymers contain anionic groups, often sulfonate groups introduced through comonomers during fiber production. Cationic dye molecules are attracted to these sites and bond firmly. The result is strong affinity, high color yield, and the vivid shades associated with acrylic knitwear, blankets, and pile fabrics.

That same affinity creates the main process challenge. The dye can strike too fast and unevenly, so good results depend on three controls:

  • Slow, controlled heating, typically from about 80°C up to the boil
  • A mildly acidic dye bath, usually around pH 4 to 5.5
  • The right auxiliaries for the dye and fiber combination

Compatible Fibers

Basic dyes work best on fibers with built-in anionic dye sites.

Fiber Why it accepts basic dyes Sourcing note
Acrylic Anionic groups in the polymer attract cationic dyes Main application; check dye compatibility in combination shades
Cationic-dyeable polyester (CDP) Sulfonate groups added during polymer modification Dyeing conditions differ from standard polyester
Modified nylon Modified to carry anionic sites Confirm the fiber grade before ordering dyes

Acrylic Fibers

Acrylic is the core market for basic dyes, covering yarn, sweaters, plush, blankets, and carpets. Dyes for this fiber should perform in both batch and continuous dyeing, with stable levelness and reliable fastness. Cationic dyes for acrylic fibers are available in labeled strength grades of 200%, 250%, and 300%, so offers can be compared on the same basis.

A technical data sheet should be this specific. Skyzon Blue X-GRL 300%, a basic dye for acrylic fiber and fabric with excellent dispersion and compatibility, lists the following:

  • Strength: 300%
  • Compatibility value (K): 3.5
  • pH stable range: 2 to 5
  • Light fastness (xenon): grade 6
  • Washing fastness: grade 4 for shade change, grade 4 to 5 for staining on cotton and acrylic
  • Rubbing fastness: grade 4 to 5, dry and wet
  • Perspiration fastness: grade 4 for shade change, grade 4 to 5 for staining

Cationic-Dyeable Polyester

CDP gives polyester fabrics bright shades and cross-dyeing options that standard polyester cannot offer. Its chemistry and dyeing conditions differ from conventional disperse dyeing, so a dye that performs well on acrylic may not behave the same way on CDP. For more detail on dye classes and conditions, see cationic dyes for modified polyester.

Modified Nylon

Some nylon grades are modified to accept cationic dyes, usually for special effects or cross-dyeing. This is a niche application. Confirm the exact fiber type with the yarn supplier and run a lab dip before bulk production.

Key Quality Parameters

Price per kilogram says little until the dye’s actual performance is clear. These parameters belong on every specification sheet.

Color Strength and Shade Consistency

Strength figures such as 200% or 300% only mean something against a defined reference standard. Ask which standard the manufacturer uses and how lot-to-lot variation is controlled. A dye that is 10% weaker than expected quietly raises batch cost and can throw off an established recipe.

Request measured shade-difference data between lots, ideally from a spectrophotometer, instead of relying on visual comparison alone.

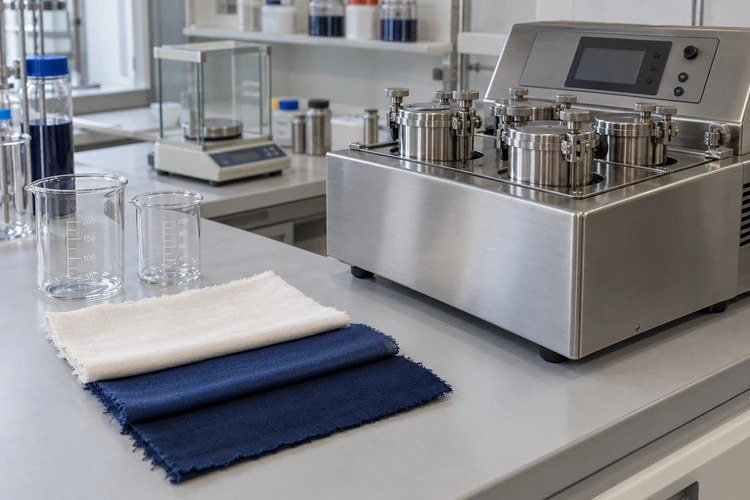
Spectrophotometer measuring blue acrylic knit samples to check shade consistency between dye lots.

Light and Wash Fastness

Fastness needs depend on the end use. Outdoor furnishings need strong light fastness, while knitwear and home textiles often prioritize wash and rub performance. Each dye should come with ratings for light, washing, rubbing, and perspiration, as in the example above, tested at the shade depth planned for production. For background on rating systems, see color fastness in textiles.

Solubility and Compatibility Value

Poor solubility causes spots, filter residue, and uneven dyeing. Confirm the recommended dissolving temperature and pH, and check that the dye’s pH stable range covers the planned dye bath.

Compatibility matters just as much. Because basic dyes barely migrate on acrylic, dyes combined in one shade must behave alike. This behavior is expressed as a compatibility value (K), commonly on a scale of 1 to 5. Dyes in the same recipe should share the same or very close K values. The test method ISO 105-Z03 specifies how to determine the compatibility of a basic dye with other basic dyes on acrylic fibers.

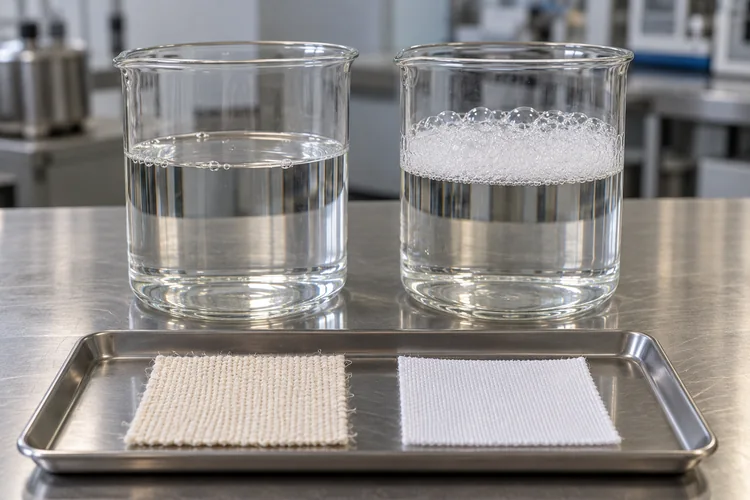
Rubbing fastness test on blue acrylic fabric using a white cotton test cloth.

How to Evaluate a Manufacturer

Once the specification is clear, the next question is who can deliver it consistently.

Area What to ask A good sign
Capacity Monthly output, backup production Scales with the forecast without delays
Technical team Application support, troubleshooting Specialists who understand acrylic dyeing
Quality control Batch testing, retained samples Certificate of analysis with every lot
Compliance Certificates, safety data, restricted substance statements Documents supplied quickly and in full
Samples Sample size, lead time, lab dip support Fast trial quantities at low or no cost

Capacity and Technical Expertise

Volume alone is not enough. A supplier who cannot discuss dyeing curves, pH windows, and retarder selection is likely to struggle when problems appear in production. Also ask how raw materials are sourced and how peak seasons are handled. The guide on choosing a textile dyeing partner lists further questions worth asking.

Batch Consistency and Quality Control

Consistency is the real product being purchased. Ask how each lot is tested before release, whether retained samples are kept, and how claims are handled when a lot falls outside tolerance. A documented quality process allows clear, specific answers to all three.

Certifications and Compliance

Certificates do not guarantee quality, but missing ones are a warning sign. Request management system certificates, environmental certificates, and product-specific compliance documents before shortlisting a supplier.

Color Matching and Sample Support

Strong suppliers do more than ship powder. They help with shade matching, recommend compatible dye combinations, and give guidance when trial results are off. Ask whether technical staff can join a call when a trial does not go as planned.

Compliance Requirements

Compliance often decides whether a shipment can enter a market or a brand approves a supplier. Raise these questions early.

REACH and Restricted Substances

For fabrics or garments sold in the European Union, REACH is the key regulation. It covers the registration, evaluation, authorization, and restriction of chemical substances. Ask the dye supplier for:

  • The REACH status of each product
  • A current safety data sheet
  • A statement on substances of very high concern
  • Confirmation that the dye does not release restricted amines or contain other ingredients prohibited by brand customers

OEKO-TEX and ZDHC Standards

Many brands require proof that chemicals meet recognized industry programs. OEKO-TEX offers certification systems for textile products and for textile chemicals. The ZDHC MRSL lists substances banned from intentional use in textile manufacturing. Request supporting documents for any product claimed to conform, since a verbal confirmation is not enough. Requirements differ by brand, so review the customer’s chemical policy first.

Sourcing Process

A clear process saves time and prevents costly surprises.

Define Specifications

Document the following before contacting suppliers:

  • Fiber type and shade targets
  • Required fastness levels
  • Dyeing method (batch or continuous)
  • Compliance requirements
  • Strength standard and preferred packaging size

The more precise the specification, the fairer the comparison between suppliers.

Run Samples and Trials

Test the exact dyes planned for production with lab dips and a small production trial on the mill’s own equipment. Check levelness, shade reproducibility, and fastness under real process conditions, not just the supplier’s lab setup. When new auxiliaries are tested at the same time, change one variable at a time so the cause of any problem is easy to identify.

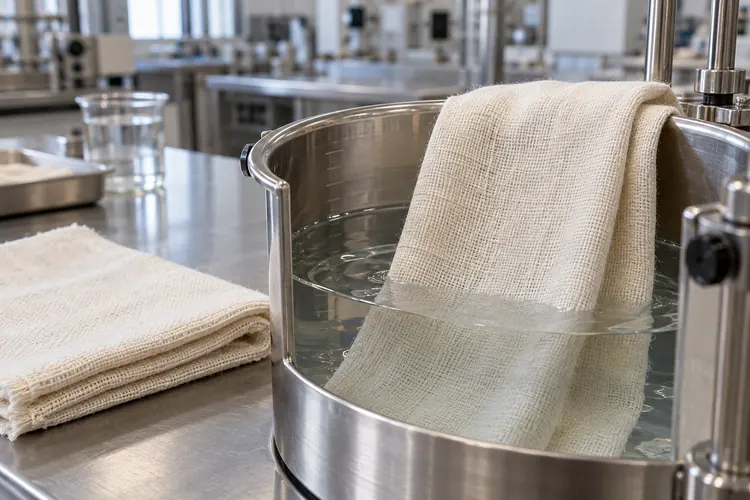
Blue acrylic yarn lifted from a lab dye bath during a sample trial.

Compare Quotes, MOQ and Lead Time

Once trials pass, compare offers on more than unit price.

Item What to compare Why it matters
Unit price Price per kg at the same strength standard Prevents comparing a 200% dye with a 300% dye by mistake
MOQ Minimum order and packaging size Affects cash flow and storage
Lead time Production plus shipping time Protects the production schedule
Payment terms Deposit, balance, credit options Affects financing
Documentation Certificates, safety data, test reports Needed for customs and brand approvals

Common Sourcing Mistakes

Two errors cause most sourcing problems.

Choosing on Price Alone

A cheaper dye with lower effective strength, poor solubility, or inconsistent lots often costs more through reprocessing, shade corrections, and delayed deliveries. Calculate cost per batch or per kilogram of finished fabric, not just price per kilogram of dye.

Ignoring Dye-Fiber Compatibility

A wrong dye class or a poorly matched combination leads to unlevel dyeing, weak fastness, or shade drift. Confirm compatibility with both the fiber supplier and the dye supplier, then verify it in a trial.

Pairing Dyes With Auxiliaries

Dyes rarely work alone. The right auxiliaries often make the difference between a level, repeatable shade and a rejected lot.

Retarders and Leveling Agents

Because cationic dyes strike quickly on acrylic, retarders are commonly used to slow dye uptake and improve levelness, and pH control keeps dyeing speed and shade consistent. Dyeing auxiliaries for acrylic help prevent barre, patchiness, and poor reproducibility.

Post-dyeing steps matter too. Sylic D2713 is a low-foam anionic soaping detergent for acrylic and acrylic blends such as cotton/acrylic and wool/acrylic. It is a beige granular powder, easily soluble in water, with a pH of 6.0 to 8.0 (1% solution) and a reference dosage of 1.0 to 3.0 g/L.

Blue acrylic knit fabric in a pilot dye bath with a temperature probe for process control.

Benefits of One-Stop Sourcing

Sourcing dyes and auxiliaries from one supplier means a single technical team can review the whole recipe, from dye selection to bath conditions. Problems are resolved faster, and paperwork, shipping, and quality documentation stay simpler.

Choosing a Reliable Supplier

The best supplier relationship works like a partnership: consistent products, honest technical advice, and quick answers when production is under pressure.

What to Expect From a Dye and Auxiliary Supplier

Skychem Group combines nearly 30 years in the chemical industry with Skyzon® cationic dyes and Sylic® dyeing auxiliaries, supported by technical assistance, sample service, and export documentation.

How to Request a Quote or Sample

To request a quote or free sample, share the fiber type, target shades, dyeing method, and annual volume. Product recommendations and trial samples follow, with responses typically within 24 hours.

FAQs About Sourcing Basic Dyes

What are basic dyes used for in textiles?

The main use is dyeing acrylic and modacrylic fibers, where they deliver bright shades and high color yield. They are also used on cationic-dyeable polyester and some modified nylon grades.

Can basic dyes be used on cotton or wool?

Basic dyes can color cotton and wool, but results are usually limited. Cotton generally needs a mordant, and fastness on both fibers is typically lower than with dyes designed for them. Reactive dyes are the usual choice for cotton, and acid dyes for wool.

How can basic dye quality be tested before a bulk order?

Request samples, run lab dips, and then complete a small production trial on the mill’s own equipment. Check strength against the reference standard, solubility, levelness, shade reproducibility, and fastness at the planned shade depth. Compare results between lots to confirm consistency.

What is the difference between basic dyes and disperse dyes?

Basic dyes are cationic and bond with anionic sites in fibers such as acrylic. Disperse dyes are non-ionic, have low water solubility, and are mainly used on polyester and other hydrophobic fibers.

What does the compatibility value (K) mean for basic dyes?

The K value describes how fast a basic dye is taken up by acrylic compared with other basic dyes. Dyes combined in one recipe should have the same or very close K values, so the shade stays consistent throughout the dyeing cycle.

What pH range is used for dyeing acrylic with basic dyes?

Dye baths are generally kept mildly acidic, roughly pH 4 to 5.5, usually adjusted with acetic acid. The dye’s pH stable range, listed on the technical data sheet, should cover this window.

How should auxiliaries be chosen for dyeing acrylic?

Start with the dye combination, fiber type, and machine. Retarders and leveling agents control the speed of dye uptake, pH adjusters keep the bath within range, and a low-foam soaping agent handles post-dyeing cleanup. Confirm the combination in a lab trial before scaling up

Sandy

With years of experience in chemical dyes and textile auxiliaries, I’m dedicated to sharing insights into the latest technologies, sustainable innovations, and market trends.

Recent Articles

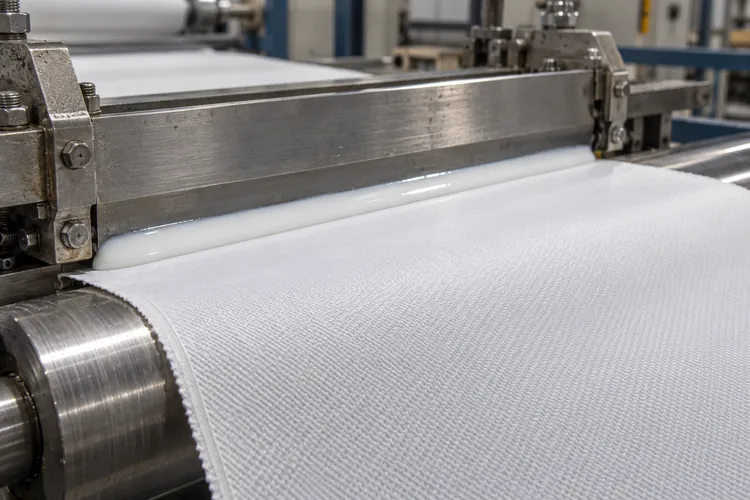
A doctor blade applies milky white PUD to woven polyester twill.

Polyurethane Dispersion (PUD) for Textile Coating: A Practical Guide

Table of Contents What Is PUD? Film Formation and Drying How the Film Forms Drying Conditions That Matter Coating Performance Adhesion and Durability Handle, Stretch, and Blocking Barrier and Appearance Properties PUD Formulation Choose the Binder Chemistry Select Compatible Auxiliaries Manage Color and Mixing Stability Troubleshoot Common Defects How to Select a PUD System Define Measurable Requirements Compare Performance and Cost Validate Before Ordering FAQs What is PUD used for in textile coating? What is the difference between film formation and curing? Does every PUD coating need a crosslinker? Can PUD coatings be waterproof and breathable? How do polyester, polyether, and polycarbonate PUDs differ? Can dyes and finishing auxiliaries affect coating adhesion? Why does a PUD coating become sticky or peel after washing? A textile coating can look smooth after drying and still crack during stretching, block in a roll, or peel after washing. These failures often reflect a mismatch between the binder, fabric, formulation, and processing conditions. Polyurethane dispersion, or PUD, is a waterborne binder used to form flexible, durable coatings on textiles. The right grade can help achieve a useful balance of adhesion, softness, elasticity, abrasion resistance, and barrier performance. Results depend on how the complete coating system is designed and applied. For textile formulators and buyers, selection starts with the finished-fabric specification. Understanding film formation, binder chemistry, and auxiliary compatibility makes it easier to turn that specification into a repeatable production process. What Is PUD? A polyurethane dispersion contains fine polyurethane-based polymer particles dispersed in water. As water evaporates under suitable conditions, the particles consolidate into a continuous film. PUDs are used in direct coating, transfer coating, backcoating, and selected lamination systems. Typical applications include outdoor fabrics, stretch apparel, upholstery, workwear, and synthetic leather. The supplied dispersion is usually one component of the coating formulation. Pigments, fillers, thickeners, wetting agents, defoamers, and crosslinkers may be added to achieve the required application behavior and finished properties. Application method affects binder selection. Direct coating requires controlled wetting and penetration on fabric. Transfer coating forms a layer on a release surface before bonding it to the textile, often as part of a multilayer structure. See textile coating methods and chemistry for a broader comparison of these processes. Film Formation and Drying How the Film Forms PUD film formation can be described in three overlapping stages: Water evaporation: The polymer particles become more concentrated and move closer together. Particle packing and deformation: The particles make close contact and deform as the layer consolidates. Film development: Coalescence and polymer-chain movement across particle boundaries help the film develop cohesion. The sequence and rate depend on the polymer and formulation. A surface that looks dry may still contain moisture or require further conditioning before testing. Physical film formation and chemical crosslinking are separate processes. Film formation creates a coherent polymer layer. Crosslinking introduces additional chemical connections in a suitably reactive system, potentially improving properties such as wash or chemical resistance. Some PUDs perform adequately without an added crosslinker; others require one to meet the specification. Drying Conditions That Matter The minimum film-forming temperature, or MFFT, is the lowest temperature at which a dispersion forms a continuous film under specified test conditions. It is a screening property, not a production curing schedule. A formulation that forms a film at low temperature may still need additional heat, time, or conditioning to remove water and develop its intended properties. Use processing recommendations for the selected binder and crosslinking system as the starting point. Control these variables during trials and production: Fabric temperature: Evaporating water can keep the wet coating cooler than the oven air. Dwell time: The coating needs sufficient time at the required conditions. Airflow and humidity: Both affect water removal and surface development. Wet coating weight: Heavier deposits generally require more drying capacity. Fabric absorption: Porous or absorbent textiles can change penetration and surface coverage. Drying too aggressively can form a surface skin while moisture remains underneath, contributing to bubbles or uneven film development. Insufficient drying can leave tackiness or poor resistance. Adjust the drying profile, airflow, and line speed together rather than relying on a higher oven temperature alone. Record the wet application weight, dry add-on, line speed, oven settings, and measured fabric temperature. These details help reproduce successful laboratory results on the production line. Coating Performance Adhesion and Durability Adhesion depends on the binder’s interaction with the actual textile surface. Fiber chemistry, construction, absorbency, and processing residues all matter. Oils, surfactants, softeners, or previous finishes may interfere with wetting and bonding. Use production-representative fabric when testing. A clean laboratory sample may give favorable results that bulk fabric cannot reproduce. Evaluate initial adhesion alongside abrasion resistance, repeated flexing, and wash durability. Inspect where failure occurs: separation at the fabric interface suggests a different problem from tearing within the coating. Hydrolysis resistance also needs separate evaluation. Hydrolysis is chemical degradation involving water, often accelerated by heat and humidity. A coating may initially resist water penetration yet lose mechanical strength during humid aging. Specify both initial barrier performance and durability under the expected service conditions. Handle, Stretch, and Blocking Fabric handle describes how the coated textile feels and drapes. It depends on binder stiffness, coating distribution, dry add-on, and surface modification. For stretch textiles, elongation at break alone is insufficient. Also consider: The force needed to extend the coating at normal working strains. Recovery after extension. Resistance to repeated stretching and flexing. Adhesion while the fabric is stretched. A highly extensible film can still feel restrictive if it requires too much force to stretch. Softness must also be balanced against blocking, which occurs when surfaces stick together during rolling or stacking. Check blocking under representative temperature, pressure, and storage conditions, particularly for soft coatings. Barrier and Appearance Properties Water repellency, resistance to water penetration, moisture-vapor transmission, and air permeability measure different behaviors. Water-repellent finishes reduce surface wetting. A suitably formulated coating can resist water penetration, while breathability depends on the transport of moisture vapor through the complete textile structure. Air permeability is a separate property.

Explore More »
Laboratory dyeing machine, analytical balance, and cotton fabric swatches on a textile lab bench.

Textile Dyeing Lab Setup: Lab-Dip Workflow, Equipment, and Scale-Up

Table of Contents Lab Setup Essentials Space, Water, and Utilities Safety and Waste Handling Core Lab Equipment Lab Dyeing Machines Balances and Dispensing Tools Spectrophotometer and Light Booth Lab-Dip Workflow Shade Brief and Target Matching Substrate Preparation Recipe Formulation Dyeing and Evaluation Reproducibility Control SOPs and Calibration Material Consistency and Residual Alkali Data Recording Scale-Up Control Key Variables Before Bulk Dyeing Liquor Ratio and Machine Differences Shade Drift and Scale-Up Problems Dyes and Auxiliaries for Lab Use Dye Selection by Fiber Key Auxiliaries and Stock Solutions FAQ What equipment is needed for a textile dyeing lab? How many lab-dip rounds are normal before approval? Why do lab-dip results differ from bulk dyeing? How can a lab improve dyeing reproducibility? Which dyes and auxiliaries suit lab-dip development? A dyeing lab is where color decisions are made before any fabric enters a production machine. Strong lab practice speeds up shade approvals, produces recipes that transfer cleanly to the dyehouse, and keeps color consistent from lot to lot. This guide covers how to plan and run a textile dyeing laboratory, from space and equipment to the lab-dip workflow, reproducibility controls, and scale-up. It is written for mill technicians, lab managers, and buyers who need dependable color from first approval to final shipment. Lab Setup Essentials Space, Water, and Utilities Start with a dedicated, well-ventilated room divided into three zones: chemical preparation and weighing, dyeing and washing-off, and color evaluation. Humidity and dust from the first two zones can damage balances and spectrophotometers, so keep color assessment in a separate, calm space with controlled lighting. Water is part of every recipe, so treat it as a controlled material. Hardness, pH, and metal content can shift a shade or reduce dye solubility. Most labs use softened or deionized water and match it as closely as possible to production water. Some also use the purity grades in ISO 3696 as a benchmark for laboratory water. Test the water on a fixed schedule and record the results. Plan the utilities as well: Stable electrical supply Hot and cold water with floor drains Compressed air, if the machines require it Enough bench space for drying and conditioning samples Safety and Waste Handling Dyes and auxiliaries are chemicals, so equip the lab accordingly: Fume extraction at the weighing station Eyewash and emergency shower access Chemical-resistant gloves and goggles Clear labels on every stock solution Safety data sheets within easy reach Separate storage for acids, alkalis, and oxidizers Collect spent dye baths, rinse water, and expired stock solutions in labeled containers and dispose of them according to local wastewater rules. A simple waste log makes audits much easier. Core Lab Equipment Lab Dyeing Machines The sample dyeing machine is the heart of the lab. Most labs use infrared or heated-bath machines with sealed beakers or canisters that rotate or shake to imitate the liquor movement of production. Prioritize accurate temperature control, programmable heating gradients, and enough positions to run several recipes at once. A lab padder is a useful addition for pad-dyeing and pad-batch development. Balances and Dispensing Tools Small weighing errors turn into visible shade differences at scale. An analytical balance reading to 0.1 mg suits dye powders, and a precision balance handles fabric and auxiliaries. Calibrated pipettes or an automatic dispensing system keep liquid volumes consistent between operators. Spectrophotometer and Light Booth A spectrophotometer measures color objectively and drives computer color matching. A light booth lets people judge a shade under standard light sources such as D65, TL84, and incandescent. Use both. The instrument shows how close the match is, and the booth reveals metamerism, which is when two samples match under one light source but not under another. Equipment Main role What to check when buying Lab dyeing machine Runs trial dyeings under controlled temperature and agitation Temperature accuracy, number of positions, program flexibility Analytical balance Weighs dyes and chemicals Readability, calibration support, draft shield Pipettes or auto-dispenser Dispenses stock solutions Accuracy, repeatability, ease of cleaning Spectrophotometer Measures color and supports recipe prediction Measurement geometry, software, calibration routine Light booth Supports visual shade assessment Multiple standard light sources, neutral gray interior pH and conductivity meters Monitor bath and water conditions Calibration frequency, probe durability Lab-Dip Workflow Each step below feeds the next, and skipping one usually costs extra rounds later. Shade Brief and Target Matching Every lab dip starts with a clear brief. Collect these details before dyeing anything: The target: a physical swatch, a Pantone reference, or a digital standard The substrate and its weight The end use The fastness requirements The agreed shade tolerance Settling the tolerance up front prevents disputes later, because “close enough” means different things to different people. Substrate Preparation A lab dip predicts bulk results only if the lab fabric behaves like the bulk fabric. Use the same construction, the same fiber lot where possible, and the same pretreatment. Scoured and bleached cotton, heat-set polyester, and neutralized fabrics all dye differently from raw or poorly prepared goods. Cut samples to a fixed weight, commonly 5 to 10 grams, and condition them the same way every time. Recipe Formulation Build the first recipe from a color-matching system, from approved recipes for similar shades, or from the colorist’s experience. Prepare dye stock solutions at known concentrations, such as 1% or 0.1%, so small quantities are easy to measure. The calculation is straightforward. A 2% shade on weight of fiber (owf) for a 5 gram sample needs 0.1 g of dye, which equals 10 mL of a 1% stock solution. Then add the auxiliaries, salt, alkali, or acid that the dye class requires, and set the lab liquor ratio. Dyeing and Evaluation Run the trial with the same temperature profile, dosing steps, and time planned for production. Rinse, soap, and dry the sample the way it will be processed in bulk, because unfixed dye and drying conditions both change the final shade. Evaluate the result against the target with the spectrophotometer and the light booth. If the shade is off, adjust the recipe

Explore More »
Cotton woven fabric immersed in a laboratory scouring bath.

Cotton Bioscouring Agents: Enzymatic vs. Alkaline Scouring

Table of Contents What Is Cotton Bioscouring? How Pectinase Works Why Supporting Auxiliaries Matter How Alkaline Scouring Works Bioscouring vs. Alkaline Scouring Which Method Should Your Mill Choose? When to Consider Bioscouring When to Retain Alkaline Scouring Selecting Bioscouring Agents Check Enzyme Performance Match the Supporting Auxiliaries Cotton Scouring Product Examples Evaluate Supplier Support Validating Scouring Performance Run a Representative Trial Check Absorbency and Fabric Quality Verify Reactive Dyeing Performance Calculate Total Cost and Resource Use FAQ Which Enzymes Are Used for Cotton Bioscouring? How Does Bioscouring Differ from Alkaline Scouring? Does Pectinase Remove Cotton Waxes? What pH and Temperature Does Bioscouring Require? Can Bioscouring Replace Desizing and Bleaching? How Does Bioscouring Affect Reactive Dyeing? Is Bioscouring More Cost-Effective? Cotton must absorb water evenly before it can be dyed or finished consistently. Natural waxes, pectin, oils, and other impurities interfere with wetting, making scouring an essential part of cotton preparation. Conventional alkaline scouring uses caustic soda, heat, and textile auxiliaries to remove these impurities. Enzymatic scouring, commonly called bioscouring, uses enzymes to target specific components of the cotton surface. Bioscouring can offer milder treatment and opportunities to reduce caustic consumption. However, its performance depends on more than the enzyme alone. For textile mills and buyers, the right choice comes down to impurity removal, fabric quality, process reliability, and total production cost. What Is Cotton Bioscouring? Cotton bioscouring is an enzymatic pretreatment that improves wettability by breaking down and helping remove noncellulosic impurities. Pectinase is central to many commercial systems, supported by suitable wetting agents, detergents, and washing conditions. How Pectinase Works Pectin forms part of the matrix in cotton’s outer layers. Pectin-degrading enzymes break down this material, helping release associated impurities so they can be removed during washing. “Pectinase” describes a group of enzymes rather than a single interchangeable chemical. Commercial preparations may contain pectate lyase or other pectin-degrading enzymes, each with its own activity and operating requirements. Pectinase targets pectic substances rather than cellulose. This selectivity can help limit unnecessary fiber degradation, although the performance of a commercial formulation depends on its complete composition and treatment conditions. Why Supporting Auxiliaries Matter Pectin removal alone does not guarantee sufficient absorbency. Pectinase does not directly break down cotton waxes, so the process must also release, disperse, and wash away enough hydrophobic material. Wetting agents help the bath penetrate the substrate. Detergents and emulsifiers help remove loosened oils and waxes and limit their redeposition. A study of bioscouring and post-washing found that effective post-treatment was essential for achieving good wettability, even after substantial pectin removal. Select the enzyme, supporting auxiliaries, and washing sequence as one system. How Alkaline Scouring Works Conventional cotton scouring uses sodium hydroxide with heat and supporting auxiliaries. Caustic soda converts saponifiable fats into soaps and helps break down or solubilize certain noncellulosic components. Surfactants assist with wetting, emulsification, and removal of impurities that are not readily dissolved. Treatment is followed by washing and, where required, neutralization. Conditions vary with the substrate, equipment, contamination, and integration with bleaching. Alkaline scouring remains widely used because it provides established, broad cleaning action and fits existing preparation lines. Its tradeoffs can include substantial heating, rinsing, chemical consumption, and effluent neutralization requirements. Fabric weight loss is not automatically evidence of damage, since removing impurities reduces weight. Nevertheless, excessive processing can cause unnecessary losses, and strength should be assessed independently. Scouring also serves a different purpose from desizing and bleaching: Desizing removes sizing materials applied during weaving. Scouring removes natural impurities and processing contaminants to improve absorbency. Bleaching reduces natural coloration to achieve the required whiteness. These operations may be combined in a validated process, but one does not automatically replace the others. Bioscouring vs. Alkaline Scouring Both methods aim to produce cotton that wets uniformly and performs consistently in subsequent processing. The main differences are their cleaning mechanisms, operating conditions, and requirements for supporting chemicals. Factor Enzymatic bioscouring Conventional alkaline scouring Cleaning mechanism Selective enzyme action, commonly targeting pectin Caustic treatment with broader impurity removal Wax and oil removal Relies on release of impurities, suitable auxiliaries, and effective washing Uses saponification where applicable, emulsification, and washing Temperature and pH Product-specific conditions, often milder than conventional caustic treatment Typically stronger alkalinity and higher treatment temperatures Absorbency Can meet production requirements with an effective complete process Established route to good absorbency under controlled conditions Fabric properties Potential for good strength retention and lower weight loss Depends on treatment severity and process control Dyeing performance Must be verified against the mill’s shade and quality requirements Provides a familiar production baseline Water and energy Savings depend on washing, bleaching, and the complete preparation route Consumption depends on equipment and process integration Effluent May reduce caustic-related alkalinity; organic load still needs measurement Alkalinity and neutralization demand require management Process control Enzyme activity, compatibility, pH, temperature, and circulation Chemical concentration, temperature, time, and washing Economics Enzyme cost must be balanced against utilities, productivity, and quality Caustic cost must be assessed alongside utilities, rinsing, and treatment costs Research comparing pectinase scouring with alkaline scouring has demonstrated comparable performance under specific experimental conditions. Commercial performance still requires mill trials. Which Method Should Your Mill Choose? Start with the production objective. Reducing caustic use, improving fabric quality, and increasing throughput are different goals, and the same process change may not improve all three. When to Consider Bioscouring Bioscouring is worth testing when: Reducing caustic consumption is a priority. Strength retention or fabric handle is important. Equipment can maintain the enzyme’s recommended conditions. Effective impurity removal can be achieved without excessive additional washing. Cotton knits, woven fabrics, and yarns can be evaluated, but trials should use representative production material. Cotton source, construction, sizing, and contamination influence treatment performance. When to Retain Alkaline Scouring Alkaline scouring may remain the more practical option when it delivers reliable quality, contamination is difficult to remove, or an enzyme route would reduce productivity. Existing combined scouring and bleaching lines deserve particular attention. Adding separate treatments or washing stages may offset savings in chemicals or bath temperature. White

Explore More »
Two textile test baths with different foam levels.

Low-Foam Wetting Agents: A Textile Pretreatment Guide

Table of Contents How Low-Foam Wetting Agents Work Wetting, Cleaning, and Foam Control Why Foam Control Matters Choosing the Right Wetting Agent Match the Fabric and Equipment Check Bath Compatibility Match Product Parameters to the Process Testing and Dosage Run a Practical Trial Set the Working Dose Compare Cost at the Effective Dose Common Problems and Fixes FAQ Are all nonionic wetting agents low foaming? Can low-foam wetting agents tolerate alkali and peroxide? Why does a low-foam wetting agent still produce foam? Can a low-foam wetting agent replace a defoamer? Fast wetting helps desizing, scouring, and bleaching chemicals reach the fabric evenly. The challenge is to achieve that penetration without creating foam that interferes with the machine. A wetting agent may perform well in a laboratory beaker but behave differently when the bath is pumped and circulated through a production machine. A suitable low-foam wetting agent must work with the fabric, equipment, and complete pretreatment recipe. The main questions are straightforward: Does the fabric wet quickly? Does foam remain manageable? Does the treated fabric show the required cleanliness and absorbency? How Low-Foam Wetting Agents Work Wetting agents reduce surface tension, helping the treatment bath spread over the fabric and enter the spaces within yarns and fiber bundles. This is particularly useful when natural cotton waxes, processing oils, or a dense fabric construction slow penetration. Understanding how textile wetting agents work also helps explain an important distinction: fast wetting does not necessarily mean effective cleaning. Fabric may wet quickly in a bath containing surfactants but remain poorly absorbent after washing because waxes or oils are still present. Wetting, Cleaning, and Foam Control These functions are related, but they serve different purposes. Auxiliary Main job What to check Wetting agent Helps the bath spread and penetrate Wetting speed and uniformity Scouring agent or detergent Helps remove waxes, oils, and other impurities Cleaning and prevention of redeposition Defoamer Breaks foam and may limit further buildup Foam control, compatibility, and fabric deposits Some products combine wetting with cleaning and emulsification. Emulsification helps break oily material into small droplets that can be carried in the bath and removed during washing. Check whether the chosen product provides enough cleaning support or whether a separate detergent is needed. Low-foam formulations limit the amount of foam produced or how long it lasts. They do not guarantee a foam-free bath at every dose, temperature, or circulation rate. Why Foam Control Matters Jet and soft-flow machines repeatedly circulate the bath through the textile. Agitation and air entering the liquid can create bubbles, which surfactants may stabilize. Persistent foam can disrupt bath handling, contribute to overflow, and make steady operation harder to maintain. On continuous pretreatment lines, foam in padding baths or washing sections can also interfere with consistent application and rinsing. Foam behavior may change during the process. A bath that produces little foam at the scouring temperature may foam during cooling or dilution. Other ingredients matter, too. Detergents, sizing residues, oils, and chemicals left from earlier stages can change the result. For this reason, a clean-water test at room temperature is only an initial check. The full recipe must be evaluated under conditions that reflect production. Choosing the Right Wetting Agent Match the Fabric and Equipment Start with the material being processed and the machine being used. Cotton: Consider natural waxes, added oils, sizing materials, and the planned scouring conditions. Polyester and blends: Check the processing oils and spin finishes that need to be removed. Dense fabrics and yarn packages: Assess penetration into the structure, not just surface wetting. Continuous lines: Make sure wetting occurs within the available contact time. Jet and soft-flow machines: Check foam under the intended circulation conditions and liquor ratio. A wetting agent cannot correct poor liquid flow through a yarn package or uneven application across the fabric. Check the machine’s ability to deliver the bath as well as the chemical’s ability to improve wetting. Check Bath Compatibility Confirm performance at the intended temperature, alkali concentration, and water hardness. The checks should match the process: For enzyme desizing, confirm compatibility with the enzyme and its operating conditions. For alkaline scouring, check wetting and stability at the actual alkali level. For peroxide bleaching, test the complete recipe, including the peroxide stabilizer and sequestering agent. Look for separation, precipitation, deposits, and slower wetting. A change in appearance does not always mean the product has failed, so compare it with measured performance. Where the wetting agent does not provide enough cleaning, use compatible textile scouring agents to help remove waxes and oils. Check the combined recipe for both cleaning and foam. Match Product Parameters to the Process For trials that require penetration and emulsification with low foam, evaluate Sylic P1412 nonionic low-foaming wetting agent. The relevant specifications are: Main component: Polyoxyethylene compounds. Ionic character: Nonionic. pH: 6–8 in a 1% aqueous solution. General application dose: 0.5–3.0 g/L for textile dyeing and finishing processes. The product’s penetration and emulsification properties are relevant when the bath needs to enter the textile and help disperse oily impurities. However, nonionic character alone does not prove low-foam performance. The stated pH describes the diluted product; it does not define the bath’s operating range or prove resistance to strong alkali. Before using P1412 in pretreatment, confirm its suitability for the intended alkali level, peroxide recipe, and equipment. Request wetting and foam test results with the conditions clearly stated, then establish the working dose through trials. The general dose range should not be treated as a universal pretreatment recipe. Testing and Dosage Run a Practical Trial Use representative untreated fabric or yarn, mill water, and the intended recipe. Compare each candidate with the current production product. Decide what counts as an acceptable result before testing. Then check four areas: Wetting speed: Use a suitable wetting or sinking test with consistent sample preparation. Repeat measurements. Trapped air and fabric construction can affect sinking time, so interpret it alongside other observations. Foam height and collapse: Measure foam after a set period of agitation, then record how

Explore More »

Contact Us for Textile Auxiliaries and Dyes

Contact Skychem Group for more chemical solutions, If you have questions or need more information, please contact us.
We will respond within 24 hours

Get a project quote

Tell us your project requirements, country, and intended application.

Sandy

With years of experience in chemical dyes and textile auxiliaries, I’m dedicated to sharing insights into the latest technologies, sustainable innovations, and market trends.

Recent Articles

A doctor blade applies milky white PUD to woven polyester twill.

Polyurethane Dispersion (PUD) for Textile Coating: A Practical Guide

Table of Contents What Is PUD? Film Formation and Drying How the Film Forms Drying Conditions That Matter Coating Performance Adhesion and Durability Handle, Stretch, and Blocking Barrier and Appearance Properties PUD Formulation Choose the Binder Chemistry Select Compatible Auxiliaries Manage Color and Mixing Stability Troubleshoot Common Defects How to Select a PUD System Define Measurable Requirements Compare Performance and Cost Validate Before Ordering FAQs What is PUD used for in textile coating? What is the difference between film formation and curing? Does every PUD coating need a crosslinker? Can PUD coatings be waterproof and breathable? How do polyester, polyether, and polycarbonate PUDs differ? Can dyes and finishing auxiliaries affect coating adhesion? Why does a PUD coating become sticky or peel after washing? A textile coating can look smooth after drying and still crack during stretching, block in a roll, or peel after washing. These failures often reflect a mismatch between the binder, fabric, formulation, and processing conditions. Polyurethane dispersion, or PUD, is a waterborne binder used to form flexible, durable coatings on textiles. The right grade can help achieve a useful balance of adhesion, softness, elasticity, abrasion resistance, and barrier performance. Results depend on how the complete coating system is designed and applied. For textile formulators and buyers, selection starts with the finished-fabric specification. Understanding film formation, binder chemistry, and auxiliary compatibility makes it easier to turn that specification into a repeatable production process. What Is PUD? A polyurethane dispersion contains fine polyurethane-based polymer particles dispersed in water. As water evaporates under suitable conditions, the particles consolidate into a continuous film. PUDs are used in direct coating, transfer coating, backcoating, and selected lamination systems. Typical applications include outdoor fabrics, stretch apparel, upholstery, workwear, and synthetic leather. The supplied dispersion is usually one component of the coating formulation. Pigments, fillers, thickeners, wetting agents, defoamers, and crosslinkers may be added to achieve the required application behavior and finished properties. Application method affects binder selection. Direct coating requires controlled wetting and penetration on fabric. Transfer coating forms a layer on a release surface before bonding it to the textile, often as part of a multilayer structure. See textile coating methods and chemistry for a broader comparison of these processes. Film Formation and Drying How the Film Forms PUD film formation can be described in three overlapping stages: Water evaporation: The polymer particles become more concentrated and move closer together. Particle packing and deformation: The particles make close contact and deform as the layer consolidates. Film development: Coalescence and polymer-chain movement across particle boundaries help the film develop cohesion. The sequence and rate depend on the polymer and formulation. A surface that looks dry may still contain moisture or require further conditioning before testing. Physical film formation and chemical crosslinking are separate processes. Film formation creates a coherent polymer layer. Crosslinking introduces additional chemical connections in a suitably reactive system, potentially improving properties such as wash or chemical resistance. Some PUDs perform adequately without an added crosslinker; others require one to meet the specification. Drying Conditions That Matter The minimum film-forming temperature, or MFFT, is the lowest temperature at which a dispersion forms a continuous film under specified test conditions. It is a screening property, not a production curing schedule. A formulation that forms a film at low temperature may still need additional heat, time, or conditioning to remove water and develop its intended properties. Use processing recommendations for the selected binder and crosslinking system as the starting point. Control these variables during trials and production: Fabric temperature: Evaporating water can keep the wet coating cooler than the oven air. Dwell time: The coating needs sufficient time at the required conditions. Airflow and humidity: Both affect water removal and surface development. Wet coating weight: Heavier deposits generally require more drying capacity. Fabric absorption: Porous or absorbent textiles can change penetration and surface coverage. Drying too aggressively can form a surface skin while moisture remains underneath, contributing to bubbles or uneven film development. Insufficient drying can leave tackiness or poor resistance. Adjust the drying profile, airflow, and line speed together rather than relying on a higher oven temperature alone. Record the wet application weight, dry add-on, line speed, oven settings, and measured fabric temperature. These details help reproduce successful laboratory results on the production line. Coating Performance Adhesion and Durability Adhesion depends on the binder’s interaction with the actual textile surface. Fiber chemistry, construction, absorbency, and processing residues all matter. Oils, surfactants, softeners, or previous finishes may interfere with wetting and bonding. Use production-representative fabric when testing. A clean laboratory sample may give favorable results that bulk fabric cannot reproduce. Evaluate initial adhesion alongside abrasion resistance, repeated flexing, and wash durability. Inspect where failure occurs: separation at the fabric interface suggests a different problem from tearing within the coating. Hydrolysis resistance also needs separate evaluation. Hydrolysis is chemical degradation involving water, often accelerated by heat and humidity. A coating may initially resist water penetration yet lose mechanical strength during humid aging. Specify both initial barrier performance and durability under the expected service conditions. Handle, Stretch, and Blocking Fabric handle describes how the coated textile feels and drapes. It depends on binder stiffness, coating distribution, dry add-on, and surface modification. For stretch textiles, elongation at break alone is insufficient. Also consider: The force needed to extend the coating at normal working strains. Recovery after extension. Resistance to repeated stretching and flexing. Adhesion while the fabric is stretched. A highly extensible film can still feel restrictive if it requires too much force to stretch. Softness must also be balanced against blocking, which occurs when surfaces stick together during rolling or stacking. Check blocking under representative temperature, pressure, and storage conditions, particularly for soft coatings. Barrier and Appearance Properties Water repellency, resistance to water penetration, moisture-vapor transmission, and air permeability measure different behaviors. Water-repellent finishes reduce surface wetting. A suitably formulated coating can resist water penetration, while breathability depends on the transport of moisture vapor through the complete textile structure. Air permeability is a separate property.

Explore More »
Laboratory dyeing machine, analytical balance, and cotton fabric swatches on a textile lab bench.

Textile Dyeing Lab Setup: Lab-Dip Workflow, Equipment, and Scale-Up

Table of Contents Lab Setup Essentials Space, Water, and Utilities Safety and Waste Handling Core Lab Equipment Lab Dyeing Machines Balances and Dispensing Tools Spectrophotometer and Light Booth Lab-Dip Workflow Shade Brief and Target Matching Substrate Preparation Recipe Formulation Dyeing and Evaluation Reproducibility Control SOPs and Calibration Material Consistency and Residual Alkali Data Recording Scale-Up Control Key Variables Before Bulk Dyeing Liquor Ratio and Machine Differences Shade Drift and Scale-Up Problems Dyes and Auxiliaries for Lab Use Dye Selection by Fiber Key Auxiliaries and Stock Solutions FAQ What equipment is needed for a textile dyeing lab? How many lab-dip rounds are normal before approval? Why do lab-dip results differ from bulk dyeing? How can a lab improve dyeing reproducibility? Which dyes and auxiliaries suit lab-dip development? A dyeing lab is where color decisions are made before any fabric enters a production machine. Strong lab practice speeds up shade approvals, produces recipes that transfer cleanly to the dyehouse, and keeps color consistent from lot to lot. This guide covers how to plan and run a textile dyeing laboratory, from space and equipment to the lab-dip workflow, reproducibility controls, and scale-up. It is written for mill technicians, lab managers, and buyers who need dependable color from first approval to final shipment. Lab Setup Essentials Space, Water, and Utilities Start with a dedicated, well-ventilated room divided into three zones: chemical preparation and weighing, dyeing and washing-off, and color evaluation. Humidity and dust from the first two zones can damage balances and spectrophotometers, so keep color assessment in a separate, calm space with controlled lighting. Water is part of every recipe, so treat it as a controlled material. Hardness, pH, and metal content can shift a shade or reduce dye solubility. Most labs use softened or deionized water and match it as closely as possible to production water. Some also use the purity grades in ISO 3696 as a benchmark for laboratory water. Test the water on a fixed schedule and record the results. Plan the utilities as well: Stable electrical supply Hot and cold water with floor drains Compressed air, if the machines require it Enough bench space for drying and conditioning samples Safety and Waste Handling Dyes and auxiliaries are chemicals, so equip the lab accordingly: Fume extraction at the weighing station Eyewash and emergency shower access Chemical-resistant gloves and goggles Clear labels on every stock solution Safety data sheets within easy reach Separate storage for acids, alkalis, and oxidizers Collect spent dye baths, rinse water, and expired stock solutions in labeled containers and dispose of them according to local wastewater rules. A simple waste log makes audits much easier. Core Lab Equipment Lab Dyeing Machines The sample dyeing machine is the heart of the lab. Most labs use infrared or heated-bath machines with sealed beakers or canisters that rotate or shake to imitate the liquor movement of production. Prioritize accurate temperature control, programmable heating gradients, and enough positions to run several recipes at once. A lab padder is a useful addition for pad-dyeing and pad-batch development. Balances and Dispensing Tools Small weighing errors turn into visible shade differences at scale. An analytical balance reading to 0.1 mg suits dye powders, and a precision balance handles fabric and auxiliaries. Calibrated pipettes or an automatic dispensing system keep liquid volumes consistent between operators. Spectrophotometer and Light Booth A spectrophotometer measures color objectively and drives computer color matching. A light booth lets people judge a shade under standard light sources such as D65, TL84, and incandescent. Use both. The instrument shows how close the match is, and the booth reveals metamerism, which is when two samples match under one light source but not under another. Equipment Main role What to check when buying Lab dyeing machine Runs trial dyeings under controlled temperature and agitation Temperature accuracy, number of positions, program flexibility Analytical balance Weighs dyes and chemicals Readability, calibration support, draft shield Pipettes or auto-dispenser Dispenses stock solutions Accuracy, repeatability, ease of cleaning Spectrophotometer Measures color and supports recipe prediction Measurement geometry, software, calibration routine Light booth Supports visual shade assessment Multiple standard light sources, neutral gray interior pH and conductivity meters Monitor bath and water conditions Calibration frequency, probe durability Lab-Dip Workflow Each step below feeds the next, and skipping one usually costs extra rounds later. Shade Brief and Target Matching Every lab dip starts with a clear brief. Collect these details before dyeing anything: The target: a physical swatch, a Pantone reference, or a digital standard The substrate and its weight The end use The fastness requirements The agreed shade tolerance Settling the tolerance up front prevents disputes later, because “close enough” means different things to different people. Substrate Preparation A lab dip predicts bulk results only if the lab fabric behaves like the bulk fabric. Use the same construction, the same fiber lot where possible, and the same pretreatment. Scoured and bleached cotton, heat-set polyester, and neutralized fabrics all dye differently from raw or poorly prepared goods. Cut samples to a fixed weight, commonly 5 to 10 grams, and condition them the same way every time. Recipe Formulation Build the first recipe from a color-matching system, from approved recipes for similar shades, or from the colorist’s experience. Prepare dye stock solutions at known concentrations, such as 1% or 0.1%, so small quantities are easy to measure. The calculation is straightforward. A 2% shade on weight of fiber (owf) for a 5 gram sample needs 0.1 g of dye, which equals 10 mL of a 1% stock solution. Then add the auxiliaries, salt, alkali, or acid that the dye class requires, and set the lab liquor ratio. Dyeing and Evaluation Run the trial with the same temperature profile, dosing steps, and time planned for production. Rinse, soap, and dry the sample the way it will be processed in bulk, because unfixed dye and drying conditions both change the final shade. Evaluate the result against the target with the spectrophotometer and the light booth. If the shade is off, adjust the recipe

Explore More »
Cotton woven fabric immersed in a laboratory scouring bath.

Cotton Bioscouring Agents: Enzymatic vs. Alkaline Scouring

Table of Contents What Is Cotton Bioscouring? How Pectinase Works Why Supporting Auxiliaries Matter How Alkaline Scouring Works Bioscouring vs. Alkaline Scouring Which Method Should Your Mill Choose? When to Consider Bioscouring When to Retain Alkaline Scouring Selecting Bioscouring Agents Check Enzyme Performance Match the Supporting Auxiliaries Cotton Scouring Product Examples Evaluate Supplier Support Validating Scouring Performance Run a Representative Trial Check Absorbency and Fabric Quality Verify Reactive Dyeing Performance Calculate Total Cost and Resource Use FAQ Which Enzymes Are Used for Cotton Bioscouring? How Does Bioscouring Differ from Alkaline Scouring? Does Pectinase Remove Cotton Waxes? What pH and Temperature Does Bioscouring Require? Can Bioscouring Replace Desizing and Bleaching? How Does Bioscouring Affect Reactive Dyeing? Is Bioscouring More Cost-Effective? Cotton must absorb water evenly before it can be dyed or finished consistently. Natural waxes, pectin, oils, and other impurities interfere with wetting, making scouring an essential part of cotton preparation. Conventional alkaline scouring uses caustic soda, heat, and textile auxiliaries to remove these impurities. Enzymatic scouring, commonly called bioscouring, uses enzymes to target specific components of the cotton surface. Bioscouring can offer milder treatment and opportunities to reduce caustic consumption. However, its performance depends on more than the enzyme alone. For textile mills and buyers, the right choice comes down to impurity removal, fabric quality, process reliability, and total production cost. What Is Cotton Bioscouring? Cotton bioscouring is an enzymatic pretreatment that improves wettability by breaking down and helping remove noncellulosic impurities. Pectinase is central to many commercial systems, supported by suitable wetting agents, detergents, and washing conditions. How Pectinase Works Pectin forms part of the matrix in cotton’s outer layers. Pectin-degrading enzymes break down this material, helping release associated impurities so they can be removed during washing. “Pectinase” describes a group of enzymes rather than a single interchangeable chemical. Commercial preparations may contain pectate lyase or other pectin-degrading enzymes, each with its own activity and operating requirements. Pectinase targets pectic substances rather than cellulose. This selectivity can help limit unnecessary fiber degradation, although the performance of a commercial formulation depends on its complete composition and treatment conditions. Why Supporting Auxiliaries Matter Pectin removal alone does not guarantee sufficient absorbency. Pectinase does not directly break down cotton waxes, so the process must also release, disperse, and wash away enough hydrophobic material. Wetting agents help the bath penetrate the substrate. Detergents and emulsifiers help remove loosened oils and waxes and limit their redeposition. A study of bioscouring and post-washing found that effective post-treatment was essential for achieving good wettability, even after substantial pectin removal. Select the enzyme, supporting auxiliaries, and washing sequence as one system. How Alkaline Scouring Works Conventional cotton scouring uses sodium hydroxide with heat and supporting auxiliaries. Caustic soda converts saponifiable fats into soaps and helps break down or solubilize certain noncellulosic components. Surfactants assist with wetting, emulsification, and removal of impurities that are not readily dissolved. Treatment is followed by washing and, where required, neutralization. Conditions vary with the substrate, equipment, contamination, and integration with bleaching. Alkaline scouring remains widely used because it provides established, broad cleaning action and fits existing preparation lines. Its tradeoffs can include substantial heating, rinsing, chemical consumption, and effluent neutralization requirements. Fabric weight loss is not automatically evidence of damage, since removing impurities reduces weight. Nevertheless, excessive processing can cause unnecessary losses, and strength should be assessed independently. Scouring also serves a different purpose from desizing and bleaching: Desizing removes sizing materials applied during weaving. Scouring removes natural impurities and processing contaminants to improve absorbency. Bleaching reduces natural coloration to achieve the required whiteness. These operations may be combined in a validated process, but one does not automatically replace the others. Bioscouring vs. Alkaline Scouring Both methods aim to produce cotton that wets uniformly and performs consistently in subsequent processing. The main differences are their cleaning mechanisms, operating conditions, and requirements for supporting chemicals. Factor Enzymatic bioscouring Conventional alkaline scouring Cleaning mechanism Selective enzyme action, commonly targeting pectin Caustic treatment with broader impurity removal Wax and oil removal Relies on release of impurities, suitable auxiliaries, and effective washing Uses saponification where applicable, emulsification, and washing Temperature and pH Product-specific conditions, often milder than conventional caustic treatment Typically stronger alkalinity and higher treatment temperatures Absorbency Can meet production requirements with an effective complete process Established route to good absorbency under controlled conditions Fabric properties Potential for good strength retention and lower weight loss Depends on treatment severity and process control Dyeing performance Must be verified against the mill’s shade and quality requirements Provides a familiar production baseline Water and energy Savings depend on washing, bleaching, and the complete preparation route Consumption depends on equipment and process integration Effluent May reduce caustic-related alkalinity; organic load still needs measurement Alkalinity and neutralization demand require management Process control Enzyme activity, compatibility, pH, temperature, and circulation Chemical concentration, temperature, time, and washing Economics Enzyme cost must be balanced against utilities, productivity, and quality Caustic cost must be assessed alongside utilities, rinsing, and treatment costs Research comparing pectinase scouring with alkaline scouring has demonstrated comparable performance under specific experimental conditions. Commercial performance still requires mill trials. Which Method Should Your Mill Choose? Start with the production objective. Reducing caustic use, improving fabric quality, and increasing throughput are different goals, and the same process change may not improve all three. When to Consider Bioscouring Bioscouring is worth testing when: Reducing caustic consumption is a priority. Strength retention or fabric handle is important. Equipment can maintain the enzyme’s recommended conditions. Effective impurity removal can be achieved without excessive additional washing. Cotton knits, woven fabrics, and yarns can be evaluated, but trials should use representative production material. Cotton source, construction, sizing, and contamination influence treatment performance. When to Retain Alkaline Scouring Alkaline scouring may remain the more practical option when it delivers reliable quality, contamination is difficult to remove, or an enzyme route would reduce productivity. Existing combined scouring and bleaching lines deserve particular attention. Adding separate treatments or washing stages may offset savings in chemicals or bath temperature. White

Explore More »
Two textile test baths with different foam levels.

Low-Foam Wetting Agents: A Textile Pretreatment Guide

Table of Contents How Low-Foam Wetting Agents Work Wetting, Cleaning, and Foam Control Why Foam Control Matters Choosing the Right Wetting Agent Match the Fabric and Equipment Check Bath Compatibility Match Product Parameters to the Process Testing and Dosage Run a Practical Trial Set the Working Dose Compare Cost at the Effective Dose Common Problems and Fixes FAQ Are all nonionic wetting agents low foaming? Can low-foam wetting agents tolerate alkali and peroxide? Why does a low-foam wetting agent still produce foam? Can a low-foam wetting agent replace a defoamer? Fast wetting helps desizing, scouring, and bleaching chemicals reach the fabric evenly. The challenge is to achieve that penetration without creating foam that interferes with the machine. A wetting agent may perform well in a laboratory beaker but behave differently when the bath is pumped and circulated through a production machine. A suitable low-foam wetting agent must work with the fabric, equipment, and complete pretreatment recipe. The main questions are straightforward: Does the fabric wet quickly? Does foam remain manageable? Does the treated fabric show the required cleanliness and absorbency? How Low-Foam Wetting Agents Work Wetting agents reduce surface tension, helping the treatment bath spread over the fabric and enter the spaces within yarns and fiber bundles. This is particularly useful when natural cotton waxes, processing oils, or a dense fabric construction slow penetration. Understanding how textile wetting agents work also helps explain an important distinction: fast wetting does not necessarily mean effective cleaning. Fabric may wet quickly in a bath containing surfactants but remain poorly absorbent after washing because waxes or oils are still present. Wetting, Cleaning, and Foam Control These functions are related, but they serve different purposes. Auxiliary Main job What to check Wetting agent Helps the bath spread and penetrate Wetting speed and uniformity Scouring agent or detergent Helps remove waxes, oils, and other impurities Cleaning and prevention of redeposition Defoamer Breaks foam and may limit further buildup Foam control, compatibility, and fabric deposits Some products combine wetting with cleaning and emulsification. Emulsification helps break oily material into small droplets that can be carried in the bath and removed during washing. Check whether the chosen product provides enough cleaning support or whether a separate detergent is needed. Low-foam formulations limit the amount of foam produced or how long it lasts. They do not guarantee a foam-free bath at every dose, temperature, or circulation rate. Why Foam Control Matters Jet and soft-flow machines repeatedly circulate the bath through the textile. Agitation and air entering the liquid can create bubbles, which surfactants may stabilize. Persistent foam can disrupt bath handling, contribute to overflow, and make steady operation harder to maintain. On continuous pretreatment lines, foam in padding baths or washing sections can also interfere with consistent application and rinsing. Foam behavior may change during the process. A bath that produces little foam at the scouring temperature may foam during cooling or dilution. Other ingredients matter, too. Detergents, sizing residues, oils, and chemicals left from earlier stages can change the result. For this reason, a clean-water test at room temperature is only an initial check. The full recipe must be evaluated under conditions that reflect production. Choosing the Right Wetting Agent Match the Fabric and Equipment Start with the material being processed and the machine being used. Cotton: Consider natural waxes, added oils, sizing materials, and the planned scouring conditions. Polyester and blends: Check the processing oils and spin finishes that need to be removed. Dense fabrics and yarn packages: Assess penetration into the structure, not just surface wetting. Continuous lines: Make sure wetting occurs within the available contact time. Jet and soft-flow machines: Check foam under the intended circulation conditions and liquor ratio. A wetting agent cannot correct poor liquid flow through a yarn package or uneven application across the fabric. Check the machine’s ability to deliver the bath as well as the chemical’s ability to improve wetting. Check Bath Compatibility Confirm performance at the intended temperature, alkali concentration, and water hardness. The checks should match the process: For enzyme desizing, confirm compatibility with the enzyme and its operating conditions. For alkaline scouring, check wetting and stability at the actual alkali level. For peroxide bleaching, test the complete recipe, including the peroxide stabilizer and sequestering agent. Look for separation, precipitation, deposits, and slower wetting. A change in appearance does not always mean the product has failed, so compare it with measured performance. Where the wetting agent does not provide enough cleaning, use compatible textile scouring agents to help remove waxes and oils. Check the combined recipe for both cleaning and foam. Match Product Parameters to the Process For trials that require penetration and emulsification with low foam, evaluate Sylic P1412 nonionic low-foaming wetting agent. The relevant specifications are: Main component: Polyoxyethylene compounds. Ionic character: Nonionic. pH: 6–8 in a 1% aqueous solution. General application dose: 0.5–3.0 g/L for textile dyeing and finishing processes. The product’s penetration and emulsification properties are relevant when the bath needs to enter the textile and help disperse oily impurities. However, nonionic character alone does not prove low-foam performance. The stated pH describes the diluted product; it does not define the bath’s operating range or prove resistance to strong alkali. Before using P1412 in pretreatment, confirm its suitability for the intended alkali level, peroxide recipe, and equipment. Request wetting and foam test results with the conditions clearly stated, then establish the working dose through trials. The general dose range should not be treated as a universal pretreatment recipe. Testing and Dosage Run a Practical Trial Use representative untreated fabric or yarn, mill water, and the intended recipe. Compare each candidate with the current production product. Decide what counts as an acceptable result before testing. Then check four areas: Wetting speed: Use a suitable wetting or sinking test with consistent sample preparation. Repeat measurements. Trapped air and fabric construction can affect sinking time, so interpret it alongside other observations. Foam height and collapse: Measure foam after a set period of agitation, then record how

Explore More »

Contact Us for Textile Auxiliaries and Dyes

Contact Skychem Group for more chemical solutions, If you have questions or need more information, please contact us.
We will respond within 24 hours

Get a project quote

Please tell us the requirements, the country and the application.

Scroll to Top
Email WhatsApp

Contact Us for Textile Auxiliaries and Dyes

Contact Skychem Group for more chemical solutions, If you have questions or need more information, please contact us.
We will respond within 24 hours