...

Contact Skychem Group for more chemical solutions, If you have questions or need more information, please contact us.
Respond within 24 hours

Color Difference Formula and ΔE: CIE Standards and Color Tolerance

Color plays an important role in how we perceive products, brands, and even everyday items. But when colors shift slightly from what we expect, the difference can be striking. That is why industries use the color difference formula to measure, compare, and control color accuracy. Whether you are in printing, textiles, coatings, or plastics, understanding how these formulas work is key to maintaining consistent quality.

Color Difference

The Science of Color Perception and Measurement

What Is ΔE (Delta E)?

The simplest way to think about color difference is with ΔE, or Delta E. This is the universal metric that expresses how far apart two colors are on a numerical scale. A ΔE of 1.0 means the difference is so small that most people cannot notice it. A ΔE of 2 or 3 is usually visible, while anything above 5 means the colors are clearly different. In other words, ΔE gives us a common language for judging whether two colors match.

Why Human Perception Alone Is Not Enough

Human perception alone is not reliable enough to make these judgments. Our eyes are easily influenced by lighting, texture, fatigue, and even the surrounding environment. That is why industries need objective measurement systems. The color difference formula helps quantify how different two colors are, removing uncertainty and ensuring consistency across production lines.

Color Spaces as the Foundation for ΔE

To make ΔE possible, scientists use a standardized framework called a color space, which describes colors with numbers instead of subjective impressions. While RGB and CMYK are common in screens and print, professional color management relies on device-independent systems created by the International Commission on Illumination (CIE).

  • CIELAB (L∗a∗b∗): This is the global standard for defining and communicating color. It organizes colors in a three-dimensional space that mirrors human vision.
    • L∗ (Lightness): From 0 (absolute black) to 100 (absolute white).
    • a∗ (Red-Green Axis): Negative values are green, positive values are red.
    • b∗ (Yellow-Blue Axis): Negative values are blue, positive values are yellow.
  • CIELCH (L∗C∗h°): An alternative way to visualize CIELAB, often considered more intuitive.
    • L∗ (Lightness): Same as in CIELAB.
    • C∗ (Chroma): The intensity or saturation of the color.
    • h° (Hue Angle): The actual color (like red, yellow, or green) on a 360-degree wheel.

By plotting two colors in one of these systems and calculating their distance apart, we arrive at ΔE. This single number is the basis of modern color quality control, bridging the gap between how humans see and how machines measure.

Color Card

Major Color Difference Formulas Explained

Over the years, the scientific community has refined the way color difference is calculated, leading to an evolution of formulas, each one improving upon the last.

  • CIE76 (ΔEab∗): The original formula is a straightforward calculation of the geometric distance between two colors in the CIELAB space. While simple, its weakness is a lack of perceptual uniformity. A ΔE of 1.0 might be obvious in one color region but completely invisible in another.
  • CMC l:c: Developed for the textile industry, this formula was a major leap forward. It adjusts the calculation based on lightness (l) and chroma (c), providing results that better correspond to how the human eye judges color differences on textured surfaces.
  • CIE94 (ΔE94∗): This formula was created as a more universal industrial standard, particularly for paints and coatings. It offers better agreement with visual assessment than CIE76, especially for subtle color variations.
  • CIEDE2000 (ΔE00∗): As the most modern and accurate standard, CIEDE2000 is recommended for nearly all applications today. Its complex equation includes weighting functions that correct for perceptual inconsistencies in the CIELAB space, especially with neutral colors, blues, and differences in hue.

Each formula has its strengths. For quick checks, CIE76 works fine. For stricter quality control, most companies now rely on CIEDE2000.

Formula Perceptual Accuracy Calculation Complexity Primary Use Case
CIE76 Low Low Comparing legacy data, not for new QC
CMC l:c Good Medium Widely used in textiles
CIE94 Good Medium Graphics, paints, and coatings
CIEDE2000 Highest High The current standard for all industries

How to Calculate and Interpret ΔE

To perform a ΔE (Delta E) calculation, you first need to measure the L*a*b values of your “standard” (the ideal target color) and your “sample” (the color being tested).

The most basic formula, ΔEab∗ (CIE76), is calculated as follows:

AE Color Formula

Here, ΔL∗ is the difference between the sample’s and standard’s L∗ values, and the same applies to Δa∗ and Δb∗.

Making Sense of the Result: The ΔE value gives you a simple pass/fail metric. General interpretations are:

  • ΔE≤1.0: Not perceptible by most people.
  • 1.0<ΔE<2.0: A minor difference, visible only to a trained eye.
  • 2.0<ΔE<3.5: A noticeable difference, often the limit for commercial acceptability.
  • 3.5<ΔE<5.0: A very clear and distinct color difference.
  • ΔE>5.0: The colors are considered fundamentally different.

Companies establish specific tolerances (the maximum allowable ΔE) based on their quality standards. A luxury car brand will have much stricter tolerances for its exterior paint than a manufacturer of garden hoses.

Tolerance Cubes

Industry Applications of Color Difference

The use of color difference metrics is widespread and critical.

  • Printing and Packaging: Ensures brand logos and packaging look the same no matter where they are printed.
  • Textiles and Apparel: Guarantees that different rolls of fabric dyed at different times will match on a finished garment.
  • Automotive and Coatings: Allows for perfect matching of parts manufactured separately, like a plastic bumper and a metal fender.
  • Digital Imaging and Displays: Critical for calibrating professional monitors and printers to ensure that on-screen designs translate accurately to physical products.
  • Plastics and Manufacturing: Maintains color consistency in everything from kitchen appliances to electronic device casings.

In these industries, high-quality dyes and pigments are essential for stable, accurate colors. Partnering with a reliable color solutions provider ensures consistency across production. As an experienced dye and pigment manufacturer, SkyChem Group can support your projects with dependable materials. Contact them today to request a quote..

Tools of the Trade: Measuring Color Accurately

Obtaining reliable color data requires professional instruments.

  • Spectrophotometers vs. Colorimeters: A colorimeter is a simpler device that measures color through red, green, and blue filters, similar to the human eye. A spectrophotometer is a more sophisticated scientific instrument that measures the light reflected at many points across the visible spectrum, providing much richer and more accurate data. Spectrophotometers are the preferred tool for high-accuracy applications like color formulation.
  • Software for Color Management: Modern software interfaces with these devices to log measurements, automatically calculate ΔE, track color quality over time, and provide reports.
  • Factors Influencing Measurement: Achieving accurate readings depends on more than just the tool. The lighting environment, the angle of measurement, sample gloss, and surface texture can all impact the data. Standardized conditions are crucial for repeatability.

Choosing the Right Formula

Not every formula suits every application. If you are working in textiles, CMC l:c may be the better choice. For automotive coatings, CIEDE2000 offers unmatched accuracy. Simpler industries may still find CIE76 sufficient for their needs.

Beyond formula selection, it is important to follow international standards such as ISO, ASTM, and CIE guidelines to ensure consistency and compliance.

Related article: What are L*,a*,b*,C*,h°,DL*,Da*,Db*,DC*,DH*,DE*,DEcmc?

FAQs

What is the most widely used ΔE formula today?

For new projects and quality control programs, CIEDE2000 (ΔE00∗​) is the recommended and increasingly dominant formula because it provides the best correlation with human visual perception.

What ΔE value is considered a “just noticeable” difference?

A ΔE of approximately 1.0 is widely cited as the “just noticeable difference” (JND). However, this is an average, as human sensitivity to color changes varies depending on the hue and saturation.

How do different industries set their ΔE tolerances?

Tolerances are determined by a product’s function, price point, and branding. High-visibility, premium products demand very low ΔE values (under 1.0), while less critical applications might allow for a ΔE of 3.0 or higher. These values are often set after extensive visual studies.

Can I measure color difference without expensive equipment?

While smartphone apps exist that claim to measure color, they are not suitable for professional use. Their results are highly influenced by ambient lighting and camera hardware. For any application where color accuracy is important, dedicated instruments like a spectrophotometer or colorimeter are necessary.

Conclusion

In our visual world, color is a powerful tool for communication and branding. To manage it effectively on a global scale, we must speak a common language. Color difference formulas provide that language. By translating the subjective experience of color into objective data, ΔE allows designers, manufacturers, and clients to communicate with absolute clarity. This precision minimizes errors, reduces waste, and ultimately ensures that a product’s color perfectly reflects its intended design.


More reading:

  1. Delta E 2000: Common Error Sources in Textile Color Measurement
  2. Unpacking the Differences Between Disperse and Reactive Dyes
  3. 9 Different Types of Dyes Used in the Textile Industry
  4. Functions and Types of Textile Auxiliary Chemicals Explained

Sandy

With years of experience in chemical dyes and textile auxiliaries, I’m dedicated to sharing insights into the latest technologies, sustainable innovations, and market trends.

Recent Articles

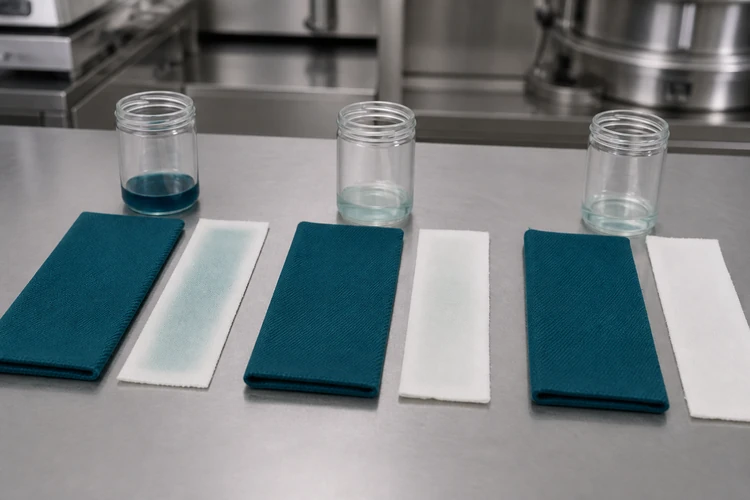
2. Low-temperature soaping leaves clearer wash liquor and less staining on adjacent white cotton strips.

Reactive Dye Soaping Guide: Better Wash Fastness, Less Back-Staining

Table of Contents What Is Reactive Dye Soaping Role in the Wash-Off Stage Why Unfixed and Hydrolyzed Dye Must Be Removed How Soaping Affects Wash Fastness Removing Hydrolyzed Dye from the Fiber Surface Connection Between Soaping and Fastness Ratings What Causes Back-Staining? Common Sources of Back-Staining Fabrics and Blends Most at Risk Key Process Parameters for Effective Soaping Temperature and Time Liquor Ratio Water Hardness and Sequestering Agents Choosing the Right Soaping Agents Anionic and Nonionic Soaping Agents Matching Agents to Fiber and Shade Depth Low-Temperature Soaping Agent Option: Sylic D2705 Key Benefits Recommended Application Performance Comparison Soaping Process Methods Cold Wash and Hot Wash Sequence One-Bath vs Multi-Step Soaping Role of Fixing Agents After Soaping Best Practices for Consistent Wash Fastness Results FAQs How long should reactive dye soaping take? Can back-staining be fixed after it happens? Does hard water affect soaping performance? Is a separate fixing agent always necessary after soaping? Reactive dye soaping is often treated as a quick step at the end of the dyeing cycle, but it has a direct effect on wash fastness and back-staining outcomes. Getting temperature, time, and agent selection right prevents costly rejects and repeat orders that eat into margins. What Is Reactive Dye Soaping Role in the Wash-Off Stage Soaping takes place after fixation, once the reactive dye has bonded to the fiber under alkaline conditions. Fabric is washed at or near boiling temperature with a detergent or specialty soaping agent to strip away everything that never formed a permanent bond with the fiber. Skipping or shortening this step leaves wash-off incomplete, and the fabric carries a hidden fastness risk that will not surface until later testing or, worse, after it reaches the customer. Why Unfixed and Hydrolyzed Dye Must Be Removed A portion of reactive dye always hydrolyzes in the dyebath instead of reacting with the fiber. Hydrolyzed dye sits loosely on the fabric surface, held only by weak physical attraction rather than a covalent bond. Left in place, it rubs off during handling, bleeds during laundering, and transfers onto lighter fabrics in the same wash load. Soaping is the step designed specifically to remove this residue before it becomes a fastness problem. How Soaping Affects Wash Fastness The quality of soaping determines much of what shows up later in fastness testing. A batch that looks correct on the shade card can still fail to wash or rub fastness if this step was rushed. Removing Hydrolyzed Dye from the Fiber Surface Effective soaping keeps loosened dye suspended in the wash liquor instead of letting it settle back onto the fabric. How completely this happens depends on agitation, liquor ratio, and the dispersing strength of the detergent or soaping agent used. Connection Between Soaping and Fastness Ratings Wash and rub fastness ratings, most commonly evaluated using AATCC colorfastness test methods, largely reflect how much unfixed dye remains after wash-off. A fabric can pass an initial shade check on the lab dip and still fail fastness testing on the bulk batch if soaping ran too briefly or at too low a temperature. What Causes Back-Staining? Common Sources of Back-Staining Back-staining happens when dye that has washed off the dyed fabric redeposits onto undyed or lighter areas in the same bath. The most common causes include: Overloaded soaping baths carrying more hydrolyzed dye than the liquor can hold Insufficient rinsing between soaping and finishing steps Soaping agents with weak dispersing power, which allow free dye particles to settle back onto the fabric Uneven liquor circulation, which creates localized zones of high dye concentration Fabrics and Blends Most at Risk Deep and dark shades generate the highest load of hydrolyzed dye and are the most frequent source of back-staining complaints. Blended fabrics, and any load that mixes dyed and undyed components, are particularly vulnerable, since redeposited dye is far more visible on the lighter portion of the fabric. Key Process Parameters for Effective Soaping Most causes of poor fastness and back-staining trace back to how tightly these three parameters are controlled. Temperature and Time Soaping typically runs at or close to boiling point for five to fifteen minutes, though the ideal combination depends on shade depth and fabric construction. Running the bath too cool slows dye removal, and cutting the time short leaves hydrolyzed dye behind even at the correct temperature. Shade depth Soaping temperature Typical time Light to medium 90 to 95°C 5 to 8 minutes Deep and dark Near boiling (98 to 100°C) 10 to 15 minutes Turquoise and problem shades Near boiling, multi-bath 15 minutes or more per bath This near-boiling range applies to conventional soaping agents. Low-temperature soaping agents are formulated to work effectively at 60 to 80°C instead, cutting energy use without giving up fastness performance (see the Sylic D2705 section below).  Liquor Ratio A tighter liquor ratio concentrates hydrolyzed dye in a smaller volume of water, which increases the risk of redeposition before it can be flushed out. Mills running jet or overflow machines at lower liquor ratios should compensate with stronger dispersing agents or an added rinse cycle. Water Hardness and Sequestering Agents Calcium, magnesium, and iron in the water supply interfere with soaping agent performance and can leave a hazy or uneven finish. A sequestering agent, such as Sylic P1501B, an anionic chelating dispersant with a pH of 2.5 to 4.0 in a 1% solution, binds these ions before soaping begins and lets the soaping agent perform as intended. Choosing the Right Soaping Agents Anionic and Nonionic Soaping Agents Anionic soaping agents are widely used for their strong dispersing action, while nonionic types perform better in hard water and at lower temperatures. Both types are available within a dyeing auxiliary range formulated for stability in alkaline baths and low-foam performance in jet machines. Matching Agents to Fiber and Shade Depth Cotton and other cellulosic fibers generally respond well to anionic soaping agents. Blends containing synthetic fibers may need a nonionic option instead, to avoid staining the more sensitive synthetic component. Deeper shades typically call

Explore More »

Reduction Clearing in Polyester Dyeing: A Complete Guide

Table of Contents What Is Reduction Clearing? Definition and Purpose Role in Disperse Dyeing Impact on Colorfastness Common Quality Complaints When Reduction Clearing Is Needed Dark and Medium Shades High Dye Concentration Recipes Blends with Cellulosic Fibers When It Can Be Skipped Process and Control Typical Recipe and Parameters Controlling Temperature and pH Avoiding Over-Reduction or Under-Reduction Rinsing and Neutralization Choosing the Right Reducing Agents Sodium Hydrosulfite Sulfur-Free Reducing Agents Low-Temperature and Sustainable Options High Wash Fastness Dyes to Reduce Clearing Load Troubleshooting Common Issues Poor Wash Fastness After Clearing Shade Change or Dulling Conclusion FAQs What Happens If You Skip It? Reduction Clearing vs Normal Washing? Can It Be Done at Low Temperature? Hydrosulfite vs Sulfur-Free Agents? A batch that looks perfect on the machine can still fail a wash fastness test days later. More often than not, the cause is unfixed disperse dye left on the fiber surface, and the fix is reduction clearing. This guide covers when the step is necessary, the chemistry behind it, and how to keep results consistent from lab dip to bulk production. What Is Reduction Clearing? Definition and Purpose Reduction clearing is a post-dyeing treatment that removes disperse dye which has not penetrated or fixed onto polyester fibers. During high temperature dyeing, some dye molecules remain on the fiber surface instead of diffusing into the polymer structure. Left untreated, this residual dye rubs off and bleeds during washing, lowering overall color fastness. A reduction clearing bath breaks down and strips away the surface dye, leaving only the dye that has properly fixed inside the fiber. Role in Disperse Dyeing Reduction clearing takes place at the end of the disperse dyeing cycle, after the main dyeing stage and before final rinsing. It is one part of a larger polyester dyeing workflow that also includes pretreatment, dyeing, and finishing. The polyester dyeing application solutions page outlines how these stages connect, along with recommended auxiliaries for each step. Impact on Colorfastness Wash and rub fastness are among the specifications buyers check most closely before accepting a shipment. Surface dye that has not been cleared is loosely bound and washes out easily, which is precisely what standardized tests such as AATCC’s laundering fastness methods are designed to detect. A properly executed reduction clearing step improves these results by removing the dye that would otherwise cause a failed test. Common Quality Complaints Mills that skip or under-perform reduction clearing tend to see a recurring pattern of issues: Color bleeding onto lighter garments in the same wash load Staining on packaging or trims during transport and storage Dull or hazy shades compared to the approved lab dip Rejected shipments after failed fastness testing at the buyer’s lab These problems are almost always traceable to residual disperse dye rather than a flaw in the dye recipe itself, which is why reduction clearing deserves the same attention as the dyeing stage it follows. When Reduction Clearing Is Needed Dark and Medium Shades Darker and medium depth shades require higher dye concentrations, which naturally leaves more unfixed dye on the fiber surface. The Skycron disperse dyes range covers both dyeing and printing applications across dark, medium, and vivid shades, and pairing these dyes with a proper reduction clearing step is standard practice for reaching acceptable fastness at these heavier depths. High Dye Concentration Recipes Any recipe with a high total dye percentage on weight of fabric (% o.w.f.) benefits from reduction clearing, not only dark shades. As a general reference, mills commonly group shade depth this way: Shade Depth Typical Dye Concentration Reduction Clearing Light Below 1% o.w.f. Often optional Medium 1 to 3% o.w.f. Recommended Dark Above 3% o.w.f. Required These figures are a general guide rather than a fixed rule, since dye class, fiber blend, and fastness targets all shift the threshold. Multi-dye combinations used for precise custom shades fall into this same logic, as several dye classes combined can leave behind varying amounts of surface residue even at a moderate total percentage. Blends with Cellulosic Fibers Polyester-cotton and polyester-viscose blends add another layer of risk. Disperse dye that has not fixed to the polyester portion can stain the cellulosic fiber, causing an unwanted tone shift across the fabric. Reduction clearing protects the intended contrast or solid shade across both fiber types. When It Can Be Skipped Very light shades with low dye loading sometimes do not require a full reduction clearing cycle, particularly when high-exhaustion dyes and well-controlled dyeing conditions are used, and a simple hot wash can be enough. Skipping the step should still be a deliberate decision based on shade depth and fastness requirements, not a shortcut taken to save time. Process and Control Typical Recipe and Parameters A standard alkaline reduction clearing bath includes a reducing agent, caustic soda or soda ash, and a wetting or dispersing agent. Sulfur-free acid-clearing systems, which run at a lower pH, are increasingly used as an alternative. A general starting point looks like this: Parameter Typical Range Reducing agent 2 to 4 g/L Alkali (NaOH or soda ash) 2 to 4 g/L Temperature 70 to 80°C Time 15 to 20 minutes Liquor ratio 1:8 to 1:15 These figures vary by shade depth, dye class, and fiber blend, so lab trials should confirm the final recipe before scaling to bulk. Controlling Temperature and pH Temperature and pH are the two variables that most affect clearing efficiency: Too cool or too brief: residual dye is left behind, and fastness suffers. Too hot or too alkaline: the polyester surface or hand feel can be affected. Most conventional recipes target a mildly alkaline pH between 9 and 11. Acid-based sulfur-free systems instead work in a neutral to mildly acidic range, depending on the product used, so the pH target should always match the chemistry selected rather than a single fixed rule. Avoiding Over-Reduction or Under-Reduction Under-reduction leaves surface dye behind, which shows up later as poor fastness. Over-reduction strips properly fixed dye from the fiber, causing shade loss, dulling, or an uneven

Explore More »
C0 vs. C6 Water Repellent Finishes

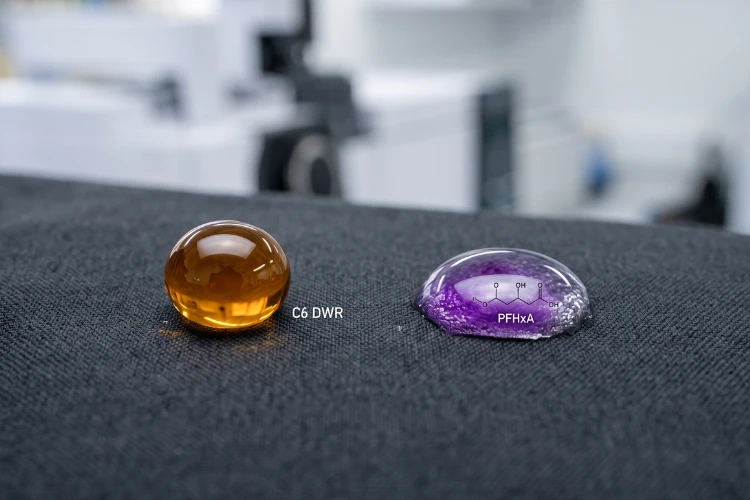
C0 vs. C6 Water Repellent Finishes: Which One Fits Your Textiles?

Table of Contents The Chemistry Behind C0 and C6 What is C6 DWR What is C0 DWR Key Structural Differences Performance Comparison Water and Oil Repellency Durability and Wash Resistance Breathability and Hand Feel Global Regulatory Landscape REACH and EU Restrictions US State Regulations Brand and Retailer Requirements Use Cases by Industry Outdoor and Sportswear Workwear and Protective Textiles Home Textiles and Upholstery Choosing the Right Finish Key Factors to Consider Testing and Certification Tips Conclusion FAQs What is the difference between C0 and C6 finishes? Is C6 DWR banned? Does C0 perform as well as C6? How do I choose between C0 and C6? Ask a fabric supplier for a water-repellent finish today, and there is a good chance you will get two very different answers: C6, or C0. Both claim to keep fabric dry. Only one is currently facing phase-out pressure from regulators in the EU, California, and New York, and from major apparel brands. For buyers sourcing water-repellent textiles right now, the choice is no longer just about performance. It is about which chemistry will still be sellable in your target market two years from now. The Chemistry Behind C0 and C6 What is C6 DWR C6 durable water repellent (DWR) finishes use short-chain fluorocarbon polymers, specifically six-carbon fluorinated side chains, to coat individual fibers. This chemistry lowers the surface energy of the fiber to roughly 12 mJ/m², which is below the surface tension of most water and oils. As a result, C6 finishes deliver both water and oil repellency, a combination that few fluorine-free systems can fully match. C6 chemistry replaced older C8 fluorotelomer finishes over a decade ago. C8 degrades into PFOA, a substance known for being persistent and bioaccumulative in the environment. C6 degrades into perfluorohexanoic acid (PFHxA) instead, which has a shorter environmental half-life and lower bioaccumulation potential. However, PFHxA is not free of regulatory scrutiny, as covered in the compliance section below. For buyers sourcing C6 products, formulations such as the Skyguard C6-C8 Waterproofer combine water and oil resistance with good wash fastness on both cellulose and synthetic fibers, applied at typical dosages of 10 to 40 g/L, and are produced without PFOS, PFOA, or APEO. What is C0 DWR C0 refers to fluorine-free water repellent chemistry. Instead of fluorocarbon side chains, C0 finishes rely on dendrimer, wax, or polyurethane-based polymers to build a hydrophobic fiber surface. These systems typically reach a surface energy of 20 to 25 mJ/m², which is sufficient to repel water effectively but generally not enough to provide strong oil repellency. Demand for C0 finishes is growing quickly because they carry no PFAS-related compliance risk, a factor that matters more each year as regulatory scope widens. Ranges such as the Skyguard Fluorine-free Waterproofer line are applied at roughly 10 to 80 g/L depending on the durability required, contain no APEO, and are built for fabrics where oil repellency is not a functional requirement, including most outerwear, home textiles, and fashion applications. Key Structural Differences Attribute C6 (Fluorocarbon) C0 (Fluorine-Free) Surface energy Approx. 12 mJ/m² Approx. 20 to 25 mJ/m² Water repellency Excellent Good to excellent Oil repellency Yes Limited or none PFAS content Present (PFHxA-based) None Typical curing temperature 150 to 160°C 160 to 180°C Performance Comparison Water and Oil Repellency C6 finishes remain the benchmark wherever oil, grease, or organic stain resistance is needed alongside water repellency, such as workwear exposed to machine oils or food-contact aprons. C0 finishes have closed most of the gap on pure water repellency, with many recent formulations achieving results comparable to C6 under standardized water resistance testing. On oil-based stains, however, C0 finishes still fall short. Durability and Wash Resistance Both chemistries rely on physical adsorption when first applied to the fabric, and this bond weakens progressively with repeated laundering and detergent exposure. A crosslinking agent extends wash durability by binding DWR polymer chains to each other and to reactive groups on the fiber surface, converting a loosely adsorbed coating into a chemically anchored one. The Sylic Cross-linking Agent, for example, is dosed in the same bath at 10 to 30 percent of the water repellent quantity, contains no APEO, PFOA, PFOS, or formaldehyde, and is compatible with both C6 and fluorine-free systems, making it a practical add-on when a finish needs to withstand 20 or more industrial or home wash cycles. Breathability and Hand Feel Both C0 and C6 finishes coat the fiber surface rather than filling the pore spaces between yarns, so breathability is generally preserved at correct application levels. Two factors most often compromise this balance: Overdosing the finish, which can partially block inter-yarn porosity and stiffen the fabric hand Uneven bath concentration, which creates localized high-add zones across the fabric width C0 finishes sometimes require slightly higher application levels to match C6 water repellency, which makes dosing accuracy and bath uniformity especially important for maintaining a soft, breathable result. Global Regulatory Landscape REACH and EU Restrictions The EU regulates PFAS in textiles under REACH Annex XVII. A restriction on PFHxA, the degradation product of C6 chemistry, takes effect in the EU and EEA from 2026, and a broader restriction covering the wider PFAS family is currently under evaluation by the European Chemicals Agency. Buyers and brands sourcing for the EU market should treat C6 as a chemistry under increasing regulatory pressure rather than a long-term safe option, and should monitor ECHA’s PFAS regulatory updates for the latest scope and timelines. US State Regulations Regulation is not limited to the EU. Two US states have already enacted PFAS restrictions specific to textiles and apparel: California AB 1817 bans the manufacture, distribution, and sale of new textile articles containing intentionally added PFAS above 100 ppm total organic fluorine as of January 1, 2025, dropping to 50 ppm from January 1, 2027. Outdoor apparel for severe wet conditions has an extension until January 1, 2028. The full requirements are set out in the official bill text. New York Environmental Conservation Law § 37-0121 prohibits the sale of new apparel

Explore More »
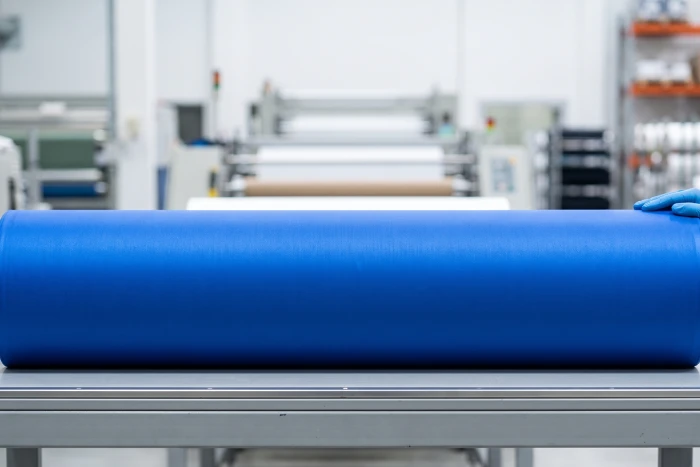
Finished royal blue nylon fabric roll.

Nylon Dyeing Defects: Causes and Process Fixes

Table of Contents Common Nylon Dyeing Defects Uneven Shade and Skitteriness Listing and Barre Ring, Tippy, and Frosty Effects The Three Levers Behind Every Defect pH Profile Heating Rate and Strike Zone Retarder Selection and Dosage Troubleshooting by Symptom Skychem Solutions for Nylon Dyeing FAQs What pH is best for nylon acid dyeing? Why does my nylon dye unevenly? How do retarders prevent uneven dyeing? What temperature should I dye nylon at? Nylon strikes fast. Acid dye bonds to its amino groups within minutes, so a slightly off process can lock in an uneven shade before it has any chance to level. Streaks, listing, barre, and a speckled, skittery surface on nylon almost always trace back to one of three controllable levers: pH, temperature, or the retarder system. This article covers how to recognize each defect and what to adjust in the process to prevent it from recurring. Common Nylon Dyeing Defects Naming a defect correctly is the first step toward fixing it. The three patterns below cover most of what shows up on nylon, and each one points to a different root cause. Uneven Shade and Skitteriness Uneven dyeing is the broad category: patches, blotches, or a shade that simply isn’t consistent across the fabric. Skitteriness is a more specific form of it, a speckled, grainy appearance where neighboring filaments take up dye at different rates. It is the clearest sign that the dye struck faster than the fiber could level out. Listing and Barre Listing is a side-to-center or selvage-to-middle shade difference across the width of the fabric. Barre appears as horizontal bars or streaks running with the courses or picks. What separates these two from skitteriness is the pattern: listing and barre follow a defined width-wise or length-wise direction, while skitteriness scatters at random. Ring, Tippy, and Frosty Effects Ring dyeing and tippy dyeing are related but distinct penetration faults, and it is worth telling them apart. Ring dyeing happens across the fiber’s cross-section: dye stays concentrated in the outer sheath and never fully diffuses to the core, so a cut filament shows a colored ring around a pale or white center even though the surface looks fully dyed. Tippy dyeing is a length-wise difference instead, where the tip of a filament or staple fiber picks up more, or less, dye than the body of the fiber, usually because the tip has a different heat history or surface condition than the rest of the fiber. Frosty effects show up as an overall pale, washed-out surface rather than a directional pattern. All three point back to the same underlying issue, dye that has not fully penetrated the fiber, even when the shade looks close to standard from a distance. The Three Levers Behind Every Defect Most nylon shade defects come down to pH, temperature, or the retarder system working against each other instead of together. Each lever below covers the mechanism, the typical failure mode, and the fix. pH Profile In an acidic bath, the amino groups at the ends of nylon’s polymer chains gain a proton and become positively charged, while the sulfonate groups on acid dye molecules carry a negative charge. The two attract and bond. pH determines how many of these sites are active, how fast the dye reaches them, and how firmly it holds once it does. The most common process error is lowering the bath pH too far or too soon. If the bath turns acidic before the goods are evenly wetted and circulating, the dye strikes in a rush and creates streaks or barre that no amount of time at temperature can correct. A pH that runs too high or drifts during the cycle has the opposite problem: weak exhaustion and shade depth that wanders from batch to batch. Different acid dye classes call for different pH windows: Leveling dyes: roughly pH 5.5 to 7.0, giving the dye room to migrate and self-correct Milling dyes  (a classification carried over from wool dyeing terminology, but standard practice for nylon as well): roughly pH 4.0 to 5.0, for deeper shades and stronger wet fastness, with less tolerance for process variation  These ranges are starting points. Confirm them against the dye supplier’s technical data sheet and in-house lab dips, and never carry a recipe over from wool, where the pH scheme for leveling and milling dyes runs in the opposite direction. The same caution applies within nylon itself: nylon 6 and nylon 6,6 can strike and build differently under identical pH and temperature conditions, and switching between substrates or dye suppliers on an unverified recipe is a common, avoidable source of shade drift. Confirm any change of fiber type or dye source with a fresh lab dip and pilot run before it reaches bulk. The fix is a repeatable pH curve rather than a single target value. A slow-acting acid donor that lowers pH gradually as temperature rises keeps the strike controlled instead of sudden, removing the guesswork of manual dosing at the wrong point in the cycle. Heating Rate and Strike Zone Temperature governs when the dye moves and how quickly. On nylon, most uptake happens in a narrow window, typically 70 to 90°C, where the fiber structure opens and dye rushes in. Nylon has a limited number of dye sites, and acid dye bonds to them almost as soon as conditions allow; ramping through the strike zone too fast fixes the dye unevenly, with no chance to level out afterward. The first ten to fifteen minutes of strike largely determine the outcome of the entire batch. The diagram above shows how this plays out across a typical cycle: a flat wetting and circulation stage, a controlled ramp that slows through the 70 to 90°C strike zone, a hold near boiling for migration and leveling, and a controlled cool down. The fix starts before the strike: confirm full, even wetting and steady circulation first. Ramp at a controlled rate, often close to 1°C per minute and slower still through the 70 to 90°C

Explore More »

Contact Us for Textile Auxiliaries and Dyes

Contact Skychem Group for more chemical solutions, If you have questions or need more information, please contact us.
We will respond within 24 hours

Get a project quote

Tell us your project requirements, country, and intended application.

Sandy

With years of experience in chemical dyes and textile auxiliaries, I’m dedicated to sharing insights into the latest technologies, sustainable innovations, and market trends.

Recent Articles

2. Low-temperature soaping leaves clearer wash liquor and less staining on adjacent white cotton strips.

Reactive Dye Soaping Guide: Better Wash Fastness, Less Back-Staining

Table of Contents What Is Reactive Dye Soaping Role in the Wash-Off Stage Why Unfixed and Hydrolyzed Dye Must Be Removed How Soaping Affects Wash Fastness Removing Hydrolyzed Dye from the Fiber Surface Connection Between Soaping and Fastness Ratings What Causes Back-Staining? Common Sources of Back-Staining Fabrics and Blends Most at Risk Key Process Parameters for Effective Soaping Temperature and Time Liquor Ratio Water Hardness and Sequestering Agents Choosing the Right Soaping Agents Anionic and Nonionic Soaping Agents Matching Agents to Fiber and Shade Depth Low-Temperature Soaping Agent Option: Sylic D2705 Key Benefits Recommended Application Performance Comparison Soaping Process Methods Cold Wash and Hot Wash Sequence One-Bath vs Multi-Step Soaping Role of Fixing Agents After Soaping Best Practices for Consistent Wash Fastness Results FAQs How long should reactive dye soaping take? Can back-staining be fixed after it happens? Does hard water affect soaping performance? Is a separate fixing agent always necessary after soaping? Reactive dye soaping is often treated as a quick step at the end of the dyeing cycle, but it has a direct effect on wash fastness and back-staining outcomes. Getting temperature, time, and agent selection right prevents costly rejects and repeat orders that eat into margins. What Is Reactive Dye Soaping Role in the Wash-Off Stage Soaping takes place after fixation, once the reactive dye has bonded to the fiber under alkaline conditions. Fabric is washed at or near boiling temperature with a detergent or specialty soaping agent to strip away everything that never formed a permanent bond with the fiber. Skipping or shortening this step leaves wash-off incomplete, and the fabric carries a hidden fastness risk that will not surface until later testing or, worse, after it reaches the customer. Why Unfixed and Hydrolyzed Dye Must Be Removed A portion of reactive dye always hydrolyzes in the dyebath instead of reacting with the fiber. Hydrolyzed dye sits loosely on the fabric surface, held only by weak physical attraction rather than a covalent bond. Left in place, it rubs off during handling, bleeds during laundering, and transfers onto lighter fabrics in the same wash load. Soaping is the step designed specifically to remove this residue before it becomes a fastness problem. How Soaping Affects Wash Fastness The quality of soaping determines much of what shows up later in fastness testing. A batch that looks correct on the shade card can still fail to wash or rub fastness if this step was rushed. Removing Hydrolyzed Dye from the Fiber Surface Effective soaping keeps loosened dye suspended in the wash liquor instead of letting it settle back onto the fabric. How completely this happens depends on agitation, liquor ratio, and the dispersing strength of the detergent or soaping agent used. Connection Between Soaping and Fastness Ratings Wash and rub fastness ratings, most commonly evaluated using AATCC colorfastness test methods, largely reflect how much unfixed dye remains after wash-off. A fabric can pass an initial shade check on the lab dip and still fail fastness testing on the bulk batch if soaping ran too briefly or at too low a temperature. What Causes Back-Staining? Common Sources of Back-Staining Back-staining happens when dye that has washed off the dyed fabric redeposits onto undyed or lighter areas in the same bath. The most common causes include: Overloaded soaping baths carrying more hydrolyzed dye than the liquor can hold Insufficient rinsing between soaping and finishing steps Soaping agents with weak dispersing power, which allow free dye particles to settle back onto the fabric Uneven liquor circulation, which creates localized zones of high dye concentration Fabrics and Blends Most at Risk Deep and dark shades generate the highest load of hydrolyzed dye and are the most frequent source of back-staining complaints. Blended fabrics, and any load that mixes dyed and undyed components, are particularly vulnerable, since redeposited dye is far more visible on the lighter portion of the fabric. Key Process Parameters for Effective Soaping Most causes of poor fastness and back-staining trace back to how tightly these three parameters are controlled. Temperature and Time Soaping typically runs at or close to boiling point for five to fifteen minutes, though the ideal combination depends on shade depth and fabric construction. Running the bath too cool slows dye removal, and cutting the time short leaves hydrolyzed dye behind even at the correct temperature. Shade depth Soaping temperature Typical time Light to medium 90 to 95°C 5 to 8 minutes Deep and dark Near boiling (98 to 100°C) 10 to 15 minutes Turquoise and problem shades Near boiling, multi-bath 15 minutes or more per bath This near-boiling range applies to conventional soaping agents. Low-temperature soaping agents are formulated to work effectively at 60 to 80°C instead, cutting energy use without giving up fastness performance (see the Sylic D2705 section below).  Liquor Ratio A tighter liquor ratio concentrates hydrolyzed dye in a smaller volume of water, which increases the risk of redeposition before it can be flushed out. Mills running jet or overflow machines at lower liquor ratios should compensate with stronger dispersing agents or an added rinse cycle. Water Hardness and Sequestering Agents Calcium, magnesium, and iron in the water supply interfere with soaping agent performance and can leave a hazy or uneven finish. A sequestering agent, such as Sylic P1501B, an anionic chelating dispersant with a pH of 2.5 to 4.0 in a 1% solution, binds these ions before soaping begins and lets the soaping agent perform as intended. Choosing the Right Soaping Agents Anionic and Nonionic Soaping Agents Anionic soaping agents are widely used for their strong dispersing action, while nonionic types perform better in hard water and at lower temperatures. Both types are available within a dyeing auxiliary range formulated for stability in alkaline baths and low-foam performance in jet machines. Matching Agents to Fiber and Shade Depth Cotton and other cellulosic fibers generally respond well to anionic soaping agents. Blends containing synthetic fibers may need a nonionic option instead, to avoid staining the more sensitive synthetic component. Deeper shades typically call

Explore More »

Reduction Clearing in Polyester Dyeing: A Complete Guide

Table of Contents What Is Reduction Clearing? Definition and Purpose Role in Disperse Dyeing Impact on Colorfastness Common Quality Complaints When Reduction Clearing Is Needed Dark and Medium Shades High Dye Concentration Recipes Blends with Cellulosic Fibers When It Can Be Skipped Process and Control Typical Recipe and Parameters Controlling Temperature and pH Avoiding Over-Reduction or Under-Reduction Rinsing and Neutralization Choosing the Right Reducing Agents Sodium Hydrosulfite Sulfur-Free Reducing Agents Low-Temperature and Sustainable Options High Wash Fastness Dyes to Reduce Clearing Load Troubleshooting Common Issues Poor Wash Fastness After Clearing Shade Change or Dulling Conclusion FAQs What Happens If You Skip It? Reduction Clearing vs Normal Washing? Can It Be Done at Low Temperature? Hydrosulfite vs Sulfur-Free Agents? A batch that looks perfect on the machine can still fail a wash fastness test days later. More often than not, the cause is unfixed disperse dye left on the fiber surface, and the fix is reduction clearing. This guide covers when the step is necessary, the chemistry behind it, and how to keep results consistent from lab dip to bulk production. What Is Reduction Clearing? Definition and Purpose Reduction clearing is a post-dyeing treatment that removes disperse dye which has not penetrated or fixed onto polyester fibers. During high temperature dyeing, some dye molecules remain on the fiber surface instead of diffusing into the polymer structure. Left untreated, this residual dye rubs off and bleeds during washing, lowering overall color fastness. A reduction clearing bath breaks down and strips away the surface dye, leaving only the dye that has properly fixed inside the fiber. Role in Disperse Dyeing Reduction clearing takes place at the end of the disperse dyeing cycle, after the main dyeing stage and before final rinsing. It is one part of a larger polyester dyeing workflow that also includes pretreatment, dyeing, and finishing. The polyester dyeing application solutions page outlines how these stages connect, along with recommended auxiliaries for each step. Impact on Colorfastness Wash and rub fastness are among the specifications buyers check most closely before accepting a shipment. Surface dye that has not been cleared is loosely bound and washes out easily, which is precisely what standardized tests such as AATCC’s laundering fastness methods are designed to detect. A properly executed reduction clearing step improves these results by removing the dye that would otherwise cause a failed test. Common Quality Complaints Mills that skip or under-perform reduction clearing tend to see a recurring pattern of issues: Color bleeding onto lighter garments in the same wash load Staining on packaging or trims during transport and storage Dull or hazy shades compared to the approved lab dip Rejected shipments after failed fastness testing at the buyer’s lab These problems are almost always traceable to residual disperse dye rather than a flaw in the dye recipe itself, which is why reduction clearing deserves the same attention as the dyeing stage it follows. When Reduction Clearing Is Needed Dark and Medium Shades Darker and medium depth shades require higher dye concentrations, which naturally leaves more unfixed dye on the fiber surface. The Skycron disperse dyes range covers both dyeing and printing applications across dark, medium, and vivid shades, and pairing these dyes with a proper reduction clearing step is standard practice for reaching acceptable fastness at these heavier depths. High Dye Concentration Recipes Any recipe with a high total dye percentage on weight of fabric (% o.w.f.) benefits from reduction clearing, not only dark shades. As a general reference, mills commonly group shade depth this way: Shade Depth Typical Dye Concentration Reduction Clearing Light Below 1% o.w.f. Often optional Medium 1 to 3% o.w.f. Recommended Dark Above 3% o.w.f. Required These figures are a general guide rather than a fixed rule, since dye class, fiber blend, and fastness targets all shift the threshold. Multi-dye combinations used for precise custom shades fall into this same logic, as several dye classes combined can leave behind varying amounts of surface residue even at a moderate total percentage. Blends with Cellulosic Fibers Polyester-cotton and polyester-viscose blends add another layer of risk. Disperse dye that has not fixed to the polyester portion can stain the cellulosic fiber, causing an unwanted tone shift across the fabric. Reduction clearing protects the intended contrast or solid shade across both fiber types. When It Can Be Skipped Very light shades with low dye loading sometimes do not require a full reduction clearing cycle, particularly when high-exhaustion dyes and well-controlled dyeing conditions are used, and a simple hot wash can be enough. Skipping the step should still be a deliberate decision based on shade depth and fastness requirements, not a shortcut taken to save time. Process and Control Typical Recipe and Parameters A standard alkaline reduction clearing bath includes a reducing agent, caustic soda or soda ash, and a wetting or dispersing agent. Sulfur-free acid-clearing systems, which run at a lower pH, are increasingly used as an alternative. A general starting point looks like this: Parameter Typical Range Reducing agent 2 to 4 g/L Alkali (NaOH or soda ash) 2 to 4 g/L Temperature 70 to 80°C Time 15 to 20 minutes Liquor ratio 1:8 to 1:15 These figures vary by shade depth, dye class, and fiber blend, so lab trials should confirm the final recipe before scaling to bulk. Controlling Temperature and pH Temperature and pH are the two variables that most affect clearing efficiency: Too cool or too brief: residual dye is left behind, and fastness suffers. Too hot or too alkaline: the polyester surface or hand feel can be affected. Most conventional recipes target a mildly alkaline pH between 9 and 11. Acid-based sulfur-free systems instead work in a neutral to mildly acidic range, depending on the product used, so the pH target should always match the chemistry selected rather than a single fixed rule. Avoiding Over-Reduction or Under-Reduction Under-reduction leaves surface dye behind, which shows up later as poor fastness. Over-reduction strips properly fixed dye from the fiber, causing shade loss, dulling, or an uneven

Explore More »
C0 vs. C6 Water Repellent Finishes

C0 vs. C6 Water Repellent Finishes: Which One Fits Your Textiles?

Table of Contents The Chemistry Behind C0 and C6 What is C6 DWR What is C0 DWR Key Structural Differences Performance Comparison Water and Oil Repellency Durability and Wash Resistance Breathability and Hand Feel Global Regulatory Landscape REACH and EU Restrictions US State Regulations Brand and Retailer Requirements Use Cases by Industry Outdoor and Sportswear Workwear and Protective Textiles Home Textiles and Upholstery Choosing the Right Finish Key Factors to Consider Testing and Certification Tips Conclusion FAQs What is the difference between C0 and C6 finishes? Is C6 DWR banned? Does C0 perform as well as C6? How do I choose between C0 and C6? Ask a fabric supplier for a water-repellent finish today, and there is a good chance you will get two very different answers: C6, or C0. Both claim to keep fabric dry. Only one is currently facing phase-out pressure from regulators in the EU, California, and New York, and from major apparel brands. For buyers sourcing water-repellent textiles right now, the choice is no longer just about performance. It is about which chemistry will still be sellable in your target market two years from now. The Chemistry Behind C0 and C6 What is C6 DWR C6 durable water repellent (DWR) finishes use short-chain fluorocarbon polymers, specifically six-carbon fluorinated side chains, to coat individual fibers. This chemistry lowers the surface energy of the fiber to roughly 12 mJ/m², which is below the surface tension of most water and oils. As a result, C6 finishes deliver both water and oil repellency, a combination that few fluorine-free systems can fully match. C6 chemistry replaced older C8 fluorotelomer finishes over a decade ago. C8 degrades into PFOA, a substance known for being persistent and bioaccumulative in the environment. C6 degrades into perfluorohexanoic acid (PFHxA) instead, which has a shorter environmental half-life and lower bioaccumulation potential. However, PFHxA is not free of regulatory scrutiny, as covered in the compliance section below. For buyers sourcing C6 products, formulations such as the Skyguard C6-C8 Waterproofer combine water and oil resistance with good wash fastness on both cellulose and synthetic fibers, applied at typical dosages of 10 to 40 g/L, and are produced without PFOS, PFOA, or APEO. What is C0 DWR C0 refers to fluorine-free water repellent chemistry. Instead of fluorocarbon side chains, C0 finishes rely on dendrimer, wax, or polyurethane-based polymers to build a hydrophobic fiber surface. These systems typically reach a surface energy of 20 to 25 mJ/m², which is sufficient to repel water effectively but generally not enough to provide strong oil repellency. Demand for C0 finishes is growing quickly because they carry no PFAS-related compliance risk, a factor that matters more each year as regulatory scope widens. Ranges such as the Skyguard Fluorine-free Waterproofer line are applied at roughly 10 to 80 g/L depending on the durability required, contain no APEO, and are built for fabrics where oil repellency is not a functional requirement, including most outerwear, home textiles, and fashion applications. Key Structural Differences Attribute C6 (Fluorocarbon) C0 (Fluorine-Free) Surface energy Approx. 12 mJ/m² Approx. 20 to 25 mJ/m² Water repellency Excellent Good to excellent Oil repellency Yes Limited or none PFAS content Present (PFHxA-based) None Typical curing temperature 150 to 160°C 160 to 180°C Performance Comparison Water and Oil Repellency C6 finishes remain the benchmark wherever oil, grease, or organic stain resistance is needed alongside water repellency, such as workwear exposed to machine oils or food-contact aprons. C0 finishes have closed most of the gap on pure water repellency, with many recent formulations achieving results comparable to C6 under standardized water resistance testing. On oil-based stains, however, C0 finishes still fall short. Durability and Wash Resistance Both chemistries rely on physical adsorption when first applied to the fabric, and this bond weakens progressively with repeated laundering and detergent exposure. A crosslinking agent extends wash durability by binding DWR polymer chains to each other and to reactive groups on the fiber surface, converting a loosely adsorbed coating into a chemically anchored one. The Sylic Cross-linking Agent, for example, is dosed in the same bath at 10 to 30 percent of the water repellent quantity, contains no APEO, PFOA, PFOS, or formaldehyde, and is compatible with both C6 and fluorine-free systems, making it a practical add-on when a finish needs to withstand 20 or more industrial or home wash cycles. Breathability and Hand Feel Both C0 and C6 finishes coat the fiber surface rather than filling the pore spaces between yarns, so breathability is generally preserved at correct application levels. Two factors most often compromise this balance: Overdosing the finish, which can partially block inter-yarn porosity and stiffen the fabric hand Uneven bath concentration, which creates localized high-add zones across the fabric width C0 finishes sometimes require slightly higher application levels to match C6 water repellency, which makes dosing accuracy and bath uniformity especially important for maintaining a soft, breathable result. Global Regulatory Landscape REACH and EU Restrictions The EU regulates PFAS in textiles under REACH Annex XVII. A restriction on PFHxA, the degradation product of C6 chemistry, takes effect in the EU and EEA from 2026, and a broader restriction covering the wider PFAS family is currently under evaluation by the European Chemicals Agency. Buyers and brands sourcing for the EU market should treat C6 as a chemistry under increasing regulatory pressure rather than a long-term safe option, and should monitor ECHA’s PFAS regulatory updates for the latest scope and timelines. US State Regulations Regulation is not limited to the EU. Two US states have already enacted PFAS restrictions specific to textiles and apparel: California AB 1817 bans the manufacture, distribution, and sale of new textile articles containing intentionally added PFAS above 100 ppm total organic fluorine as of January 1, 2025, dropping to 50 ppm from January 1, 2027. Outdoor apparel for severe wet conditions has an extension until January 1, 2028. The full requirements are set out in the official bill text. New York Environmental Conservation Law § 37-0121 prohibits the sale of new apparel

Explore More »
Finished royal blue nylon fabric roll.

Nylon Dyeing Defects: Causes and Process Fixes

Table of Contents Common Nylon Dyeing Defects Uneven Shade and Skitteriness Listing and Barre Ring, Tippy, and Frosty Effects The Three Levers Behind Every Defect pH Profile Heating Rate and Strike Zone Retarder Selection and Dosage Troubleshooting by Symptom Skychem Solutions for Nylon Dyeing FAQs What pH is best for nylon acid dyeing? Why does my nylon dye unevenly? How do retarders prevent uneven dyeing? What temperature should I dye nylon at? Nylon strikes fast. Acid dye bonds to its amino groups within minutes, so a slightly off process can lock in an uneven shade before it has any chance to level. Streaks, listing, barre, and a speckled, skittery surface on nylon almost always trace back to one of three controllable levers: pH, temperature, or the retarder system. This article covers how to recognize each defect and what to adjust in the process to prevent it from recurring. Common Nylon Dyeing Defects Naming a defect correctly is the first step toward fixing it. The three patterns below cover most of what shows up on nylon, and each one points to a different root cause. Uneven Shade and Skitteriness Uneven dyeing is the broad category: patches, blotches, or a shade that simply isn’t consistent across the fabric. Skitteriness is a more specific form of it, a speckled, grainy appearance where neighboring filaments take up dye at different rates. It is the clearest sign that the dye struck faster than the fiber could level out. Listing and Barre Listing is a side-to-center or selvage-to-middle shade difference across the width of the fabric. Barre appears as horizontal bars or streaks running with the courses or picks. What separates these two from skitteriness is the pattern: listing and barre follow a defined width-wise or length-wise direction, while skitteriness scatters at random. Ring, Tippy, and Frosty Effects Ring dyeing and tippy dyeing are related but distinct penetration faults, and it is worth telling them apart. Ring dyeing happens across the fiber’s cross-section: dye stays concentrated in the outer sheath and never fully diffuses to the core, so a cut filament shows a colored ring around a pale or white center even though the surface looks fully dyed. Tippy dyeing is a length-wise difference instead, where the tip of a filament or staple fiber picks up more, or less, dye than the body of the fiber, usually because the tip has a different heat history or surface condition than the rest of the fiber. Frosty effects show up as an overall pale, washed-out surface rather than a directional pattern. All three point back to the same underlying issue, dye that has not fully penetrated the fiber, even when the shade looks close to standard from a distance. The Three Levers Behind Every Defect Most nylon shade defects come down to pH, temperature, or the retarder system working against each other instead of together. Each lever below covers the mechanism, the typical failure mode, and the fix. pH Profile In an acidic bath, the amino groups at the ends of nylon’s polymer chains gain a proton and become positively charged, while the sulfonate groups on acid dye molecules carry a negative charge. The two attract and bond. pH determines how many of these sites are active, how fast the dye reaches them, and how firmly it holds once it does. The most common process error is lowering the bath pH too far or too soon. If the bath turns acidic before the goods are evenly wetted and circulating, the dye strikes in a rush and creates streaks or barre that no amount of time at temperature can correct. A pH that runs too high or drifts during the cycle has the opposite problem: weak exhaustion and shade depth that wanders from batch to batch. Different acid dye classes call for different pH windows: Leveling dyes: roughly pH 5.5 to 7.0, giving the dye room to migrate and self-correct Milling dyes  (a classification carried over from wool dyeing terminology, but standard practice for nylon as well): roughly pH 4.0 to 5.0, for deeper shades and stronger wet fastness, with less tolerance for process variation  These ranges are starting points. Confirm them against the dye supplier’s technical data sheet and in-house lab dips, and never carry a recipe over from wool, where the pH scheme for leveling and milling dyes runs in the opposite direction. The same caution applies within nylon itself: nylon 6 and nylon 6,6 can strike and build differently under identical pH and temperature conditions, and switching between substrates or dye suppliers on an unverified recipe is a common, avoidable source of shade drift. Confirm any change of fiber type or dye source with a fresh lab dip and pilot run before it reaches bulk. The fix is a repeatable pH curve rather than a single target value. A slow-acting acid donor that lowers pH gradually as temperature rises keeps the strike controlled instead of sudden, removing the guesswork of manual dosing at the wrong point in the cycle. Heating Rate and Strike Zone Temperature governs when the dye moves and how quickly. On nylon, most uptake happens in a narrow window, typically 70 to 90°C, where the fiber structure opens and dye rushes in. Nylon has a limited number of dye sites, and acid dye bonds to them almost as soon as conditions allow; ramping through the strike zone too fast fixes the dye unevenly, with no chance to level out afterward. The first ten to fifteen minutes of strike largely determine the outcome of the entire batch. The diagram above shows how this plays out across a typical cycle: a flat wetting and circulation stage, a controlled ramp that slows through the 70 to 90°C strike zone, a hold near boiling for migration and leveling, and a controlled cool down. The fix starts before the strike: confirm full, even wetting and steady circulation first. Ramp at a controlled rate, often close to 1°C per minute and slower still through the 70 to 90°C

Explore More »

Contact Us for Textile Auxiliaries and Dyes

Contact Skychem Group for more chemical solutions, If you have questions or need more information, please contact us.
We will respond within 24 hours

Get a project quote

Please tell us the requirements, the country and the application.

Scroll to Top
Email WhatsApp

Contact Us for Textile Auxiliaries and Dyes

Contact Skychem Group for more chemical solutions, If you have questions or need more information, please contact us.
We will respond within 24 hours