...

Contact Skychem Group for more chemical solutions, If you have questions or need more information, please contact us.
Respond within 24 hours

What Is Defoamer and How to Choose for Textile Processing?

Foam in textile processing can disrupt liquor circulation, reduce efficiency, and affect fabric quality. Choosing the right defoamer is not only about controlling foam quickly, but also about ensuring compatibility, process stability, and reliable performance across pretreatment, dyeing, and finishing.

What Is a Defoamer?

A defoamer is a chemical additive used to reduce or eliminate foam in liquid systems. It works by destabilizing the thin liquid films that surround air bubbles, causing them to collapse before they build into persistent foam.

In textile processing, foam develops easily because baths often contain surfactants, operate at elevated temperatures, and are exposed to constant agitation. These conditions make foam control a process requirement rather than a minor adjustment. A suitable defoamer helps maintain smooth machine operation, stable bath circulation, and more consistent results on fabric.

Why Foam Forms in Textile Processing?

Foam is a dispersion of gas bubbles in a liquid. It becomes stable when surfactants lower surface tension and form a protective layer around each bubble.

Several factors make textile wet processing especially prone to foam:

Surfactants: Scouring agents, wetting agents, detergents, dispersants, and other auxiliaries are essential for wet processing, but they also stabilize foam.

Agitation: Jet circulation, pump movement, overflow systems, and mechanical stirring continuously introduce air into the bath. The more turbulence in the system, the more likely foam will develop.

Temperature: Temperature changes the behavior of both the liquid and the chemicals in it. In many textile baths, higher temperatures can make foam more difficult to control, especially when multiple auxiliaries are present.

Defoamer in Textile

Why Foam Is a Problem in Textile Processing?

Foam affects both process efficiency and product quality.

In jet dyeing, excessive foam can reduce effective nozzle pressure and disturb liquor flow, leading to uneven dye uptake, rope marks, or patchy shades. In printing, air bubbles can create pinholes and poor print definition. In washing ranges, foam can reduce washing efficiency and trigger overflow. In finishing, foam may cause uneven pick-up, streaks, or inconsistency in hand feel across the fabric width.

Foam also creates operational risks. Overflow increases housekeeping problems, raises the chance of slippery floors, and can interrupt continuous production lines.

How a Defoamer Works?

Breaking existing foam

A defoamer acts by spreading rapidly across the foam surface and entering the thin liquid film between bubbles. Because the defoamer has a lower surface tension than the surrounding liquid, it weakens the film and causes the bubble to collapse.

Preventing new foam

Many products also provide antifoaming action. Instead of only destroying foam that is already present, they help prevent stable bubbles from forming in the first place. In practice, most modern textile products are expected to do both.

In practice, some textile defoamers are designed not only for quick foam knockdown but also for continued antifoaming performance throughout the process.

Defoamer vs. antifoam agent

The two terms are often used interchangeably. Technically, a defoamer destroys existing foam, while an antifoam agent helps prevent foam formation. In commercial textile use, the distinction matters less than actual performance under your bath conditions.

Main Types of Textile Defoamers

Different process conditions call for different defoamer chemistries. The table below summarizes the main types used in textile manufacturing and where each is generally most suitable.

Type Key Characteristics Best Used For
Silicone-based Fast spreading, effective at low dosage, good heat stability High-temperature jet dyeing, exhaust dyeing
Mineral oil-based Cost-effective, good general performance Scouring, washing, general-purpose baths
EO/PO polymer-based Good water dispersibility, lower residue risk, broad compatibility Continuous dyeing, padding, printing
Silicone-free Reduced risk of silicone-related spots, often non-ionic, easy to disperse, suitable for sensitive systems Finishing baths, compatibility-sensitive processes, residue-sensitive applications


Key Applications in Textile Manufacturing

Pretreatment baths

Pretreatment baths such as scouring and desizing are highly foam-prone because they combine surfactants, alkalis, enzymes, high temperature, and strong agitation. Foam in this stage can reduce bath-to-fiber contact and interfere with the removal of oils, waxes, and sizing materials.

For mills dealing with foam in pretreatment, selecting the right defoamer is only part of the solution. Skychem Group supports customers with broader textile auxiliary solutions that help improve compatibility, process stability, and production efficiency.

  • In-house R&D focused on real textile processing conditions
  • Application support for compatibility checks, dosage optimization, and scale-up stability
  • Solutions developed for pretreatment, dyeing, and finishing processes
  • Silicone-free, non-ionic options that are easy to disperse in water
  • Good compatibility with wetting agents, softeners, and other auxiliaries
  • Effective foam control across a broad pH and temperature range
  • A system-based approach that helps reduce trial-and-error costs and downstream defects

Dyeing and jet dyeing

Jet dyeing depends on stable liquor flow. Foam can reduce circulation efficiency, disturb pressure balance, and contribute to shade variation. Defoamers used here must stay effective throughout the temperature profile of the dyeing cycle and remain compatible with the dye system.

Printing pastes

In printing pastes, foam creates defects such as pinholes, poor edge definition, and uneven color penetration. The defoamer must control entrained air without disturbing paste viscosity, pigment stability, or rheology.

Washing and rinsing

In continuous washing ranges, residual surfactants from previous stages can generate substantial foam. Fast foam knockdown is important, but the product also needs to leave the fabric clean and not interfere with subsequent steps.

Finishing processes

Finishing baths often contain emulsified softeners, repellents, or functional additives that are sensitive to foam and to incompatible auxiliaries. In these systems, silicone-free or highly compatible defoamers are often preferred to reduce the risk of streaks, uneven add-on, or surface defects.

How to Choose the Right Defoamer?

Check compatibility first

Compatibility with dyes, auxiliaries, and bath chemistry should always be the first screening factor. A defoamer that destabilizes a dye bath or interferes with a leveling agent can create more serious problems than the foam itself.

This is one reason why non-ionic grades are often attractive. Their broader compatibility can make them easier to use alongside wetting agents, softeners, and other textile auxiliaries.

Ease of dispersion also matters in day-to-day production, because a defoamer that can be introduced and distributed uniformly is less likely to create localized overdosing or performance inconsistency.

Match the fabric and downstream process

The right product also depends on what happens after the wet process. Some defoamers may leave residues that are acceptable in one application but problematic in another. Fabrics that will later be coated, laminated, or given specialty finishes need especially clean surface performance.

Look at temperature and pH stability

A defoamer that performs well in a mild wash bath may fail in a hot dyeing bath or in strongly alkaline pretreatment. Always match the product to the actual temperature and pH range of your process.

In practical terms, a useful textile defoamer should not only give fast knockdown but also maintain antifoaming performance across a broad operating window. This matters in real production, where temperature, agitation, and chemical load can shift during the run.

Control residue and defect risk

Silicone spots remain one of the best-known defoamer-related defects in textile production. The risk increases when products are overdosed, poorly dispersed, or added directly into severe shear conditions.

This is why silicone-free grades are often considered when the process is sensitive to residue or when finish uniformity is critical. Good water dispersibility is also important because it helps the defoamer distribute more evenly through the system.

Evaluate dosage the right way

More defoamer is not always better. Overdosing adds cost and can increase the risk of defects or compatibility issues. The correct dosage depends on the foaming medium, temperature, agitation level, and the rest of the chemical system. Generic dosage ranges can be useful as a starting point, but product-specific recommendations should always take priority. Some non-silicon grades may perform well at several hundred ppm, while others may require different levels depending on the process.

For example, some products may be recommended at around 500 to 800 ppm under typical operating conditions. It is also important not to judge performance by solids content alone. A product with higher concentration is not automatically more effective in foam control. In practice, the better comparison is cost at effective dosage under your actual operating conditions.

A Practical Example of a Silicone-Free Option

A product such as Sylic FU5765 reflects what many mills look for in a modern silicone-free defoamer: non-silicon, non-ionic chemistry, easy water dispersion, fast foam knockdown, and reliable antifoaming performance across a broad pH and temperature range. These features matter because effective foam control must also support compatibility, process stability, and ease of use in production.
Skychem Group Company

Conclusion

The right defoamer supports stable processing, consistent fabric quality, and lower production risk. For textile pretreatment, dyeing, or finishing applications, contact us to discuss your process conditions and get a product recommendation tailored to your system.


Recommended reading:

  1. The Role of Leveling Agents
  2. What Is a Wetting Agent in Textiles?
  3. EDTA vs DTPA vs NTA
  4. Pretreatment Impacts on Fabric Quality and Color Fastness

Sandy

With years of experience in chemical dyes and textile auxiliaries, I’m dedicated to sharing insights into the latest technologies, sustainable innovations, and market trends.

Recent Articles

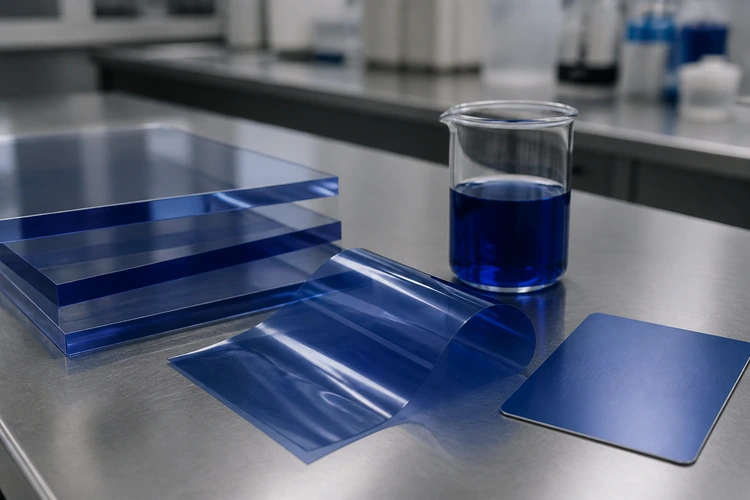
Solvent dye applications in plastics, inks, and coatings.

How to Choose the Right Solvent Dye for Plastics, Inks and Coating?

Table of Contents What Are Solvent Dyes? Why Use Solvent Dyes Instead of Pigments? Key Factors for Selecting Solvent Dyes Solubility Heat Resistance Light Fastness Migration Resistance Solvent Dye Selection by Application Plastics Printing Inks Coatings Recommended Solvent Dye Grades FAQs Can solvent dyes and pigments be combined in the same formulation? Which solvents suit gravure and flexographic inks? How is thermal stability tested? What causes dye migration in packaging? This guide compares solvent dyes for plastics, printing inks, and coatings by solubility, heat resistance, light fastness, and migration performance, so formulators can match the right grade to a specific solvent system, processing temperature, and end-use application. What Are Solvent Dyes? Solvent dyes are colorants that dissolve fully into the host medium at a molecular level, giving plastics, printing inks, and coatings their characteristic transparency, brightness, and consistent shade. Choosing a solvent dye for plastics, printing inks, or coatings comes down to three practical questions: does it dissolve cleanly in the carrier system, will it hold up at the required processing temperature, and will it stay in place once the product ships. Why Use Solvent Dyes Instead of Pigments? Pigments form particle suspensions that scatter light, which can introduce haze and uneven color strength in transparent parts. Solvent dyes dissolve fully in the host medium, producing clear, vibrant color even in thin films or lightly tinted plastics. For applications where transparency and color intensity matter more than opacity, such as clear plastic components, flexible packaging inks, or wood stains, solvent dyes are typically the better fit. Key Factors for Selecting Solvent Dyes Four factors most often determine whether a solvent dye grade performs as expected in a given application: solubility in the carrier system, heat resistance during processing, light fastness under end-use exposure, and migration resistance once the product is in service. Solubility Solvent dyes only perform as intended when they fully dissolve in the carrier a formulator is already using. Compatibility with the specific solvent blend determines both color strength and clarity in the finished product. Ketones and Esters. Ketones such as MEK and acetone, along with esters such as ethyl acetate and butyl acetate, are common carriers in gravure and flexographic printing inks. Solvent dyes formulated for these systems typically dissolve quickly and leave minimal residue, which supports consistent print density. Aromatic Hydrocarbons. Toluene and xylene remain widely used in industrial coatings and some legacy ink systems. Solubility in aromatic hydrocarbons can vary more between dye chemistries than it does in ketone or ester systems, so each grade needs to be checked against the specific carrier rather than assumed compatible by solvent class. Alcohols. Ethanol and isopropanol appear in a range of coatings and lower-VOC formulations. Solvent dye solubility tends to be more limited across the board in alcohol systems, which makes it one of the first properties worth confirming before committing to a grade. Because solubility varies by individual dye chemistry rather than by solvent class alone, it is worth verifying a dye’s solubility profile against the exact carrier solvent before finalizing a formulation. Heat Resistance Processing temperature is often the deciding factor between two otherwise similar solvent dyes. Thermal stability depends heavily on the underlying dye chemistry, and choosing incorrectly can lead to shade shift, gassing, or reduced clarity during melt processing or curing. Anthraquinone Dyes. Many anthraquinone-based solvent dyes offer excellent thermal stability and are commonly selected for high-temperature plastics applications such as polycarbonate and ABS, though the exact thermal ceiling varies by grade and should be confirmed for each specific dye. Azo Dyes. Azo-based solvent dyes typically have a lower thermal ceiling than anthraquinone types and generally suit lower-temperature processing such as polystyrene. They are often the more cost-effective option when the application does not require extended heat exposure. Property Anthraquinone Dyes Azo Dyes Typical thermal ceiling Generally higher, but varies by grade Generally lower, but varies by grade Light fastness Generally superior UV resistance Adequate for short-term or indoor use Common resins Polycarbonate, ABS Polystyrene Relative cost Higher Lower Light Fastness Light fastness measures how well a color resists fading under UV or prolonged light exposure. Anthraquinone dyes generally offer superior light fastness and are better suited to outdoor or long-term exposure applications, while azo dyes are typically adequate for short-term or indoor use. For coatings and plastics that will see extended outdoor exposure, light fastness is worth weighing alongside heat resistance rather than treating it as a separate afterthought. Migration Resistance Migration becomes a concern whenever a colored plastic, film, or coating sits in direct or indirect contact with another material over time. A dye that migrates can bleed into adjacent layers, packaging contents, or surrounding surfaces, affecting both appearance and, in some cases, regulatory compliance. Molecular Weight and Migration. Solvent dyes with higher molecular weight and lower solubility in the contacting medium generally show better migration resistance. This matters most in multilayer plastic films or packaging structures, where dye movement between layers can show up as discoloration or staining over time. Testing Conditions. Migration behavior should be assessed under the temperature and humidity conditions the finished product will actually see. Results measured at room temperature do not reliably predict performance in warmer storage or transport environments, so testing under real-world conditions is essential before a grade is finalized. For packaging destined for food-contact applications, migration testing is typically benchmarked against established frameworks such as the EU regulation on plastic materials intended for food contact. Colorants generally fall outside that regulation’s specific substance list, but they are still subject to its general safety requirements, so this remains a useful reference point when setting internal migration limits. Solvent Dye Selection by Application Once solubility, heat, light, and migration requirements are defined, the right solvent dye also depends on the specific application it will be used in. Plastics In plastics processing, common resins include polystyrene, ABS, acrylics, polycarbonate, and PET. Solvent dyes deliver transparent, uniform coloring that pigments cannot always match, especially in clear or lightly tinted parts. Printing Inks For flexographic, gravure,

Explore More »
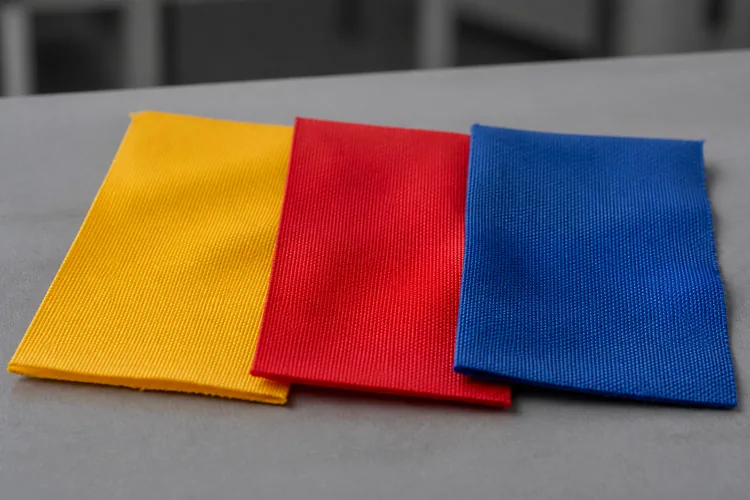
Yellow, red, and blue nylon swatches representing a compatible trichromatic acid dye set.

Trichromatic Acid Dye Selection for Consistent Nylon Shades

Table of Contents Understanding Strike Rate Factors Influencing Strike Rate Matching Strike Rates in a Combination The Role of pH in Dye Uptake pH Ranges by Dye Class Controlling pH During Dyeing Trichromatic Selection Principles Choosing Compatible Yellow, Red, Blue Typical Trichromatic Acid Dye Combinations for Nylon Light Shade Trichromatic Combination Deep Shade Trichromatic Combination Migration and Buildup Properties Avoiding Shade Shift Practical Recipe Guidelines Lab Trial Checklist FAQs What causes uneven dyeing with acid dyes on nylon? How does pH control affect reproducibility? What makes a trichromatic combination reliable? Nylon dyeing rewards precision. Acid dyes bond well with polyamide fibers, but shade consistency depends on how closely strike rate, pH, and trichromatic combinations are controlled together. A small mismatch in any one variable can shift a shade off standard, even when the recipe looks correct on paper. This article breaks down the practical factors that keep acid dye combinations compatible on nylon. Understanding Strike Rate Strike rate describes how quickly a dye moves from the bath onto the fiber. On nylon, this speed depends on dye structure, temperature ramp, and the number of available dye sites on the substrate. A dye with a fast strike rate can produce uneven color if it exhausts before the bath fully penetrates the goods, particularly on tightly constructed knits or dense yarns. Factors Influencing Strike Rate Three variables have the greatest effect on how fast a given acid dye takes up on nylon: Molecular size and structure: smaller, more mobile molecules tend to migrate and level more readily, while larger or more linear structures strike faster but migrate less once fixed. Electrolyte concentration: higher salt levels in the bath slow strike by increasing ionic competition at the fiber surface, which can help leveling but may reduce total exhaustion if not balanced correctly. Temperature ramp speed: a ramp that heats too quickly gives the dye little time to migrate before fixation, raising the risk of streaks or tailing on the goods. Matching Strike Rates in a Combination When combining dyes for a shade, each component should have a comparable strike rate. If one dye in a mix strikes noticeably faster than the others, it dominates the early stages of dyeing and shifts the shade as the bath progresses. This is one of the most common causes of reproducibility problems in nylon dyehouses, especially when recipes are adjusted without checking how the new combination behaves as a system rather than as individual dyes. The Role of pH in Dye Uptake Acid dyes require an acidic bath to bond effectively with the amine groups on nylon fiber. pH does more than set the chemical environment; it also governs how fast dye uptake occurs and how much correction is possible once dyeing has started. pH Ranges by Dye Class Different acid dye classes are formulated to perform within specific pH windows. Working outside that window changes uptake speed and can affect fastness properties. Dye Class Typical pH Range Uptake Behavior Leveling acid dyes pH 5 to 6 Slower strike, good migration, easier to correct Milling acid dyes pH 4.5 to 5.5 Moderate strike, less forgiving on unlevel dyeing Metal complex acid dyes pH 4 to 5 Faster strike, stronger fastness, tighter process control needed These ranges are starting references. Actual performance depends on the specific dye grade, liquor ratio, and machine type, so lab confirmation on the intended substrate remains necessary before scaling to bulk. Controlling pH During Dyeing Holding pH steady throughout the cycle matters as much as setting the correct starting point. A pH that drifts upward during dyeing slows uptake and can leave the shade pale or uneven, while a sharp early drop can cause the dye to strike too fast for proper migration. Buffering systems and controlled acid addition keep the bath within range from start to finish. Leveling agents and buffering auxiliaries formulated for pH and strike control help stabilize uptake speed across different fabric constructions and machine conditions, particularly on constructions prone to rapid initial strike. Trichromatic Selection Principles Trichromatic dyeing uses a yellow, red, and blue dye to build a wide range of shades from a small working palette. Compatibility across these three dyes determines how predictable the resulting shades will be, both in the lab and in bulk. Choosing Compatible Yellow, Red, Blue A workable trichromatic set should share similar strike rates, similar pH sensitivity, and comparable migration behavior. Mismatched components can produce shade drift between lab dips and production batches, even when the total dye concentration is correct. The Skyacido Acid Dyes, formulated specifically for polyamide dyeing, offers a wide shade gamut with strong inter-shade combinability, which supports matching yellow, red, and blue components as a coordinated set rather than selecting each color independently based on shade alone. The table below outlines what to check across each primary when building a trichromatic set: Component Strike Rate Check pH Sensitivity Migration Behavior Yellow Compare exhaustion curve against red and blue Note shift point where uptake accelerates Confirm redistribution at hold temperature Red Compare exhaustion curve against yellow and blue Note shift point where uptake accelerates Confirm redistribution at hold temperature Blue Compare exhaustion curve against yellow and red Note shift point where uptake accelerates Confirm redistribution at hold temperature Running this comparison during lab dip development, rather than after a bulk batch shows shade drift, catches mismatches while they are still inexpensive to correct. Typical Trichromatic Acid Dye Combinations for Nylon In practical nylon dyeing, trichromatic combinations are usually selected according to shade depth, buildup requirement, and compatibility between dyes. Different combinations may be required for light shades and deep shades to maintain balanced exhaustion, migration, and shade reproducibility. Light Shade Trichromatic Combination For light and medium shades, dyes with good migration performance and moderate strike behavior are preferred to achieve excellent leveling and shade correction ability. A typical light shade combination may include: Trichromatic Position Example Acid Dye Yellow Skyacido Yellow 199 Red Skyacido Red 337 Blue Skyacido Blue 324 This combination provides good compatibility and is

Explore More »
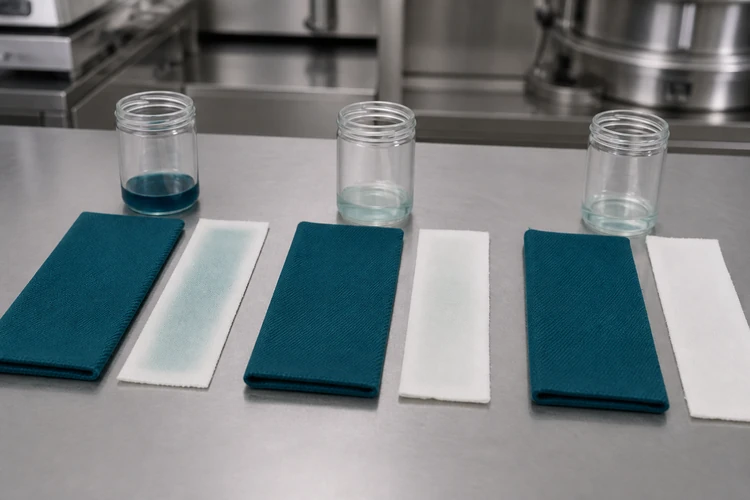
2. Low-temperature soaping leaves clearer wash liquor and less staining on adjacent white cotton strips.

Reactive Dye Soaping Guide: Better Wash Fastness, Less Back-Staining

Table of Contents What Is Reactive Dye Soaping Role in the Wash-Off Stage Why Unfixed and Hydrolyzed Dye Must Be Removed How Soaping Affects Wash Fastness Removing Hydrolyzed Dye from the Fiber Surface Connection Between Soaping and Fastness Ratings What Causes Back-Staining? Common Sources of Back-Staining Fabrics and Blends Most at Risk Key Process Parameters for Effective Soaping Temperature and Time Liquor Ratio Water Hardness and Sequestering Agents Choosing the Right Soaping Agents Anionic and Nonionic Soaping Agents Matching Agents to Fiber and Shade Depth Low-Temperature Soaping Agent Option: Sylic D2705 Key Benefits Recommended Application Performance Comparison Soaping Process Methods Cold Wash and Hot Wash Sequence One-Bath vs Multi-Step Soaping Role of Fixing Agents After Soaping Best Practices for Consistent Wash Fastness Results FAQs How long should reactive dye soaping take? Can back-staining be fixed after it happens? Does hard water affect soaping performance? Is a separate fixing agent always necessary after soaping? Reactive dye soaping is often treated as a quick step at the end of the dyeing cycle, but it has a direct effect on wash fastness and back-staining outcomes. Getting temperature, time, and agent selection right prevents costly rejects and repeat orders that eat into margins. What Is Reactive Dye Soaping Role in the Wash-Off Stage Soaping takes place after fixation, once the reactive dye has bonded to the fiber under alkaline conditions. Fabric is washed at or near boiling temperature with a detergent or specialty soaping agent to strip away everything that never formed a permanent bond with the fiber. Skipping or shortening this step leaves wash-off incomplete, and the fabric carries a hidden fastness risk that will not surface until later testing or, worse, after it reaches the customer. Why Unfixed and Hydrolyzed Dye Must Be Removed A portion of reactive dye always hydrolyzes in the dyebath instead of reacting with the fiber. Hydrolyzed dye sits loosely on the fabric surface, held only by weak physical attraction rather than a covalent bond. Left in place, it rubs off during handling, bleeds during laundering, and transfers onto lighter fabrics in the same wash load. Soaping is the step designed specifically to remove this residue before it becomes a fastness problem. How Soaping Affects Wash Fastness The quality of soaping determines much of what shows up later in fastness testing. A batch that looks correct on the shade card can still fail to wash or rub fastness if this step was rushed. Removing Hydrolyzed Dye from the Fiber Surface Effective soaping keeps loosened dye suspended in the wash liquor instead of letting it settle back onto the fabric. How completely this happens depends on agitation, liquor ratio, and the dispersing strength of the detergent or soaping agent used. Connection Between Soaping and Fastness Ratings Wash and rub fastness ratings, most commonly evaluated using AATCC colorfastness test methods, largely reflect how much unfixed dye remains after wash-off. A fabric can pass an initial shade check on the lab dip and still fail fastness testing on the bulk batch if soaping ran too briefly or at too low a temperature. What Causes Back-Staining? Common Sources of Back-Staining Back-staining happens when dye that has washed off the dyed fabric redeposits onto undyed or lighter areas in the same bath. The most common causes include: Overloaded soaping baths carrying more hydrolyzed dye than the liquor can hold Insufficient rinsing between soaping and finishing steps Soaping agents with weak dispersing power, which allow free dye particles to settle back onto the fabric Uneven liquor circulation, which creates localized zones of high dye concentration Fabrics and Blends Most at Risk Deep and dark shades generate the highest load of hydrolyzed dye and are the most frequent source of back-staining complaints. Blended fabrics, and any load that mixes dyed and undyed components, are particularly vulnerable, since redeposited dye is far more visible on the lighter portion of the fabric. Key Process Parameters for Effective Soaping Most causes of poor fastness and back-staining trace back to how tightly these three parameters are controlled. Temperature and Time Soaping typically runs at or close to boiling point for five to fifteen minutes, though the ideal combination depends on shade depth and fabric construction. Running the bath too cool slows dye removal, and cutting the time short leaves hydrolyzed dye behind even at the correct temperature. Shade depth Soaping temperature Typical time Light to medium 90 to 95°C 5 to 8 minutes Deep and dark Near boiling (98 to 100°C) 10 to 15 minutes Turquoise and problem shades Near boiling, multi-bath 15 minutes or more per bath This near-boiling range applies to conventional soaping agents. Low-temperature soaping agents are formulated to work effectively at 60 to 80°C instead, cutting energy use without giving up fastness performance (see the Sylic D2705 section below).  Liquor Ratio A tighter liquor ratio concentrates hydrolyzed dye in a smaller volume of water, which increases the risk of redeposition before it can be flushed out. Mills running jet or overflow machines at lower liquor ratios should compensate with stronger dispersing agents or an added rinse cycle. Water Hardness and Sequestering Agents Calcium, magnesium, and iron in the water supply interfere with soaping agent performance and can leave a hazy or uneven finish. A sequestering agent, such as Sylic P1501B, an anionic chelating dispersant with a pH of 2.5 to 4.0 in a 1% solution, binds these ions before soaping begins and lets the soaping agent perform as intended. Choosing the Right Soaping Agents Anionic and Nonionic Soaping Agents Anionic soaping agents are widely used for their strong dispersing action, while nonionic types perform better in hard water and at lower temperatures. Both types are available within a dyeing auxiliary range formulated for stability in alkaline baths and low-foam performance in jet machines. Matching Agents to Fiber and Shade Depth Cotton and other cellulosic fibers generally respond well to anionic soaping agents. Blends containing synthetic fibers may need a nonionic option instead, to avoid staining the more sensitive synthetic component. Deeper shades typically call

Explore More »

Reduction Clearing in Polyester Dyeing: A Complete Guide

Table of Contents What Is Reduction Clearing? Definition and Purpose Role in Disperse Dyeing Impact on Colorfastness Common Quality Complaints When Reduction Clearing Is Needed Dark and Medium Shades High Dye Concentration Recipes Blends with Cellulosic Fibers When It Can Be Skipped Process and Control Typical Recipe and Parameters Controlling Temperature and pH Avoiding Over-Reduction or Under-Reduction Rinsing and Neutralization Choosing the Right Reducing Agents Sodium Hydrosulfite Sulfur-Free Reducing Agents Low-Temperature and Sustainable Options High Wash Fastness Dyes to Reduce Clearing Load Troubleshooting Common Issues Poor Wash Fastness After Clearing Shade Change or Dulling Conclusion FAQs What Happens If You Skip It? Reduction Clearing vs Normal Washing? Can It Be Done at Low Temperature? Hydrosulfite vs Sulfur-Free Agents? A batch that looks perfect on the machine can still fail a wash fastness test days later. More often than not, the cause is unfixed disperse dye left on the fiber surface, and the fix is reduction clearing. This guide covers when the step is necessary, the chemistry behind it, and how to keep results consistent from lab dip to bulk production. What Is Reduction Clearing? Definition and Purpose Reduction clearing is a post-dyeing treatment that removes disperse dye which has not penetrated or fixed onto polyester fibers. During high temperature dyeing, some dye molecules remain on the fiber surface instead of diffusing into the polymer structure. Left untreated, this residual dye rubs off and bleeds during washing, lowering overall color fastness. A reduction clearing bath breaks down and strips away the surface dye, leaving only the dye that has properly fixed inside the fiber. Role in Disperse Dyeing Reduction clearing takes place at the end of the disperse dyeing cycle, after the main dyeing stage and before final rinsing. It is one part of a larger polyester dyeing workflow that also includes pretreatment, dyeing, and finishing. The polyester dyeing application solutions page outlines how these stages connect, along with recommended auxiliaries for each step. Impact on Colorfastness Wash and rub fastness are among the specifications buyers check most closely before accepting a shipment. Surface dye that has not been cleared is loosely bound and washes out easily, which is precisely what standardized tests such as AATCC’s laundering fastness methods are designed to detect. A properly executed reduction clearing step improves these results by removing the dye that would otherwise cause a failed test. Common Quality Complaints Mills that skip or under-perform reduction clearing tend to see a recurring pattern of issues: Color bleeding onto lighter garments in the same wash load Staining on packaging or trims during transport and storage Dull or hazy shades compared to the approved lab dip Rejected shipments after failed fastness testing at the buyer’s lab These problems are almost always traceable to residual disperse dye rather than a flaw in the dye recipe itself, which is why reduction clearing deserves the same attention as the dyeing stage it follows. When Reduction Clearing Is Needed Dark and Medium Shades Darker and medium depth shades require higher dye concentrations, which naturally leaves more unfixed dye on the fiber surface. The Skycron disperse dyes range covers both dyeing and printing applications across dark, medium, and vivid shades, and pairing these dyes with a proper reduction clearing step is standard practice for reaching acceptable fastness at these heavier depths. High Dye Concentration Recipes Any recipe with a high total dye percentage on weight of fabric (% o.w.f.) benefits from reduction clearing, not only dark shades. As a general reference, mills commonly group shade depth this way: Shade Depth Typical Dye Concentration Reduction Clearing Light Below 1% o.w.f. Often optional Medium 1 to 3% o.w.f. Recommended Dark Above 3% o.w.f. Required These figures are a general guide rather than a fixed rule, since dye class, fiber blend, and fastness targets all shift the threshold. Multi-dye combinations used for precise custom shades fall into this same logic, as several dye classes combined can leave behind varying amounts of surface residue even at a moderate total percentage. Blends with Cellulosic Fibers Polyester-cotton and polyester-viscose blends add another layer of risk. Disperse dye that has not fixed to the polyester portion can stain the cellulosic fiber, causing an unwanted tone shift across the fabric. Reduction clearing protects the intended contrast or solid shade across both fiber types. When It Can Be Skipped Very light shades with low dye loading sometimes do not require a full reduction clearing cycle, particularly when high-exhaustion dyes and well-controlled dyeing conditions are used, and a simple hot wash can be enough. Skipping the step should still be a deliberate decision based on shade depth and fastness requirements, not a shortcut taken to save time. Process and Control Typical Recipe and Parameters A standard alkaline reduction clearing bath includes a reducing agent, caustic soda or soda ash, and a wetting or dispersing agent. Sulfur-free acid-clearing systems, which run at a lower pH, are increasingly used as an alternative. A general starting point looks like this: Parameter Typical Range Reducing agent 2 to 4 g/L Alkali (NaOH or soda ash) 2 to 4 g/L Temperature 70 to 80°C Time 15 to 20 minutes Liquor ratio 1:8 to 1:15 These figures vary by shade depth, dye class, and fiber blend, so lab trials should confirm the final recipe before scaling to bulk. Controlling Temperature and pH Temperature and pH are the two variables that most affect clearing efficiency: Too cool or too brief: residual dye is left behind, and fastness suffers. Too hot or too alkaline: the polyester surface or hand feel can be affected. Most conventional recipes target a mildly alkaline pH between 9 and 11. Acid-based sulfur-free systems instead work in a neutral to mildly acidic range, depending on the product used, so the pH target should always match the chemistry selected rather than a single fixed rule. Avoiding Over-Reduction or Under-Reduction Under-reduction leaves surface dye behind, which shows up later as poor fastness. Over-reduction strips properly fixed dye from the fiber, causing shade loss, dulling, or an uneven

Explore More »

Contact Us for Textile Auxiliaries and Dyes

Contact Skychem Group for more chemical solutions, If you have questions or need more information, please contact us.
We will respond within 24 hours

Get a project quote

Tell us your project requirements, country, and intended application.

Sandy

With years of experience in chemical dyes and textile auxiliaries, I’m dedicated to sharing insights into the latest technologies, sustainable innovations, and market trends.

Recent Articles

Solvent dye applications in plastics, inks, and coatings.

How to Choose the Right Solvent Dye for Plastics, Inks and Coating?

Table of Contents What Are Solvent Dyes? Why Use Solvent Dyes Instead of Pigments? Key Factors for Selecting Solvent Dyes Solubility Heat Resistance Light Fastness Migration Resistance Solvent Dye Selection by Application Plastics Printing Inks Coatings Recommended Solvent Dye Grades FAQs Can solvent dyes and pigments be combined in the same formulation? Which solvents suit gravure and flexographic inks? How is thermal stability tested? What causes dye migration in packaging? This guide compares solvent dyes for plastics, printing inks, and coatings by solubility, heat resistance, light fastness, and migration performance, so formulators can match the right grade to a specific solvent system, processing temperature, and end-use application. What Are Solvent Dyes? Solvent dyes are colorants that dissolve fully into the host medium at a molecular level, giving plastics, printing inks, and coatings their characteristic transparency, brightness, and consistent shade. Choosing a solvent dye for plastics, printing inks, or coatings comes down to three practical questions: does it dissolve cleanly in the carrier system, will it hold up at the required processing temperature, and will it stay in place once the product ships. Why Use Solvent Dyes Instead of Pigments? Pigments form particle suspensions that scatter light, which can introduce haze and uneven color strength in transparent parts. Solvent dyes dissolve fully in the host medium, producing clear, vibrant color even in thin films or lightly tinted plastics. For applications where transparency and color intensity matter more than opacity, such as clear plastic components, flexible packaging inks, or wood stains, solvent dyes are typically the better fit. Key Factors for Selecting Solvent Dyes Four factors most often determine whether a solvent dye grade performs as expected in a given application: solubility in the carrier system, heat resistance during processing, light fastness under end-use exposure, and migration resistance once the product is in service. Solubility Solvent dyes only perform as intended when they fully dissolve in the carrier a formulator is already using. Compatibility with the specific solvent blend determines both color strength and clarity in the finished product. Ketones and Esters. Ketones such as MEK and acetone, along with esters such as ethyl acetate and butyl acetate, are common carriers in gravure and flexographic printing inks. Solvent dyes formulated for these systems typically dissolve quickly and leave minimal residue, which supports consistent print density. Aromatic Hydrocarbons. Toluene and xylene remain widely used in industrial coatings and some legacy ink systems. Solubility in aromatic hydrocarbons can vary more between dye chemistries than it does in ketone or ester systems, so each grade needs to be checked against the specific carrier rather than assumed compatible by solvent class. Alcohols. Ethanol and isopropanol appear in a range of coatings and lower-VOC formulations. Solvent dye solubility tends to be more limited across the board in alcohol systems, which makes it one of the first properties worth confirming before committing to a grade. Because solubility varies by individual dye chemistry rather than by solvent class alone, it is worth verifying a dye’s solubility profile against the exact carrier solvent before finalizing a formulation. Heat Resistance Processing temperature is often the deciding factor between two otherwise similar solvent dyes. Thermal stability depends heavily on the underlying dye chemistry, and choosing incorrectly can lead to shade shift, gassing, or reduced clarity during melt processing or curing. Anthraquinone Dyes. Many anthraquinone-based solvent dyes offer excellent thermal stability and are commonly selected for high-temperature plastics applications such as polycarbonate and ABS, though the exact thermal ceiling varies by grade and should be confirmed for each specific dye. Azo Dyes. Azo-based solvent dyes typically have a lower thermal ceiling than anthraquinone types and generally suit lower-temperature processing such as polystyrene. They are often the more cost-effective option when the application does not require extended heat exposure. Property Anthraquinone Dyes Azo Dyes Typical thermal ceiling Generally higher, but varies by grade Generally lower, but varies by grade Light fastness Generally superior UV resistance Adequate for short-term or indoor use Common resins Polycarbonate, ABS Polystyrene Relative cost Higher Lower Light Fastness Light fastness measures how well a color resists fading under UV or prolonged light exposure. Anthraquinone dyes generally offer superior light fastness and are better suited to outdoor or long-term exposure applications, while azo dyes are typically adequate for short-term or indoor use. For coatings and plastics that will see extended outdoor exposure, light fastness is worth weighing alongside heat resistance rather than treating it as a separate afterthought. Migration Resistance Migration becomes a concern whenever a colored plastic, film, or coating sits in direct or indirect contact with another material over time. A dye that migrates can bleed into adjacent layers, packaging contents, or surrounding surfaces, affecting both appearance and, in some cases, regulatory compliance. Molecular Weight and Migration. Solvent dyes with higher molecular weight and lower solubility in the contacting medium generally show better migration resistance. This matters most in multilayer plastic films or packaging structures, where dye movement between layers can show up as discoloration or staining over time. Testing Conditions. Migration behavior should be assessed under the temperature and humidity conditions the finished product will actually see. Results measured at room temperature do not reliably predict performance in warmer storage or transport environments, so testing under real-world conditions is essential before a grade is finalized. For packaging destined for food-contact applications, migration testing is typically benchmarked against established frameworks such as the EU regulation on plastic materials intended for food contact. Colorants generally fall outside that regulation’s specific substance list, but they are still subject to its general safety requirements, so this remains a useful reference point when setting internal migration limits. Solvent Dye Selection by Application Once solubility, heat, light, and migration requirements are defined, the right solvent dye also depends on the specific application it will be used in. Plastics In plastics processing, common resins include polystyrene, ABS, acrylics, polycarbonate, and PET. Solvent dyes deliver transparent, uniform coloring that pigments cannot always match, especially in clear or lightly tinted parts. Printing Inks For flexographic, gravure,

Explore More »
Yellow, red, and blue nylon swatches representing a compatible trichromatic acid dye set.

Trichromatic Acid Dye Selection for Consistent Nylon Shades

Table of Contents Understanding Strike Rate Factors Influencing Strike Rate Matching Strike Rates in a Combination The Role of pH in Dye Uptake pH Ranges by Dye Class Controlling pH During Dyeing Trichromatic Selection Principles Choosing Compatible Yellow, Red, Blue Typical Trichromatic Acid Dye Combinations for Nylon Light Shade Trichromatic Combination Deep Shade Trichromatic Combination Migration and Buildup Properties Avoiding Shade Shift Practical Recipe Guidelines Lab Trial Checklist FAQs What causes uneven dyeing with acid dyes on nylon? How does pH control affect reproducibility? What makes a trichromatic combination reliable? Nylon dyeing rewards precision. Acid dyes bond well with polyamide fibers, but shade consistency depends on how closely strike rate, pH, and trichromatic combinations are controlled together. A small mismatch in any one variable can shift a shade off standard, even when the recipe looks correct on paper. This article breaks down the practical factors that keep acid dye combinations compatible on nylon. Understanding Strike Rate Strike rate describes how quickly a dye moves from the bath onto the fiber. On nylon, this speed depends on dye structure, temperature ramp, and the number of available dye sites on the substrate. A dye with a fast strike rate can produce uneven color if it exhausts before the bath fully penetrates the goods, particularly on tightly constructed knits or dense yarns. Factors Influencing Strike Rate Three variables have the greatest effect on how fast a given acid dye takes up on nylon: Molecular size and structure: smaller, more mobile molecules tend to migrate and level more readily, while larger or more linear structures strike faster but migrate less once fixed. Electrolyte concentration: higher salt levels in the bath slow strike by increasing ionic competition at the fiber surface, which can help leveling but may reduce total exhaustion if not balanced correctly. Temperature ramp speed: a ramp that heats too quickly gives the dye little time to migrate before fixation, raising the risk of streaks or tailing on the goods. Matching Strike Rates in a Combination When combining dyes for a shade, each component should have a comparable strike rate. If one dye in a mix strikes noticeably faster than the others, it dominates the early stages of dyeing and shifts the shade as the bath progresses. This is one of the most common causes of reproducibility problems in nylon dyehouses, especially when recipes are adjusted without checking how the new combination behaves as a system rather than as individual dyes. The Role of pH in Dye Uptake Acid dyes require an acidic bath to bond effectively with the amine groups on nylon fiber. pH does more than set the chemical environment; it also governs how fast dye uptake occurs and how much correction is possible once dyeing has started. pH Ranges by Dye Class Different acid dye classes are formulated to perform within specific pH windows. Working outside that window changes uptake speed and can affect fastness properties. Dye Class Typical pH Range Uptake Behavior Leveling acid dyes pH 5 to 6 Slower strike, good migration, easier to correct Milling acid dyes pH 4.5 to 5.5 Moderate strike, less forgiving on unlevel dyeing Metal complex acid dyes pH 4 to 5 Faster strike, stronger fastness, tighter process control needed These ranges are starting references. Actual performance depends on the specific dye grade, liquor ratio, and machine type, so lab confirmation on the intended substrate remains necessary before scaling to bulk. Controlling pH During Dyeing Holding pH steady throughout the cycle matters as much as setting the correct starting point. A pH that drifts upward during dyeing slows uptake and can leave the shade pale or uneven, while a sharp early drop can cause the dye to strike too fast for proper migration. Buffering systems and controlled acid addition keep the bath within range from start to finish. Leveling agents and buffering auxiliaries formulated for pH and strike control help stabilize uptake speed across different fabric constructions and machine conditions, particularly on constructions prone to rapid initial strike. Trichromatic Selection Principles Trichromatic dyeing uses a yellow, red, and blue dye to build a wide range of shades from a small working palette. Compatibility across these three dyes determines how predictable the resulting shades will be, both in the lab and in bulk. Choosing Compatible Yellow, Red, Blue A workable trichromatic set should share similar strike rates, similar pH sensitivity, and comparable migration behavior. Mismatched components can produce shade drift between lab dips and production batches, even when the total dye concentration is correct. The Skyacido Acid Dyes, formulated specifically for polyamide dyeing, offers a wide shade gamut with strong inter-shade combinability, which supports matching yellow, red, and blue components as a coordinated set rather than selecting each color independently based on shade alone. The table below outlines what to check across each primary when building a trichromatic set: Component Strike Rate Check pH Sensitivity Migration Behavior Yellow Compare exhaustion curve against red and blue Note shift point where uptake accelerates Confirm redistribution at hold temperature Red Compare exhaustion curve against yellow and blue Note shift point where uptake accelerates Confirm redistribution at hold temperature Blue Compare exhaustion curve against yellow and red Note shift point where uptake accelerates Confirm redistribution at hold temperature Running this comparison during lab dip development, rather than after a bulk batch shows shade drift, catches mismatches while they are still inexpensive to correct. Typical Trichromatic Acid Dye Combinations for Nylon In practical nylon dyeing, trichromatic combinations are usually selected according to shade depth, buildup requirement, and compatibility between dyes. Different combinations may be required for light shades and deep shades to maintain balanced exhaustion, migration, and shade reproducibility. Light Shade Trichromatic Combination For light and medium shades, dyes with good migration performance and moderate strike behavior are preferred to achieve excellent leveling and shade correction ability. A typical light shade combination may include: Trichromatic Position Example Acid Dye Yellow Skyacido Yellow 199 Red Skyacido Red 337 Blue Skyacido Blue 324 This combination provides good compatibility and is

Explore More »
2. Low-temperature soaping leaves clearer wash liquor and less staining on adjacent white cotton strips.

Reactive Dye Soaping Guide: Better Wash Fastness, Less Back-Staining

Table of Contents What Is Reactive Dye Soaping Role in the Wash-Off Stage Why Unfixed and Hydrolyzed Dye Must Be Removed How Soaping Affects Wash Fastness Removing Hydrolyzed Dye from the Fiber Surface Connection Between Soaping and Fastness Ratings What Causes Back-Staining? Common Sources of Back-Staining Fabrics and Blends Most at Risk Key Process Parameters for Effective Soaping Temperature and Time Liquor Ratio Water Hardness and Sequestering Agents Choosing the Right Soaping Agents Anionic and Nonionic Soaping Agents Matching Agents to Fiber and Shade Depth Low-Temperature Soaping Agent Option: Sylic D2705 Key Benefits Recommended Application Performance Comparison Soaping Process Methods Cold Wash and Hot Wash Sequence One-Bath vs Multi-Step Soaping Role of Fixing Agents After Soaping Best Practices for Consistent Wash Fastness Results FAQs How long should reactive dye soaping take? Can back-staining be fixed after it happens? Does hard water affect soaping performance? Is a separate fixing agent always necessary after soaping? Reactive dye soaping is often treated as a quick step at the end of the dyeing cycle, but it has a direct effect on wash fastness and back-staining outcomes. Getting temperature, time, and agent selection right prevents costly rejects and repeat orders that eat into margins. What Is Reactive Dye Soaping Role in the Wash-Off Stage Soaping takes place after fixation, once the reactive dye has bonded to the fiber under alkaline conditions. Fabric is washed at or near boiling temperature with a detergent or specialty soaping agent to strip away everything that never formed a permanent bond with the fiber. Skipping or shortening this step leaves wash-off incomplete, and the fabric carries a hidden fastness risk that will not surface until later testing or, worse, after it reaches the customer. Why Unfixed and Hydrolyzed Dye Must Be Removed A portion of reactive dye always hydrolyzes in the dyebath instead of reacting with the fiber. Hydrolyzed dye sits loosely on the fabric surface, held only by weak physical attraction rather than a covalent bond. Left in place, it rubs off during handling, bleeds during laundering, and transfers onto lighter fabrics in the same wash load. Soaping is the step designed specifically to remove this residue before it becomes a fastness problem. How Soaping Affects Wash Fastness The quality of soaping determines much of what shows up later in fastness testing. A batch that looks correct on the shade card can still fail to wash or rub fastness if this step was rushed. Removing Hydrolyzed Dye from the Fiber Surface Effective soaping keeps loosened dye suspended in the wash liquor instead of letting it settle back onto the fabric. How completely this happens depends on agitation, liquor ratio, and the dispersing strength of the detergent or soaping agent used. Connection Between Soaping and Fastness Ratings Wash and rub fastness ratings, most commonly evaluated using AATCC colorfastness test methods, largely reflect how much unfixed dye remains after wash-off. A fabric can pass an initial shade check on the lab dip and still fail fastness testing on the bulk batch if soaping ran too briefly or at too low a temperature. What Causes Back-Staining? Common Sources of Back-Staining Back-staining happens when dye that has washed off the dyed fabric redeposits onto undyed or lighter areas in the same bath. The most common causes include: Overloaded soaping baths carrying more hydrolyzed dye than the liquor can hold Insufficient rinsing between soaping and finishing steps Soaping agents with weak dispersing power, which allow free dye particles to settle back onto the fabric Uneven liquor circulation, which creates localized zones of high dye concentration Fabrics and Blends Most at Risk Deep and dark shades generate the highest load of hydrolyzed dye and are the most frequent source of back-staining complaints. Blended fabrics, and any load that mixes dyed and undyed components, are particularly vulnerable, since redeposited dye is far more visible on the lighter portion of the fabric. Key Process Parameters for Effective Soaping Most causes of poor fastness and back-staining trace back to how tightly these three parameters are controlled. Temperature and Time Soaping typically runs at or close to boiling point for five to fifteen minutes, though the ideal combination depends on shade depth and fabric construction. Running the bath too cool slows dye removal, and cutting the time short leaves hydrolyzed dye behind even at the correct temperature. Shade depth Soaping temperature Typical time Light to medium 90 to 95°C 5 to 8 minutes Deep and dark Near boiling (98 to 100°C) 10 to 15 minutes Turquoise and problem shades Near boiling, multi-bath 15 minutes or more per bath This near-boiling range applies to conventional soaping agents. Low-temperature soaping agents are formulated to work effectively at 60 to 80°C instead, cutting energy use without giving up fastness performance (see the Sylic D2705 section below).  Liquor Ratio A tighter liquor ratio concentrates hydrolyzed dye in a smaller volume of water, which increases the risk of redeposition before it can be flushed out. Mills running jet or overflow machines at lower liquor ratios should compensate with stronger dispersing agents or an added rinse cycle. Water Hardness and Sequestering Agents Calcium, magnesium, and iron in the water supply interfere with soaping agent performance and can leave a hazy or uneven finish. A sequestering agent, such as Sylic P1501B, an anionic chelating dispersant with a pH of 2.5 to 4.0 in a 1% solution, binds these ions before soaping begins and lets the soaping agent perform as intended. Choosing the Right Soaping Agents Anionic and Nonionic Soaping Agents Anionic soaping agents are widely used for their strong dispersing action, while nonionic types perform better in hard water and at lower temperatures. Both types are available within a dyeing auxiliary range formulated for stability in alkaline baths and low-foam performance in jet machines. Matching Agents to Fiber and Shade Depth Cotton and other cellulosic fibers generally respond well to anionic soaping agents. Blends containing synthetic fibers may need a nonionic option instead, to avoid staining the more sensitive synthetic component. Deeper shades typically call

Explore More »

Reduction Clearing in Polyester Dyeing: A Complete Guide

Table of Contents What Is Reduction Clearing? Definition and Purpose Role in Disperse Dyeing Impact on Colorfastness Common Quality Complaints When Reduction Clearing Is Needed Dark and Medium Shades High Dye Concentration Recipes Blends with Cellulosic Fibers When It Can Be Skipped Process and Control Typical Recipe and Parameters Controlling Temperature and pH Avoiding Over-Reduction or Under-Reduction Rinsing and Neutralization Choosing the Right Reducing Agents Sodium Hydrosulfite Sulfur-Free Reducing Agents Low-Temperature and Sustainable Options High Wash Fastness Dyes to Reduce Clearing Load Troubleshooting Common Issues Poor Wash Fastness After Clearing Shade Change or Dulling Conclusion FAQs What Happens If You Skip It? Reduction Clearing vs Normal Washing? Can It Be Done at Low Temperature? Hydrosulfite vs Sulfur-Free Agents? A batch that looks perfect on the machine can still fail a wash fastness test days later. More often than not, the cause is unfixed disperse dye left on the fiber surface, and the fix is reduction clearing. This guide covers when the step is necessary, the chemistry behind it, and how to keep results consistent from lab dip to bulk production. What Is Reduction Clearing? Definition and Purpose Reduction clearing is a post-dyeing treatment that removes disperse dye which has not penetrated or fixed onto polyester fibers. During high temperature dyeing, some dye molecules remain on the fiber surface instead of diffusing into the polymer structure. Left untreated, this residual dye rubs off and bleeds during washing, lowering overall color fastness. A reduction clearing bath breaks down and strips away the surface dye, leaving only the dye that has properly fixed inside the fiber. Role in Disperse Dyeing Reduction clearing takes place at the end of the disperse dyeing cycle, after the main dyeing stage and before final rinsing. It is one part of a larger polyester dyeing workflow that also includes pretreatment, dyeing, and finishing. The polyester dyeing application solutions page outlines how these stages connect, along with recommended auxiliaries for each step. Impact on Colorfastness Wash and rub fastness are among the specifications buyers check most closely before accepting a shipment. Surface dye that has not been cleared is loosely bound and washes out easily, which is precisely what standardized tests such as AATCC’s laundering fastness methods are designed to detect. A properly executed reduction clearing step improves these results by removing the dye that would otherwise cause a failed test. Common Quality Complaints Mills that skip or under-perform reduction clearing tend to see a recurring pattern of issues: Color bleeding onto lighter garments in the same wash load Staining on packaging or trims during transport and storage Dull or hazy shades compared to the approved lab dip Rejected shipments after failed fastness testing at the buyer’s lab These problems are almost always traceable to residual disperse dye rather than a flaw in the dye recipe itself, which is why reduction clearing deserves the same attention as the dyeing stage it follows. When Reduction Clearing Is Needed Dark and Medium Shades Darker and medium depth shades require higher dye concentrations, which naturally leaves more unfixed dye on the fiber surface. The Skycron disperse dyes range covers both dyeing and printing applications across dark, medium, and vivid shades, and pairing these dyes with a proper reduction clearing step is standard practice for reaching acceptable fastness at these heavier depths. High Dye Concentration Recipes Any recipe with a high total dye percentage on weight of fabric (% o.w.f.) benefits from reduction clearing, not only dark shades. As a general reference, mills commonly group shade depth this way: Shade Depth Typical Dye Concentration Reduction Clearing Light Below 1% o.w.f. Often optional Medium 1 to 3% o.w.f. Recommended Dark Above 3% o.w.f. Required These figures are a general guide rather than a fixed rule, since dye class, fiber blend, and fastness targets all shift the threshold. Multi-dye combinations used for precise custom shades fall into this same logic, as several dye classes combined can leave behind varying amounts of surface residue even at a moderate total percentage. Blends with Cellulosic Fibers Polyester-cotton and polyester-viscose blends add another layer of risk. Disperse dye that has not fixed to the polyester portion can stain the cellulosic fiber, causing an unwanted tone shift across the fabric. Reduction clearing protects the intended contrast or solid shade across both fiber types. When It Can Be Skipped Very light shades with low dye loading sometimes do not require a full reduction clearing cycle, particularly when high-exhaustion dyes and well-controlled dyeing conditions are used, and a simple hot wash can be enough. Skipping the step should still be a deliberate decision based on shade depth and fastness requirements, not a shortcut taken to save time. Process and Control Typical Recipe and Parameters A standard alkaline reduction clearing bath includes a reducing agent, caustic soda or soda ash, and a wetting or dispersing agent. Sulfur-free acid-clearing systems, which run at a lower pH, are increasingly used as an alternative. A general starting point looks like this: Parameter Typical Range Reducing agent 2 to 4 g/L Alkali (NaOH or soda ash) 2 to 4 g/L Temperature 70 to 80°C Time 15 to 20 minutes Liquor ratio 1:8 to 1:15 These figures vary by shade depth, dye class, and fiber blend, so lab trials should confirm the final recipe before scaling to bulk. Controlling Temperature and pH Temperature and pH are the two variables that most affect clearing efficiency: Too cool or too brief: residual dye is left behind, and fastness suffers. Too hot or too alkaline: the polyester surface or hand feel can be affected. Most conventional recipes target a mildly alkaline pH between 9 and 11. Acid-based sulfur-free systems instead work in a neutral to mildly acidic range, depending on the product used, so the pH target should always match the chemistry selected rather than a single fixed rule. Avoiding Over-Reduction or Under-Reduction Under-reduction leaves surface dye behind, which shows up later as poor fastness. Over-reduction strips properly fixed dye from the fiber, causing shade loss, dulling, or an uneven

Explore More »

Contact Us for Textile Auxiliaries and Dyes

Contact Skychem Group for more chemical solutions, If you have questions or need more information, please contact us.
We will respond within 24 hours

Get a project quote

Please tell us the requirements, the country and the application.

Scroll to Top
Email WhatsApp

Contact Us for Textile Auxiliaries and Dyes

Contact Skychem Group for more chemical solutions, If you have questions or need more information, please contact us.
We will respond within 24 hours