Contact Skychem Group for more chemical solutions, If you have questions or need more information, please contact us.
Respond within 24 hours

Sequestering Agents in Textile Dyeing: What They Do, When to Use, and How to Dose?

Sequestering agents are a critical but often overlooked part of textile wet processing. Used correctly, they protect dye baths, improve shade consistency, and help prevent costly rework across pre-treatment, dyeing, and finishing.

What Is a Sequestering Agent?

Definition and Function

A sequestering agent is a chemical compound that binds to metal ions in process water and neutralizes their reactivity — capturing unwanted ions such as calcium, magnesium, iron, and copper before they interfere with dyes, bleaching agents, or other auxiliaries.

How Chelation Works

Most sequestering agents work through chelation: a molecule with multiple bonding sites wraps around a metal ion, forming a stable, soluble complex that remains inert in solution. The captured ions can no longer cause precipitation, interfere with dye solubility, or damage fiber surfaces.

Binding strength is expressed as a stability constant, or log K. The higher the value, the more tightly the agent holds the metal ion under demanding process conditions.

Why Metal Ions Are a Problem in Dyeing

Common Metal Ion Contaminants in Process Water

Most textile mills draw water from municipal supplies, wells, rivers, or recycled sources, and even treated water carries dissolved mineral content. The most common problematic ions are:

  • Calcium and magnesium: The primary cause of water hardness. They react with soaps, surfactants, and dye anions to form insoluble precipitates.
  • Iron: Present in well water, old pipework, and recycling systems. Even trace amounts are damaging, as iron catalyzes hydrogen peroxide decomposition and causes shade shifts, particularly in reactive and vat dyeing.
  • Copper and manganese: Less common but capable of significant shade deviation, especially in pastel or bright shades.
  • Trace heavy metals: Zinc, nickel, and chromium may appear in recycled or industrial water and can disrupt dye chemistry.

Water hardness is expressed in ppm CaCO₃ or German degrees of hardness (°dH). For reference, 1 mmol/L ≈ 100 ppm CaCO₃ ≈ 5.6 °dH, a conversion that is useful when cross-referencing international laboratory reports or European standards. Even moderately hard water at 150 to 200 ppm CaCO₃ can produce visible dyeing problems if left untreated.

Impact on Dyeing Quality

Metal ion effects on dyeing quality fall into two distinct categories, each operating through different mechanisms.

Hardness ions (calcium and magnesium) reduce dye solubility at elevated temperatures and compete with dye molecules at the fiber surface, lowering exhaustion efficiency and causing uneven distribution. They also react with anionic dyes and surfactants to form insoluble soaps and precipitates that can deposit on the fabric surface and impair further processing.

Transition metals (iron and copper) cause more chemically specific disruptions. Iron is particularly aggressive: in hydrogen peroxide bleaching, it catalyzes Fenton-type reactions that accelerate peroxide decomposition, causing inconsistent whiteness and, in severe cases, fiber damage. During dyeing, it forms complexes with dye molecules, causing shade shifts or precipitates in the bath. Copper presents similar risks: in reactive dyeing it weakens the dye-fiber bond and reduces wash fastness; in vat dyeing, trace copper slows the reduction process and leads to incomplete dye development.

Left uncontrolled, metal ion contamination results in:

  • Unlevel dyeing: Uneven dye distribution visible as streaks, patches, or tonal variation.
  • Shade deviation: The final color does not match the target, particularly when iron or copper forms complexes with dye chromophores.
  • Reduced color fastness: Poorly bonded dye releases more easily during washing or rubbing.
  • Fabric damage: Iron-catalyzed peroxide decomposition can cause tendering or holes in cellulosic fibers during bleaching.
  • Higher re-dyeing rates: Off-shade batches and second-quality output raise both cost and water consumption.

Types of Sequestering Agents

Sequestering agents used in textile processing are not a single chemical family. They differ in chelation strength, pH stability, temperature resistance, and environmental profile.

Phosphonate-Based Sequestering Agents

Phosphonate-based agents are among the most widely used in textile wet processing. They form strong complexes with calcium, magnesium, iron, and heavy metals across a wide pH range and at high temperatures. Key characteristics include excellent stability in alkaline baths, reliability at high temperatures, effectiveness at low dosages, and good threshold inhibition — meaning they prevent scale formation even at sub-stoichiometric doses.

One trade-off is that phosphonate agents contain phosphorus, which contributes to eutrophication in wastewater. Regulatory pressure on phosphorus is increasing in several regions, pushing some mills toward phosphorus-free alternatives.

Polycarboxylate Sequestering Agents

Polycarboxylate agents are generally more environmentally acceptable than phosphonate types: they are more biodegradable and do not contribute phosphorus to wastewater. Their chelation strength for calcium and magnesium is comparable to phosphonate types at moderate hardness levels, while their capacity for iron and copper is generally lower.

Modern high-molecular-weight polycarboxylates have improved iron sequestering capability compared to earlier formulations; however, their stability under high-temperature and strongly alkaline conditions remains lower than that of phosphonate-based agents, which is an important consideration when selecting a product for scouring or bleaching baths. Many also provide dispersing action alongside sequestering, making them useful in combined auxiliary formulations.

Polycarboxylates are a common active ingredient in eco-label-certified products and are increasingly specified by mills working toward ZDHC MRSL compliance or OEKO-TEX certification.

ZDHC Skychem Group

EDTA, DTPA, and NTA at a Glance

EDTA, DTPA, and NTA belong to the aminopolycarboxylate family and are the most technically discussed sequestering agents in textile chemistry. Each differs in chelation strength, stability, and environmental profile:

Agent Chelation Strength Best Use Stage Biodegradability Key Consideration
EDTA Medium General dyeing and pre-treatment Low Slow environmental degradation
DTPA Strongest Iron-sensitive and high-temperature dyeing Low Higher unit cost
NTA Moderate Pre-treatment and scouring Higher Regulated in some markets; chelating properties can remobilize heavy metals bound in sediment or sludge, increasing their environmental bioavailability. Compliance with local regulations is required before use. 

EDTA is the most widely used general-purpose option. DTPA offers stronger control over iron and copper and is preferred for sensitive shades or high-temperature processes. NTA is more economical and biodegrades more readily, but is subject to restrictions in some regions because its chelating properties can remobilize heavy metals that are otherwise bound in sediment or treatment sludge, increasing their environmental bioavailability. Mills should verify applicable local regulations before selecting NTA-based products.

Sylic® Sequestering Agents are formulated specifically for textile wet processing, with options covering pre-treatment, dyeing, and washing-off stages. Each product is developed to perform reliably under the pH, temperature, and chemical conditions typical of industrial dyeing operations.

One example is Sylic® P1500A, a dispersing sequestering agent in powder form suitable for pre-treatment, soaping, and post-dyeing washing across a variety of fabric types. It helps prevent sedimentation during dyeing and finishing, with a recommended dosage of 0.5–1.5 g/L in continuous processes and 2.0–3.0 g/L in batch processes. In continuous processes where the liquor ratio is lower, the upper end of the dosage range may be warranted when metal ion concentrations are elevated. In batch processes, the optimal dosage should be adjusted according to the actual liquor ratio and water hardness. Specific dosage in either case should be confirmed through water quality testing.

When to Use a Sequestering Agent?

Depending on water quality, fiber type, and process chemistry, sequestering agents may be needed at multiple points across the production line.

Pre-Treatment: Scouring and Bleaching

During scouring, hard water ions react with fatty acids and surfactants to form calcium or magnesium soaps that deposit on the fabric surface and impair dye uptake. In hydrogen peroxide bleaching, even a few ppm of free iron can catalyze uncontrolled peroxide decomposition, leading to inconsistent whiteness and, in severe cases, fiber tendering. Sequestering agents work alongside peroxide stabilizers to protect both the bleaching agent and the fiber.

Pre-treatment baths are typically alkaline at 60°C to 130°C, so the sequestering agent must be stable under high-pH, high-temperature conditions. Phosphonate-based types and specific polycarboxylates are well suited here.

Sylic® Pre-treatment Auxiliaries include sequestering agents engineered for stability in strongly alkaline, high-temperature scouring and bleaching baths, helping mills maintain consistent whiteness and fabric integrity from the first processing step.

During Dyeing: Reactive, Disperse, and Vat Dyes

In reactive dyeing of cotton, calcium and magnesium reduce dye solubility at higher temperatures, while iron shifts shade hue by forming complexes with the dye chromophore. The sequestering agent should be added before the dye to condition the water and keep the bath stable throughout exhaustion and fixation.

In disperse dyeing of polyester at high temperatures (120°C to 135°C), sequestering agents prevent hardness precipitation and maintain dispersant effectiveness. Supplemental dosing is often necessary when water hardness exceeds 150 ppm, even when built-in sequestering is present in the dye formulation.

In vat dyeing, iron and copper disrupt the reduction-oxidation chemistry that develops the dye inside the fiber. A sequestering agent keeps the reduction bath clean and consistent.

Sylic® Dyeing Auxiliaries include sequestering and leveling solutions compatible with reactive, disperse, vat, and other dye systems, designed to support stable exhaustion, even dye penetration, and reproducible shade results across different fiber types.

Washing Off and Finishing

Hard water ions during washing off can cause loose dye to re-deposit onto the fabric rather than rinse away, which is a common cause of poor rubbing fastness even when dyeing and fixation were sound. A small dose of sequestering agent in washing-off baths, particularly for reactive and vat dyeing, keeps unfixed dye in suspension and promotes a cleaner rinse.

The benefit of sequestering agents at the washing stage varies by dye class. For reactive dyes, they provide a useful supplementary role in keeping unfixed dye dispersed and preventing redeposition, but they do not replace dedicated washing-off auxiliaries formulated for reactive systems. For disperse dyes and thermosol dyeing processes, the contribution of a sequestering agent during washing is generally limited and may not justify routine addition. It is advisable to evaluate necessity based on the specific dye system and actual water quality before making it a standard step.

In finishing stages such as softening or functional treatment, sequestering agents are less commonly required but remain relevant when water is very hard or when the bath is sensitive to calcium or magnesium precipitation.

How to Dose Sequestering Agents?

Underdosing leaves residual metal ions free to cause problems. Overdosing wastes product and can occasionally interfere with bath chemistry. Getting the dose right depends on the specific conditions of each process stage.

Factors That Affect Dosage

  • Water hardness: The higher the total hardness (ppm CaCO₃ or °dH), the more sequestering agent is needed.
  • Iron and heavy metal content: Iron requires greater sequestering capacity per ppm than calcium or magnesium due to its stronger affinity for dye molecules and fiber surfaces.
  • Liquor ratio: A lower liquor ratio concentrates metal ions relative to water volume, requiring proportionally higher dosing.
  • Process stage: Pre-treatment baths require higher doses than dyeing or washing-off baths due to stronger alkalinity and higher temperatures.
  • Fiber and dye type: Cellulosic fibers and reactive or vat dyes are more sensitive to metal ion interference than synthetics or disperse dyes.
  • Product specifications: Active content and chelation capacity vary by product. Always refer to the technical datasheet for dosing guidance.

Dosage Reference: By Water Hardness and Process Stage

A practical starting point is to match the chelation capacity of the chosen agent to the measured metal ion load in the process water:

  1. Measure total water hardness (ppm CaCO₃) and iron content (ppm Fe) using a test kit or laboratory analysis.
  2. Check the product datasheet for the chelation value, typically expressed as mg CaCO₃ sequestered per gram of product.
  3. Calculate the dose needed to complex the measured hardness, then add a 20 to 30% safety margin for variability and additional metal contributors.

The table below provides indicative dose ranges by water hardness, assuming moderate iron levels. When dissolved iron in process water exceeds 1 ppm, increase the indicated dosage by 20 to 50%, particularly for reactive dyeing and hydrogen peroxide bleaching stages where even low iron concentrations can significantly affect shade consistency and bleaching performance.

Water Hardness Indicative Dose Range
Soft (0–100 ppm CaCO₃) 0.5–1.0 g/L
Moderate (100–250 ppm CaCO₃) 1.0–2.0 g/L
Hard (250–400 ppm CaCO₃) 2.0–3.0 g/L
Very Hard (>400 ppm CaCO₃) 3.0–5.0 g/L or above

Typical ranges by process stage are:

  • Scouring and bleaching: 1.0–3.0 g/L, added before or alongside the alkali and bleaching agent.
  • Dyeing bath: 0.5–1.5 g/L, added before the dye to condition the water first.
  • Washing off: 0.3–1.0 g/L, to prevent dye redeposition and ensure a clean rinse.

All figures are general guidance only. Always verify against the product datasheet and conduct bath trials before changing bulk production dosages.
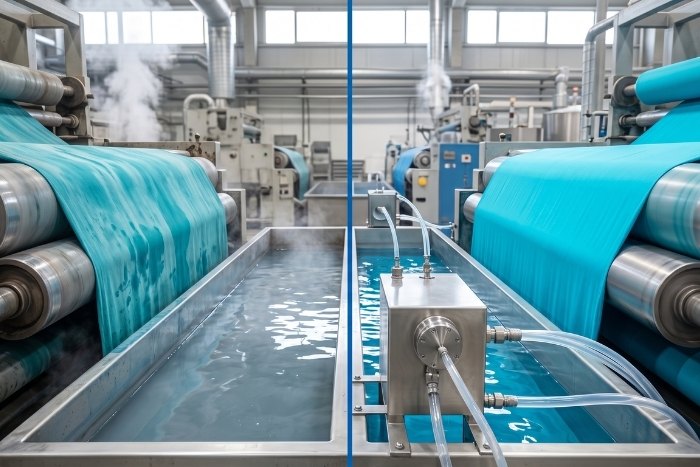
Common Dosing Mistakes to Avoid

Adding the sequestering agent after the dye: It should always go in before the dye. Once free metal ions have begun reacting with dye molecules, the damage to shade quality cannot be fully reversed.

Applying a fixed dose regardless of water quality: Water hardness can shift seasonally, especially in mills drawing from river or partially recycled sources. Regular testing and dose adjustment prevent both underperformance and unnecessary chemical spend.

Omitting iron from the dose calculation: Standard hardness titration kits measure calcium and magnesium but not iron. Since dissolved iron interferes with dyeing at far lower concentrations than calcium, a separate iron test is essential when shade consistency problems persist.

Assuming one product works across all stages: Some sequestering agents are stable only under alkaline conditions and may lose effectiveness in neutral or mildly acidic dyeing baths. Always check the pH stability range before applying a product across multiple stages.

Skipping sequestering in soft water areas: Seasonal variation, machine scale buildup, or recycled water contamination can introduce enough metal ions to affect results even in generally soft water areas. A consistent low-level dose provides a reliable buffer.

In Summary

Sequestering agents protect every wet-processing stage, from scouring through dyeing to washing off. By controlling metal ion interference, they stabilize dye baths, improve shade reproducibility, reduce re-dyeing rates, and protect fabric during bleaching. Effective use comes down to selecting the right agent type, adding it at the right stage and in the correct sequence, and dosing it based on actual water quality.

To get guidance on selecting the right sequestering agent for a specific process or to request a sample, contact Skychem.

FAQs

Can sequestering agents be used with all dye classes?

Yes. Sequestering agents are compatible with all major dye classes, including reactive, disperse, vat, acid, and direct dyes. The product type and timing of addition should match the dye class and bath conditions. For example, an agent used in alkaline reactive dyeing must be stable at high pH, while one used in acid dyeing of nylon must remain effective at lower pH values. Always verify product compatibility with the target dye class before use.

Are phosphate-free sequestering agents as effective?

For most standard applications, yes. Phosphonate-based and polycarboxylate products without phosphate groups have improved significantly in recent years and can match or closely approach phosphate-based performance in scouring, bleaching, and dyeing. Some phosphate-free options may require slightly higher dosages at very high hardness levels or show reduced stability at extreme temperatures. Testing under actual process conditions is the most reliable way to confirm performance before switching.

How do I test water hardness before dosing?

A titration-based test kit is the simplest approach. It is widely available, inexpensive, and delivers a result in ppm CaCO₃ or °dH within a few minutes, making it suitable for routine monitoring on the mill floor. For a more complete analysis covering iron, manganese, and other trace metals, laboratory testing by an accredited service is recommended, particularly when persistent dyeing problems suggest contamination beyond standard hardness.


Related reading:

  1. EDTA vs DTPA vs NTA in Textile Dyeing
  2. Pretreatment Impacts on Fabric Quality
  3. Chemicals Used in Textile Dyeing

Sandy

With years of experience in chemical dyes and textile auxiliaries, I’m dedicated to sharing insights into the latest technologies, sustainable innovations, and market trends.

Recent Articles

Reduction Clearing in Polyester Dyeing: A Complete Guide

Table of Contents What Is Reduction Clearing? Definition and Purpose Role in Disperse Dyeing Impact on Colorfastness Common Quality Complaints When Reduction Clearing Is Needed Dark and Medium Shades High Dye Concentration Recipes Blends with Cellulosic Fibers When It Can Be Skipped Process and Control Typical Recipe and Parameters Controlling Temperature and pH Avoiding Over-Reduction or Under-Reduction Rinsing and Neutralization Choosing the Right Reducing Agents Sodium Hydrosulfite Sulfur-Free Reducing Agents Low-Temperature and Sustainable Options High Wash Fastness Dyes to Reduce Clearing Load Troubleshooting Common Issues Poor Wash Fastness After Clearing Shade Change or Dulling Conclusion FAQs What Happens If You Skip It? Reduction Clearing vs Normal Washing? Can It Be Done at Low Temperature? Hydrosulfite vs Sulfur-Free Agents? A batch that looks perfect on the machine can still fail a wash fastness test days later. More often than not, the cause is unfixed disperse dye left on the fiber surface, and the fix is reduction clearing. This guide covers when the step is necessary, the chemistry behind it, and how to keep results consistent from lab dip to bulk production. What Is Reduction Clearing? Definition and Purpose Reduction clearing is a post-dyeing treatment that removes disperse dye which has not penetrated or fixed onto polyester fibers. During high temperature dyeing, some dye molecules remain on the fiber surface instead of diffusing into the polymer structure. Left untreated, this residual dye rubs off and bleeds during washing, lowering overall color fastness. A reduction clearing bath breaks down and strips away the surface dye, leaving only the dye that has properly fixed inside the fiber. Role in Disperse Dyeing Reduction clearing takes place at the end of the disperse dyeing cycle, after the main dyeing stage and before final rinsing. It is one part of a larger polyester dyeing workflow that also includes pretreatment, dyeing, and finishing. The polyester dyeing application solutions page outlines how these stages connect, along with recommended auxiliaries for each step. Impact on Colorfastness Wash and rub fastness are among the specifications buyers check most closely before accepting a shipment. Surface dye that has not been cleared is loosely bound and washes out easily, which is precisely what standardized tests such as AATCC’s laundering fastness methods are designed to detect. A properly executed reduction clearing step improves these results by removing the dye that would otherwise cause a failed test. Common Quality Complaints Mills that skip or under-perform reduction clearing tend to see a recurring pattern of issues: Color bleeding onto lighter garments in the same wash load Staining on packaging or trims during transport and storage Dull or hazy shades compared to the approved lab dip Rejected shipments after failed fastness testing at the buyer’s lab These problems are almost always traceable to residual disperse dye rather than a flaw in the dye recipe itself, which is why reduction clearing deserves the same attention as the dyeing stage it follows. When Reduction Clearing Is Needed Dark and Medium Shades Darker and medium depth shades require higher dye concentrations, which naturally leaves more unfixed dye on the fiber surface. The Skycron disperse dyes range covers both dyeing and printing applications across dark, medium, and vivid shades, and pairing these dyes with a proper reduction clearing step is standard practice for reaching acceptable fastness at these heavier depths. High Dye Concentration Recipes Any recipe with a high total dye percentage on weight of fabric (% o.w.f.) benefits from reduction clearing, not only dark shades. As a general reference, mills commonly group shade depth this way: Shade Depth Typical Dye Concentration Reduction Clearing Light Below 1% o.w.f. Often optional Medium 1 to 3% o.w.f. Recommended Dark Above 3% o.w.f. Required These figures are a general guide rather than a fixed rule, since dye class, fiber blend, and fastness targets all shift the threshold. Multi-dye combinations used for precise custom shades fall into this same logic, as several dye classes combined can leave behind varying amounts of surface residue even at a moderate total percentage. Blends with Cellulosic Fibers Polyester-cotton and polyester-viscose blends add another layer of risk. Disperse dye that has not fixed to the polyester portion can stain the cellulosic fiber, causing an unwanted tone shift across the fabric. Reduction clearing protects the intended contrast or solid shade across both fiber types. When It Can Be Skipped Very light shades with low dye loading sometimes do not require a full reduction clearing cycle, particularly when high-exhaustion dyes and well-controlled dyeing conditions are used, and a simple hot wash can be enough. Skipping the step should still be a deliberate decision based on shade depth and fastness requirements, not a shortcut taken to save time. Process and Control Typical Recipe and Parameters A standard alkaline reduction clearing bath includes a reducing agent, caustic soda or soda ash, and a wetting or dispersing agent. Sulfur-free acid-clearing systems, which run at a lower pH, are increasingly used as an alternative. A general starting point looks like this: Parameter Typical Range Reducing agent 2 to 4 g/L Alkali (NaOH or soda ash) 2 to 4 g/L Temperature 70 to 80°C Time 15 to 20 minutes Liquor ratio 1:8 to 1:15 These figures vary by shade depth, dye class, and fiber blend, so lab trials should confirm the final recipe before scaling to bulk. Controlling Temperature and pH Temperature and pH are the two variables that most affect clearing efficiency: Too cool or too brief: residual dye is left behind, and fastness suffers. Too hot or too alkaline: the polyester surface or hand feel can be affected. Most conventional recipes target a mildly alkaline pH between 9 and 11. Acid-based sulfur-free systems instead work in a neutral to mildly acidic range, depending on the product used, so the pH target should always match the chemistry selected rather than a single fixed rule. Avoiding Over-Reduction or Under-Reduction Under-reduction leaves surface dye behind, which shows up later as poor fastness. Over-reduction strips properly fixed dye from the fiber, causing shade loss, dulling, or an uneven

Explore More »
C0 vs. C6 Water Repellent Finishes

C0 vs. C6 Water Repellent Finishes: Which One Fits Your Textiles?

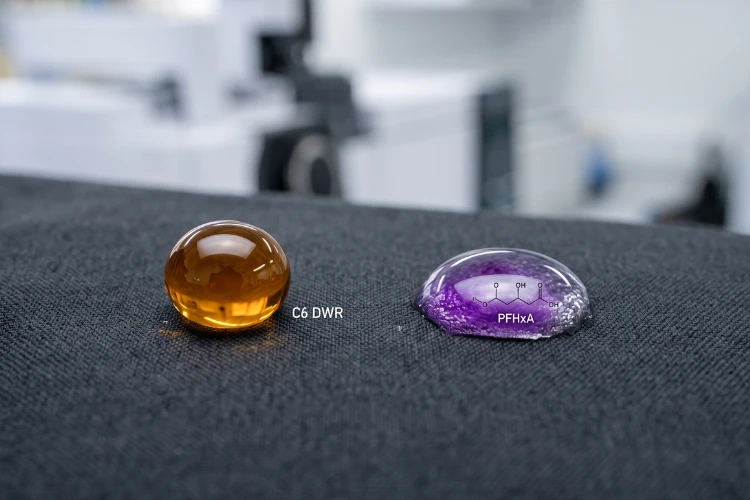
Table of Contents The Chemistry Behind C0 and C6 What is C6 DWR What is C0 DWR Key Structural Differences Performance Comparison Water and Oil Repellency Durability and Wash Resistance Breathability and Hand Feel Global Regulatory Landscape REACH and EU Restrictions US State Regulations Brand and Retailer Requirements Use Cases by Industry Outdoor and Sportswear Workwear and Protective Textiles Home Textiles and Upholstery Choosing the Right Finish Key Factors to Consider Testing and Certification Tips Conclusion FAQs What is the difference between C0 and C6 finishes? Is C6 DWR banned? Does C0 perform as well as C6? How do I choose between C0 and C6? Ask a fabric supplier for a water-repellent finish today, and there is a good chance you will get two very different answers: C6, or C0. Both claim to keep fabric dry. Only one is currently facing phase-out pressure from regulators in the EU, California, and New York, and from major apparel brands. For buyers sourcing water-repellent textiles right now, the choice is no longer just about performance. It is about which chemistry will still be sellable in your target market two years from now. The Chemistry Behind C0 and C6 What is C6 DWR C6 durable water repellent (DWR) finishes use short-chain fluorocarbon polymers, specifically six-carbon fluorinated side chains, to coat individual fibers. This chemistry lowers the surface energy of the fiber to roughly 12 mJ/m², which is below the surface tension of most water and oils. As a result, C6 finishes deliver both water and oil repellency, a combination that few fluorine-free systems can fully match. C6 chemistry replaced older C8 fluorotelomer finishes over a decade ago. C8 degrades into PFOA, a substance known for being persistent and bioaccumulative in the environment. C6 degrades into perfluorohexanoic acid (PFHxA) instead, which has a shorter environmental half-life and lower bioaccumulation potential. However, PFHxA is not free of regulatory scrutiny, as covered in the compliance section below. For buyers sourcing C6 products, formulations such as the Skyguard C6-C8 Waterproofer combine water and oil resistance with good wash fastness on both cellulose and synthetic fibers, applied at typical dosages of 10 to 40 g/L, and are produced without PFOS, PFOA, or APEO. What is C0 DWR C0 refers to fluorine-free water repellent chemistry. Instead of fluorocarbon side chains, C0 finishes rely on dendrimer, wax, or polyurethane-based polymers to build a hydrophobic fiber surface. These systems typically reach a surface energy of 20 to 25 mJ/m², which is sufficient to repel water effectively but generally not enough to provide strong oil repellency. Demand for C0 finishes is growing quickly because they carry no PFAS-related compliance risk, a factor that matters more each year as regulatory scope widens. Ranges such as the Skyguard Fluorine-free Waterproofer line are applied at roughly 10 to 80 g/L depending on the durability required, contain no APEO, and are built for fabrics where oil repellency is not a functional requirement, including most outerwear, home textiles, and fashion applications. Key Structural Differences Attribute C6 (Fluorocarbon) C0 (Fluorine-Free) Surface energy Approx. 12 mJ/m² Approx. 20 to 25 mJ/m² Water repellency Excellent Good to excellent Oil repellency Yes Limited or none PFAS content Present (PFHxA-based) None Typical curing temperature 150 to 160°C 160 to 180°C Performance Comparison Water and Oil Repellency C6 finishes remain the benchmark wherever oil, grease, or organic stain resistance is needed alongside water repellency, such as workwear exposed to machine oils or food-contact aprons. C0 finishes have closed most of the gap on pure water repellency, with many recent formulations achieving results comparable to C6 under standardized water resistance testing. On oil-based stains, however, C0 finishes still fall short. Durability and Wash Resistance Both chemistries rely on physical adsorption when first applied to the fabric, and this bond weakens progressively with repeated laundering and detergent exposure. A crosslinking agent extends wash durability by binding DWR polymer chains to each other and to reactive groups on the fiber surface, converting a loosely adsorbed coating into a chemically anchored one. The Sylic Cross-linking Agent, for example, is dosed in the same bath at 10 to 30 percent of the water repellent quantity, contains no APEO, PFOA, PFOS, or formaldehyde, and is compatible with both C6 and fluorine-free systems, making it a practical add-on when a finish needs to withstand 20 or more industrial or home wash cycles. Breathability and Hand Feel Both C0 and C6 finishes coat the fiber surface rather than filling the pore spaces between yarns, so breathability is generally preserved at correct application levels. Two factors most often compromise this balance: Overdosing the finish, which can partially block inter-yarn porosity and stiffen the fabric hand Uneven bath concentration, which creates localized high-add zones across the fabric width C0 finishes sometimes require slightly higher application levels to match C6 water repellency, which makes dosing accuracy and bath uniformity especially important for maintaining a soft, breathable result. Global Regulatory Landscape REACH and EU Restrictions The EU regulates PFAS in textiles under REACH Annex XVII. A restriction on PFHxA, the degradation product of C6 chemistry, takes effect in the EU and EEA from 2026, and a broader restriction covering the wider PFAS family is currently under evaluation by the European Chemicals Agency. Buyers and brands sourcing for the EU market should treat C6 as a chemistry under increasing regulatory pressure rather than a long-term safe option, and should monitor ECHA’s PFAS regulatory updates for the latest scope and timelines. US State Regulations Regulation is not limited to the EU. Two US states have already enacted PFAS restrictions specific to textiles and apparel: California AB 1817 bans the manufacture, distribution, and sale of new textile articles containing intentionally added PFAS above 100 ppm total organic fluorine as of January 1, 2025, dropping to 50 ppm from January 1, 2027. Outdoor apparel for severe wet conditions has an extension until January 1, 2028. The full requirements are set out in the official bill text. New York Environmental Conservation Law § 37-0121 prohibits the sale of new apparel

Explore More »
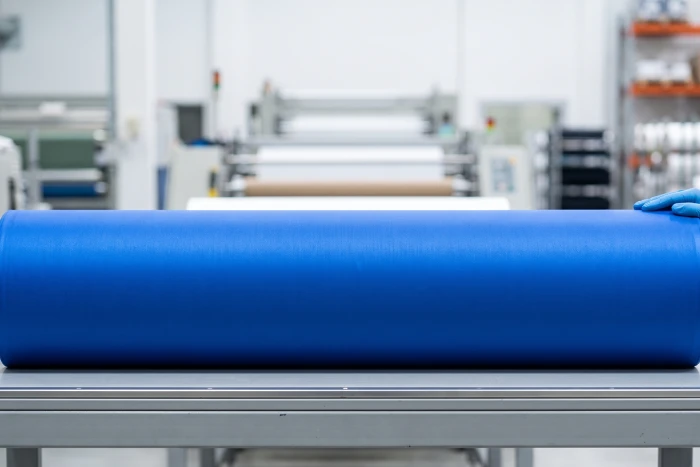
Finished royal blue nylon fabric roll.

Nylon Dyeing Defects: Causes and Process Fixes

Table of Contents Common Nylon Dyeing Defects Uneven Shade and Skitteriness Listing and Barre Ring, Tippy, and Frosty Effects The Three Levers Behind Every Defect pH Profile Heating Rate and Strike Zone Retarder Selection and Dosage Troubleshooting by Symptom Skychem Solutions for Nylon Dyeing FAQs What pH is best for nylon acid dyeing? Why does my nylon dye unevenly? How do retarders prevent uneven dyeing? What temperature should I dye nylon at? Nylon strikes fast. Acid dye bonds to its amino groups within minutes, so a slightly off process can lock in an uneven shade before it has any chance to level. Streaks, listing, barre, and a speckled, skittery surface on nylon almost always trace back to one of three controllable levers: pH, temperature, or the retarder system. This article covers how to recognize each defect and what to adjust in the process to prevent it from recurring. Common Nylon Dyeing Defects Naming a defect correctly is the first step toward fixing it. The three patterns below cover most of what shows up on nylon, and each one points to a different root cause. Uneven Shade and Skitteriness Uneven dyeing is the broad category: patches, blotches, or a shade that simply isn’t consistent across the fabric. Skitteriness is a more specific form of it, a speckled, grainy appearance where neighboring filaments take up dye at different rates. It is the clearest sign that the dye struck faster than the fiber could level out. Listing and Barre Listing is a side-to-center or selvage-to-middle shade difference across the width of the fabric. Barre appears as horizontal bars or streaks running with the courses or picks. What separates these two from skitteriness is the pattern: listing and barre follow a defined width-wise or length-wise direction, while skitteriness scatters at random. Ring, Tippy, and Frosty Effects Ring dyeing and tippy dyeing are related but distinct penetration faults, and it is worth telling them apart. Ring dyeing happens across the fiber’s cross-section: dye stays concentrated in the outer sheath and never fully diffuses to the core, so a cut filament shows a colored ring around a pale or white center even though the surface looks fully dyed. Tippy dyeing is a length-wise difference instead, where the tip of a filament or staple fiber picks up more, or less, dye than the body of the fiber, usually because the tip has a different heat history or surface condition than the rest of the fiber. Frosty effects show up as an overall pale, washed-out surface rather than a directional pattern. All three point back to the same underlying issue, dye that has not fully penetrated the fiber, even when the shade looks close to standard from a distance. The Three Levers Behind Every Defect Most nylon shade defects come down to pH, temperature, or the retarder system working against each other instead of together. Each lever below covers the mechanism, the typical failure mode, and the fix. pH Profile In an acidic bath, the amino groups at the ends of nylon’s polymer chains gain a proton and become positively charged, while the sulfonate groups on acid dye molecules carry a negative charge. The two attract and bond. pH determines how many of these sites are active, how fast the dye reaches them, and how firmly it holds once it does. The most common process error is lowering the bath pH too far or too soon. If the bath turns acidic before the goods are evenly wetted and circulating, the dye strikes in a rush and creates streaks or barre that no amount of time at temperature can correct. A pH that runs too high or drifts during the cycle has the opposite problem: weak exhaustion and shade depth that wanders from batch to batch. Different acid dye classes call for different pH windows: Leveling dyes: roughly pH 5.5 to 7.0, giving the dye room to migrate and self-correct Milling dyes  (a classification carried over from wool dyeing terminology, but standard practice for nylon as well): roughly pH 4.0 to 5.0, for deeper shades and stronger wet fastness, with less tolerance for process variation  These ranges are starting points. Confirm them against the dye supplier’s technical data sheet and in-house lab dips, and never carry a recipe over from wool, where the pH scheme for leveling and milling dyes runs in the opposite direction. The same caution applies within nylon itself: nylon 6 and nylon 6,6 can strike and build differently under identical pH and temperature conditions, and switching between substrates or dye suppliers on an unverified recipe is a common, avoidable source of shade drift. Confirm any change of fiber type or dye source with a fresh lab dip and pilot run before it reaches bulk. The fix is a repeatable pH curve rather than a single target value. A slow-acting acid donor that lowers pH gradually as temperature rises keeps the strike controlled instead of sudden, removing the guesswork of manual dosing at the wrong point in the cycle. Heating Rate and Strike Zone Temperature governs when the dye moves and how quickly. On nylon, most uptake happens in a narrow window, typically 70 to 90°C, where the fiber structure opens and dye rushes in. Nylon has a limited number of dye sites, and acid dye bonds to them almost as soon as conditions allow; ramping through the strike zone too fast fixes the dye unevenly, with no chance to level out afterward. The first ten to fifteen minutes of strike largely determine the outcome of the entire batch. The diagram above shows how this plays out across a typical cycle: a flat wetting and circulation stage, a controlled ramp that slows through the 70 to 90°C strike zone, a hold near boiling for migration and leveling, and a controlled cool down. The fix starts before the strike: confirm full, even wetting and steady circulation first. Ramp at a controlled rate, often close to 1°C per minute and slower still through the 70 to 90°C

Explore More »
Filter paper test comparing even disperse dye dispersion and uneven aggregation

Troubleshooting Disperse Dye Baths: Spots, Sedimentation, and Shade Drift

Table of Contents What Bath Stability Means The Dispersed State of the Dye Three Failure Modes Spots and Specks Dye Aggregation Under Heat Dispersant Breakdown Hard Water and Electrolytes Sedimentation Crystal Growth and pH Drift Heating Too Fast Poor Liquor Circulation Poor Reproducibility Unstable Water and pH Dosing and Prep Errors Temperature Profile Variation Diagnose and Control Filter Paper Dispersion Test Stabilize pH and Water Choose the Right Leveling Agent Optimize the Heating Curve Conclusion Disperse dyeing looks straightforward on paper, but in practice it depends on something fragile. The bath is full of tiny dye particles that have to stay evenly suspended through hours of heat, pressure, and circulation. When that suspension holds, the result is clean, level, repeatable color. When it breaks down, the problems show up as spots on the fabric, sediment in the machine, and shades that refuse to match the last batch. This guide explains why disperse dye baths lose stability and how to catch and control each failure mode before it reaches the cloth. What Bath Stability Means The Dispersed State of the Dye Disperse dyes are almost insoluble in water. Instead of dissolving like a reactive or acid dye, they are milled into very fine particles and held in suspension by dispersing agents that coat each particle and keep it from clumping. The dye bath is therefore not a true solution. It is a dispersion, and its performance rises or falls with how well that dispersion survives the dyeing cycle. Stability means the particles stay fine, stay evenly distributed, and resist growing or sticking together. High temperature, high pressure, shear from pump circulation, and shifts in water chemistry all work against that goal, so bath stability is really about what keeps the particles apart and what makes them collapse together. Three Failure Modes Most disperse dyeing complaints that trace back to the bath fall into three recognizable patterns. They often share root causes, but each one looks different on the fabric and calls for a slightly different response. Failure mode What you see Core driver Spots and specks Darker pinpoints or blotches on the cloth Particles aggregate and deposit as concentrated points Sedimentation Dye settling, tar, or deposits in the bath and machine Particles grow or fall out of suspension Poor reproducibility Shade that drifts from batch to batch Bath conditions vary, so dye uptake varies The sections below break down the causes behind each pattern, then bring them together into a single diagnostic and control routine. Spots and Specks Dye Aggregation Under Heat Under high-temperature, high-pressure conditions, the kinetic energy of the dye particles rises sharply. They move faster, collide more often, and are far more likely to fuse into larger aggregates. An aggregate carries much more color than a single fine particle, so when it lands on the fabric it prints as a deeper, concentrated speck rather than blending into the overall shade. This is why spotting often appears only after the bath reaches peak temperature, even when everything looked fine during heating. Dispersant Breakdown The dispersing agents that keep particles apart are not indestructible. Long cycles, very high temperatures, or repeated reuse of a bath can degrade the dispersant and reduce its protective power. Dye stock that has been stored too long, diluted incorrectly, or held warm before use can arrive in the bath already weakened. Once the dispersant can no longer hold the particles in their fine state, aggregation and spotting follow quickly. Hard Water and Electrolytes Water chemistry decides whether particles stay apart or coagulate. Calcium and magnesium ions from hard water, along with high electrolyte loads, compress the electrical double layer surrounding each dye particle and reduce the electrostatic repulsion that keeps the dispersion stable. The particles can then approach closely enough to bond and grow. Controlling water hardness and avoiding unnecessary electrolyte additions are among the simplest and most effective ways to reduce speck formation. Sedimentation Crystal Growth and pH Drift Even a well-dispersed bath can develop sediment through crystal growth, where smaller particles gradually redeposit onto larger ones until they become heavy enough to settle. pH plays a large role here. Many disperse dyes, and ester-based structures such as those built on Disperse Blue 79 in particular, are sensitive to pH and can hydrolyze if the bath drifts outside the recommended window. A bath held around pH 4.5 to 5.5 generally protects dye stability and color yield, while a drifting pH accelerates both hydrolysis and sedimentation. Heating Too Fast A heating curve that rises too quickly pushes the bath through the temperature zone where dyes are most prone to aggregation before the particles have had time to distribute evenly. The result is localized over-concentration and precipitation. A controlled ramp gives the dispersion time to stay even and gives the dye time to move onto the fiber in an orderly way, rather than crashing out of suspension. Poor Liquor Circulation Sedimentation is not always a chemistry problem. Anywhere liquor moves slowly, particles are free to settle. Common culprits include: Dead zones in jet machines Overpacked beams or fabric rolls Weak or worn pump performance Uneven loading and an unsuitable liquor ratio Good circulation keeps the dispersion in motion and in contact with the fabric, so machine maintenance, correct loading, and an appropriate liquor ratio are part of bath stability just as much as the chemistry is. Poor Reproducibility Unstable Water and pH Reproducibility is the discipline of getting the same shade twice, and it is unusually sensitive to small changes in bath conditions. If incoming water hardness varies from one day to the next, or if pH is set differently between batches, dye exhaustion shifts and so does the final shade. Consistent buffering and consistent water treatment remove two of the largest sources of unexplained variation. Dosing and Prep Errors How the dye is prepared and added matters as much as how much is used. Inaccurate weighing, incomplete pre-dispersion of the dye paste, and inconsistent addition order all introduce variation that is hard to trace

Explore More »

Contact Us for Textile Auxiliaries and Dyes

Contact Skychem Group for more chemical solutions, If you have questions or need more information, please contact us.
We will respond within 24 hours

Get a project quote

Tell us your project requirements, country, and intended application.

Sandy

With years of experience in chemical dyes and textile auxiliaries, I’m dedicated to sharing insights into the latest technologies, sustainable innovations, and market trends.

Recent Articles

Reduction Clearing in Polyester Dyeing: A Complete Guide

Table of Contents What Is Reduction Clearing? Definition and Purpose Role in Disperse Dyeing Impact on Colorfastness Common Quality Complaints When Reduction Clearing Is Needed Dark and Medium Shades High Dye Concentration Recipes Blends with Cellulosic Fibers When It Can Be Skipped Process and Control Typical Recipe and Parameters Controlling Temperature and pH Avoiding Over-Reduction or Under-Reduction Rinsing and Neutralization Choosing the Right Reducing Agents Sodium Hydrosulfite Sulfur-Free Reducing Agents Low-Temperature and Sustainable Options High Wash Fastness Dyes to Reduce Clearing Load Troubleshooting Common Issues Poor Wash Fastness After Clearing Shade Change or Dulling Conclusion FAQs What Happens If You Skip It? Reduction Clearing vs Normal Washing? Can It Be Done at Low Temperature? Hydrosulfite vs Sulfur-Free Agents? A batch that looks perfect on the machine can still fail a wash fastness test days later. More often than not, the cause is unfixed disperse dye left on the fiber surface, and the fix is reduction clearing. This guide covers when the step is necessary, the chemistry behind it, and how to keep results consistent from lab dip to bulk production. What Is Reduction Clearing? Definition and Purpose Reduction clearing is a post-dyeing treatment that removes disperse dye which has not penetrated or fixed onto polyester fibers. During high temperature dyeing, some dye molecules remain on the fiber surface instead of diffusing into the polymer structure. Left untreated, this residual dye rubs off and bleeds during washing, lowering overall color fastness. A reduction clearing bath breaks down and strips away the surface dye, leaving only the dye that has properly fixed inside the fiber. Role in Disperse Dyeing Reduction clearing takes place at the end of the disperse dyeing cycle, after the main dyeing stage and before final rinsing. It is one part of a larger polyester dyeing workflow that also includes pretreatment, dyeing, and finishing. The polyester dyeing application solutions page outlines how these stages connect, along with recommended auxiliaries for each step. Impact on Colorfastness Wash and rub fastness are among the specifications buyers check most closely before accepting a shipment. Surface dye that has not been cleared is loosely bound and washes out easily, which is precisely what standardized tests such as AATCC’s laundering fastness methods are designed to detect. A properly executed reduction clearing step improves these results by removing the dye that would otherwise cause a failed test. Common Quality Complaints Mills that skip or under-perform reduction clearing tend to see a recurring pattern of issues: Color bleeding onto lighter garments in the same wash load Staining on packaging or trims during transport and storage Dull or hazy shades compared to the approved lab dip Rejected shipments after failed fastness testing at the buyer’s lab These problems are almost always traceable to residual disperse dye rather than a flaw in the dye recipe itself, which is why reduction clearing deserves the same attention as the dyeing stage it follows. When Reduction Clearing Is Needed Dark and Medium Shades Darker and medium depth shades require higher dye concentrations, which naturally leaves more unfixed dye on the fiber surface. The Skycron disperse dyes range covers both dyeing and printing applications across dark, medium, and vivid shades, and pairing these dyes with a proper reduction clearing step is standard practice for reaching acceptable fastness at these heavier depths. High Dye Concentration Recipes Any recipe with a high total dye percentage on weight of fabric (% o.w.f.) benefits from reduction clearing, not only dark shades. As a general reference, mills commonly group shade depth this way: Shade Depth Typical Dye Concentration Reduction Clearing Light Below 1% o.w.f. Often optional Medium 1 to 3% o.w.f. Recommended Dark Above 3% o.w.f. Required These figures are a general guide rather than a fixed rule, since dye class, fiber blend, and fastness targets all shift the threshold. Multi-dye combinations used for precise custom shades fall into this same logic, as several dye classes combined can leave behind varying amounts of surface residue even at a moderate total percentage. Blends with Cellulosic Fibers Polyester-cotton and polyester-viscose blends add another layer of risk. Disperse dye that has not fixed to the polyester portion can stain the cellulosic fiber, causing an unwanted tone shift across the fabric. Reduction clearing protects the intended contrast or solid shade across both fiber types. When It Can Be Skipped Very light shades with low dye loading sometimes do not require a full reduction clearing cycle, particularly when high-exhaustion dyes and well-controlled dyeing conditions are used, and a simple hot wash can be enough. Skipping the step should still be a deliberate decision based on shade depth and fastness requirements, not a shortcut taken to save time. Process and Control Typical Recipe and Parameters A standard alkaline reduction clearing bath includes a reducing agent, caustic soda or soda ash, and a wetting or dispersing agent. Sulfur-free acid-clearing systems, which run at a lower pH, are increasingly used as an alternative. A general starting point looks like this: Parameter Typical Range Reducing agent 2 to 4 g/L Alkali (NaOH or soda ash) 2 to 4 g/L Temperature 70 to 80°C Time 15 to 20 minutes Liquor ratio 1:8 to 1:15 These figures vary by shade depth, dye class, and fiber blend, so lab trials should confirm the final recipe before scaling to bulk. Controlling Temperature and pH Temperature and pH are the two variables that most affect clearing efficiency: Too cool or too brief: residual dye is left behind, and fastness suffers. Too hot or too alkaline: the polyester surface or hand feel can be affected. Most conventional recipes target a mildly alkaline pH between 9 and 11. Acid-based sulfur-free systems instead work in a neutral to mildly acidic range, depending on the product used, so the pH target should always match the chemistry selected rather than a single fixed rule. Avoiding Over-Reduction or Under-Reduction Under-reduction leaves surface dye behind, which shows up later as poor fastness. Over-reduction strips properly fixed dye from the fiber, causing shade loss, dulling, or an uneven

Explore More »
C0 vs. C6 Water Repellent Finishes

C0 vs. C6 Water Repellent Finishes: Which One Fits Your Textiles?

Table of Contents The Chemistry Behind C0 and C6 What is C6 DWR What is C0 DWR Key Structural Differences Performance Comparison Water and Oil Repellency Durability and Wash Resistance Breathability and Hand Feel Global Regulatory Landscape REACH and EU Restrictions US State Regulations Brand and Retailer Requirements Use Cases by Industry Outdoor and Sportswear Workwear and Protective Textiles Home Textiles and Upholstery Choosing the Right Finish Key Factors to Consider Testing and Certification Tips Conclusion FAQs What is the difference between C0 and C6 finishes? Is C6 DWR banned? Does C0 perform as well as C6? How do I choose between C0 and C6? Ask a fabric supplier for a water-repellent finish today, and there is a good chance you will get two very different answers: C6, or C0. Both claim to keep fabric dry. Only one is currently facing phase-out pressure from regulators in the EU, California, and New York, and from major apparel brands. For buyers sourcing water-repellent textiles right now, the choice is no longer just about performance. It is about which chemistry will still be sellable in your target market two years from now. The Chemistry Behind C0 and C6 What is C6 DWR C6 durable water repellent (DWR) finishes use short-chain fluorocarbon polymers, specifically six-carbon fluorinated side chains, to coat individual fibers. This chemistry lowers the surface energy of the fiber to roughly 12 mJ/m², which is below the surface tension of most water and oils. As a result, C6 finishes deliver both water and oil repellency, a combination that few fluorine-free systems can fully match. C6 chemistry replaced older C8 fluorotelomer finishes over a decade ago. C8 degrades into PFOA, a substance known for being persistent and bioaccumulative in the environment. C6 degrades into perfluorohexanoic acid (PFHxA) instead, which has a shorter environmental half-life and lower bioaccumulation potential. However, PFHxA is not free of regulatory scrutiny, as covered in the compliance section below. For buyers sourcing C6 products, formulations such as the Skyguard C6-C8 Waterproofer combine water and oil resistance with good wash fastness on both cellulose and synthetic fibers, applied at typical dosages of 10 to 40 g/L, and are produced without PFOS, PFOA, or APEO. What is C0 DWR C0 refers to fluorine-free water repellent chemistry. Instead of fluorocarbon side chains, C0 finishes rely on dendrimer, wax, or polyurethane-based polymers to build a hydrophobic fiber surface. These systems typically reach a surface energy of 20 to 25 mJ/m², which is sufficient to repel water effectively but generally not enough to provide strong oil repellency. Demand for C0 finishes is growing quickly because they carry no PFAS-related compliance risk, a factor that matters more each year as regulatory scope widens. Ranges such as the Skyguard Fluorine-free Waterproofer line are applied at roughly 10 to 80 g/L depending on the durability required, contain no APEO, and are built for fabrics where oil repellency is not a functional requirement, including most outerwear, home textiles, and fashion applications. Key Structural Differences Attribute C6 (Fluorocarbon) C0 (Fluorine-Free) Surface energy Approx. 12 mJ/m² Approx. 20 to 25 mJ/m² Water repellency Excellent Good to excellent Oil repellency Yes Limited or none PFAS content Present (PFHxA-based) None Typical curing temperature 150 to 160°C 160 to 180°C Performance Comparison Water and Oil Repellency C6 finishes remain the benchmark wherever oil, grease, or organic stain resistance is needed alongside water repellency, such as workwear exposed to machine oils or food-contact aprons. C0 finishes have closed most of the gap on pure water repellency, with many recent formulations achieving results comparable to C6 under standardized water resistance testing. On oil-based stains, however, C0 finishes still fall short. Durability and Wash Resistance Both chemistries rely on physical adsorption when first applied to the fabric, and this bond weakens progressively with repeated laundering and detergent exposure. A crosslinking agent extends wash durability by binding DWR polymer chains to each other and to reactive groups on the fiber surface, converting a loosely adsorbed coating into a chemically anchored one. The Sylic Cross-linking Agent, for example, is dosed in the same bath at 10 to 30 percent of the water repellent quantity, contains no APEO, PFOA, PFOS, or formaldehyde, and is compatible with both C6 and fluorine-free systems, making it a practical add-on when a finish needs to withstand 20 or more industrial or home wash cycles. Breathability and Hand Feel Both C0 and C6 finishes coat the fiber surface rather than filling the pore spaces between yarns, so breathability is generally preserved at correct application levels. Two factors most often compromise this balance: Overdosing the finish, which can partially block inter-yarn porosity and stiffen the fabric hand Uneven bath concentration, which creates localized high-add zones across the fabric width C0 finishes sometimes require slightly higher application levels to match C6 water repellency, which makes dosing accuracy and bath uniformity especially important for maintaining a soft, breathable result. Global Regulatory Landscape REACH and EU Restrictions The EU regulates PFAS in textiles under REACH Annex XVII. A restriction on PFHxA, the degradation product of C6 chemistry, takes effect in the EU and EEA from 2026, and a broader restriction covering the wider PFAS family is currently under evaluation by the European Chemicals Agency. Buyers and brands sourcing for the EU market should treat C6 as a chemistry under increasing regulatory pressure rather than a long-term safe option, and should monitor ECHA’s PFAS regulatory updates for the latest scope and timelines. US State Regulations Regulation is not limited to the EU. Two US states have already enacted PFAS restrictions specific to textiles and apparel: California AB 1817 bans the manufacture, distribution, and sale of new textile articles containing intentionally added PFAS above 100 ppm total organic fluorine as of January 1, 2025, dropping to 50 ppm from January 1, 2027. Outdoor apparel for severe wet conditions has an extension until January 1, 2028. The full requirements are set out in the official bill text. New York Environmental Conservation Law § 37-0121 prohibits the sale of new apparel

Explore More »
Finished royal blue nylon fabric roll.

Nylon Dyeing Defects: Causes and Process Fixes

Table of Contents Common Nylon Dyeing Defects Uneven Shade and Skitteriness Listing and Barre Ring, Tippy, and Frosty Effects The Three Levers Behind Every Defect pH Profile Heating Rate and Strike Zone Retarder Selection and Dosage Troubleshooting by Symptom Skychem Solutions for Nylon Dyeing FAQs What pH is best for nylon acid dyeing? Why does my nylon dye unevenly? How do retarders prevent uneven dyeing? What temperature should I dye nylon at? Nylon strikes fast. Acid dye bonds to its amino groups within minutes, so a slightly off process can lock in an uneven shade before it has any chance to level. Streaks, listing, barre, and a speckled, skittery surface on nylon almost always trace back to one of three controllable levers: pH, temperature, or the retarder system. This article covers how to recognize each defect and what to adjust in the process to prevent it from recurring. Common Nylon Dyeing Defects Naming a defect correctly is the first step toward fixing it. The three patterns below cover most of what shows up on nylon, and each one points to a different root cause. Uneven Shade and Skitteriness Uneven dyeing is the broad category: patches, blotches, or a shade that simply isn’t consistent across the fabric. Skitteriness is a more specific form of it, a speckled, grainy appearance where neighboring filaments take up dye at different rates. It is the clearest sign that the dye struck faster than the fiber could level out. Listing and Barre Listing is a side-to-center or selvage-to-middle shade difference across the width of the fabric. Barre appears as horizontal bars or streaks running with the courses or picks. What separates these two from skitteriness is the pattern: listing and barre follow a defined width-wise or length-wise direction, while skitteriness scatters at random. Ring, Tippy, and Frosty Effects Ring dyeing and tippy dyeing are related but distinct penetration faults, and it is worth telling them apart. Ring dyeing happens across the fiber’s cross-section: dye stays concentrated in the outer sheath and never fully diffuses to the core, so a cut filament shows a colored ring around a pale or white center even though the surface looks fully dyed. Tippy dyeing is a length-wise difference instead, where the tip of a filament or staple fiber picks up more, or less, dye than the body of the fiber, usually because the tip has a different heat history or surface condition than the rest of the fiber. Frosty effects show up as an overall pale, washed-out surface rather than a directional pattern. All three point back to the same underlying issue, dye that has not fully penetrated the fiber, even when the shade looks close to standard from a distance. The Three Levers Behind Every Defect Most nylon shade defects come down to pH, temperature, or the retarder system working against each other instead of together. Each lever below covers the mechanism, the typical failure mode, and the fix. pH Profile In an acidic bath, the amino groups at the ends of nylon’s polymer chains gain a proton and become positively charged, while the sulfonate groups on acid dye molecules carry a negative charge. The two attract and bond. pH determines how many of these sites are active, how fast the dye reaches them, and how firmly it holds once it does. The most common process error is lowering the bath pH too far or too soon. If the bath turns acidic before the goods are evenly wetted and circulating, the dye strikes in a rush and creates streaks or barre that no amount of time at temperature can correct. A pH that runs too high or drifts during the cycle has the opposite problem: weak exhaustion and shade depth that wanders from batch to batch. Different acid dye classes call for different pH windows: Leveling dyes: roughly pH 5.5 to 7.0, giving the dye room to migrate and self-correct Milling dyes  (a classification carried over from wool dyeing terminology, but standard practice for nylon as well): roughly pH 4.0 to 5.0, for deeper shades and stronger wet fastness, with less tolerance for process variation  These ranges are starting points. Confirm them against the dye supplier’s technical data sheet and in-house lab dips, and never carry a recipe over from wool, where the pH scheme for leveling and milling dyes runs in the opposite direction. The same caution applies within nylon itself: nylon 6 and nylon 6,6 can strike and build differently under identical pH and temperature conditions, and switching between substrates or dye suppliers on an unverified recipe is a common, avoidable source of shade drift. Confirm any change of fiber type or dye source with a fresh lab dip and pilot run before it reaches bulk. The fix is a repeatable pH curve rather than a single target value. A slow-acting acid donor that lowers pH gradually as temperature rises keeps the strike controlled instead of sudden, removing the guesswork of manual dosing at the wrong point in the cycle. Heating Rate and Strike Zone Temperature governs when the dye moves and how quickly. On nylon, most uptake happens in a narrow window, typically 70 to 90°C, where the fiber structure opens and dye rushes in. Nylon has a limited number of dye sites, and acid dye bonds to them almost as soon as conditions allow; ramping through the strike zone too fast fixes the dye unevenly, with no chance to level out afterward. The first ten to fifteen minutes of strike largely determine the outcome of the entire batch. The diagram above shows how this plays out across a typical cycle: a flat wetting and circulation stage, a controlled ramp that slows through the 70 to 90°C strike zone, a hold near boiling for migration and leveling, and a controlled cool down. The fix starts before the strike: confirm full, even wetting and steady circulation first. Ramp at a controlled rate, often close to 1°C per minute and slower still through the 70 to 90°C

Explore More »
Filter paper test comparing even disperse dye dispersion and uneven aggregation

Troubleshooting Disperse Dye Baths: Spots, Sedimentation, and Shade Drift

Table of Contents What Bath Stability Means The Dispersed State of the Dye Three Failure Modes Spots and Specks Dye Aggregation Under Heat Dispersant Breakdown Hard Water and Electrolytes Sedimentation Crystal Growth and pH Drift Heating Too Fast Poor Liquor Circulation Poor Reproducibility Unstable Water and pH Dosing and Prep Errors Temperature Profile Variation Diagnose and Control Filter Paper Dispersion Test Stabilize pH and Water Choose the Right Leveling Agent Optimize the Heating Curve Conclusion Disperse dyeing looks straightforward on paper, but in practice it depends on something fragile. The bath is full of tiny dye particles that have to stay evenly suspended through hours of heat, pressure, and circulation. When that suspension holds, the result is clean, level, repeatable color. When it breaks down, the problems show up as spots on the fabric, sediment in the machine, and shades that refuse to match the last batch. This guide explains why disperse dye baths lose stability and how to catch and control each failure mode before it reaches the cloth. What Bath Stability Means The Dispersed State of the Dye Disperse dyes are almost insoluble in water. Instead of dissolving like a reactive or acid dye, they are milled into very fine particles and held in suspension by dispersing agents that coat each particle and keep it from clumping. The dye bath is therefore not a true solution. It is a dispersion, and its performance rises or falls with how well that dispersion survives the dyeing cycle. Stability means the particles stay fine, stay evenly distributed, and resist growing or sticking together. High temperature, high pressure, shear from pump circulation, and shifts in water chemistry all work against that goal, so bath stability is really about what keeps the particles apart and what makes them collapse together. Three Failure Modes Most disperse dyeing complaints that trace back to the bath fall into three recognizable patterns. They often share root causes, but each one looks different on the fabric and calls for a slightly different response. Failure mode What you see Core driver Spots and specks Darker pinpoints or blotches on the cloth Particles aggregate and deposit as concentrated points Sedimentation Dye settling, tar, or deposits in the bath and machine Particles grow or fall out of suspension Poor reproducibility Shade that drifts from batch to batch Bath conditions vary, so dye uptake varies The sections below break down the causes behind each pattern, then bring them together into a single diagnostic and control routine. Spots and Specks Dye Aggregation Under Heat Under high-temperature, high-pressure conditions, the kinetic energy of the dye particles rises sharply. They move faster, collide more often, and are far more likely to fuse into larger aggregates. An aggregate carries much more color than a single fine particle, so when it lands on the fabric it prints as a deeper, concentrated speck rather than blending into the overall shade. This is why spotting often appears only after the bath reaches peak temperature, even when everything looked fine during heating. Dispersant Breakdown The dispersing agents that keep particles apart are not indestructible. Long cycles, very high temperatures, or repeated reuse of a bath can degrade the dispersant and reduce its protective power. Dye stock that has been stored too long, diluted incorrectly, or held warm before use can arrive in the bath already weakened. Once the dispersant can no longer hold the particles in their fine state, aggregation and spotting follow quickly. Hard Water and Electrolytes Water chemistry decides whether particles stay apart or coagulate. Calcium and magnesium ions from hard water, along with high electrolyte loads, compress the electrical double layer surrounding each dye particle and reduce the electrostatic repulsion that keeps the dispersion stable. The particles can then approach closely enough to bond and grow. Controlling water hardness and avoiding unnecessary electrolyte additions are among the simplest and most effective ways to reduce speck formation. Sedimentation Crystal Growth and pH Drift Even a well-dispersed bath can develop sediment through crystal growth, where smaller particles gradually redeposit onto larger ones until they become heavy enough to settle. pH plays a large role here. Many disperse dyes, and ester-based structures such as those built on Disperse Blue 79 in particular, are sensitive to pH and can hydrolyze if the bath drifts outside the recommended window. A bath held around pH 4.5 to 5.5 generally protects dye stability and color yield, while a drifting pH accelerates both hydrolysis and sedimentation. Heating Too Fast A heating curve that rises too quickly pushes the bath through the temperature zone where dyes are most prone to aggregation before the particles have had time to distribute evenly. The result is localized over-concentration and precipitation. A controlled ramp gives the dispersion time to stay even and gives the dye time to move onto the fiber in an orderly way, rather than crashing out of suspension. Poor Liquor Circulation Sedimentation is not always a chemistry problem. Anywhere liquor moves slowly, particles are free to settle. Common culprits include: Dead zones in jet machines Overpacked beams or fabric rolls Weak or worn pump performance Uneven loading and an unsuitable liquor ratio Good circulation keeps the dispersion in motion and in contact with the fabric, so machine maintenance, correct loading, and an appropriate liquor ratio are part of bath stability just as much as the chemistry is. Poor Reproducibility Unstable Water and pH Reproducibility is the discipline of getting the same shade twice, and it is unusually sensitive to small changes in bath conditions. If incoming water hardness varies from one day to the next, or if pH is set differently between batches, dye exhaustion shifts and so does the final shade. Consistent buffering and consistent water treatment remove two of the largest sources of unexplained variation. Dosing and Prep Errors How the dye is prepared and added matters as much as how much is used. Inaccurate weighing, incomplete pre-dispersion of the dye paste, and inconsistent addition order all introduce variation that is hard to trace

Explore More »

Contact Us for Textile Auxiliaries and Dyes

Contact Skychem Group for more chemical solutions, If you have questions or need more information, please contact us.
We will respond within 24 hours

Get a project quote

Please tell us the requirements, the country and the application.

Scroll to Top
Email WhatsApp

Contact Us for Textile Auxiliaries and Dyes

Contact Skychem Group for more chemical solutions, If you have questions or need more information, please contact us.
We will respond within 24 hours